Nikon COOLPIX P900 Reference Manual
Nikon COOLPIX P900 Manual
 |
View all Nikon COOLPIX P900 manuals
Add to My Manuals
Save this manual to your list of manuals |
Nikon COOLPIX P900 manual content summary:
- Nikon COOLPIX P900 | Reference Manual - Page 1
DIGITAL CAMERA Reference Manual • Read this manual thoroughly before using the camera. • To ensure proper use of the camera, be sure to read "For Your Safety" (page vi). • After reading this manual, keep it in a readily accessible place for future reference. - Nikon COOLPIX P900 | Reference Manual - Page 2
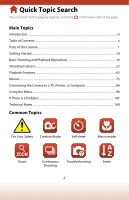
Features...23 Playback Features...63 Movies ...75 Connecting the Camera to a TV, Printer, or Computer 86 Using the Menu...96 If There Is a Problem...147 Technical Notes...160 Common Topics For Your Safety Creative Mode Self-timer Macro mode Zoom Continuous Shooting Troubleshooting ii Index - Nikon COOLPIX P900 | Reference Manual - Page 3
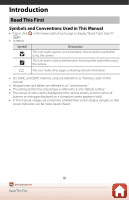
." • The names of menu items displayed on the camera screen, and the names of buttons or messages displayed on a computer screen appear in bold. • In this manual, images are sometimes omitted from screen display samples so that screen indicators can be more clearly shown. iii Introduction Read This - Nikon COOLPIX P900 | Reference Manual - Page 4
device as an authentic Nikon product. For more information about Nikon brand accessories, contact a local authorized Nikon dealer. Before Taking Important Pictures Before taking pictures on important occasions (such as at weddings or before taking the camera on a trip), take a test shot to ensure - Nikon COOLPIX P900 | Reference Manual - Page 5
the Manuals • No part of the manuals included with this product may be reproduced, transmitted, transcribed, stored in a retrieval system, or translated into any language in any form, by any means, without Nikon's prior written permission. • Illustrations and screen content shown in this manual may - Nikon COOLPIX P900 | Reference Manual - Page 6
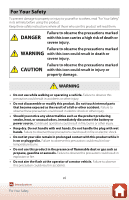
before using this product. Keep these safety instructions where all those who use this product will use while walking or operating a vehicle. Failure to observe this precaution could result in accidents or other injury. • Do not disassemble or modify this product. Do not touch internal parts - Nikon COOLPIX P900 | Reference Manual - Page 7
the lens pointed at the sun or other strong light sources. Light focused by the lens could cause fire or damage to product's internal parts. When shooting backlit subjects, keep the sun well out of the frame. • Turn this product off when its use is prohibited. Disable wireless features when the - Nikon COOLPIX P900 | Reference Manual - Page 8
precaution could result in fire or product malfunction. • Do not transport the camera with a tripod or similar accessory attached. Failure to observe this precaution could result in injury or product malfunction. DANGER for Batteries • Do not mishandle batteries. Failure to observe the following - Nikon COOLPIX P900 | Reference Manual - Page 9
• If battery liquid comes into contact with a person's skin or clothing, immediately rinse the affected area with plenty of clean water. Failure to observe this precaution could result in skin irritation. ix Introduction For Your Safety - Nikon COOLPIX P900 | Reference Manual - Page 10
iii Read This First ...iii Symbols and Conventions Used in This Manual iii Information and Precautions ...iv For Your Safety ...vi Parts of the Camera ...1 The Camera Body...2 The Monitor ...4 Switching the Information Displayed on the Screen (s Button 4 For Shooting...5 For Playback...8 Getting - Nikon COOLPIX P900 | Reference Manual - Page 11
Close-up Pictures 50 Exposure Compensation (Adjusting Brightness 51 Using the Zoom...52 Focusing...54 The Shutter-release Button...54 Using Target Finding AF ...55 Using Face Detection ...56 Subjects Not Suitable for Autofocus ...57 Focus Lock...58 Default Settings (Flash Mode, Self-timer, and - Nikon COOLPIX P900 | Reference Manual - Page 12
Movie 84 Saving a Frame from a Movie as a Still Image 85 Connecting the Camera to a TV, Printer, or Computer 86 Utilizing Images Images to a Computer ...93 Using the Menu...96 Menu Operations...97 The Image Selection Screen...99 Menu Lists ...100 The 111 Autofocus Mode ...114 xii Table of Contents - Nikon COOLPIX P900 | Reference Manual - Page 13
115 Blink Proof ...116 The Movie Menu ...117 Movie Options...117 Autofocus Mode ...121 Movie VR ...122 Wind Noise Reduction ...123 Frame ...133 Monitor Settings ...135 Date Stamp ...136 Self-timer: After Release ...137 Photo VR ...138 AF Assist ...138 Digital Zoom ...139 Sound Settings...139 Auto Off - Nikon COOLPIX P900 | Reference Manual - Page 14
If There Is a Problem...147 Troubleshooting ...148 Error Messages...157 Technical Notes...160 Notices...161 Notes About Wireless Communication Functions 163 Caring for the Product ...166 The Camera...166 The Battery ...167 The Charging AC Adapter...168 Memory Cards...169 Cleaning and Storage...170 - Nikon COOLPIX P900 | Reference Manual - Page 15
Parts of the Camera The Camera Body ...2 The Monitor...4 1 Parts of the Camera - Nikon COOLPIX P900 | Reference Manual - Page 16
The Camera Body 3 45 6 7 2 1 3 8 11 10 9 Zoom control 52 f : Wide-angle 52 1 g : Telephoto 52 h : Thumbnail playback 65 i : Playback zoom 64 2 Shutter-release button 18, 54 3 Eyelet for strap 11 Power 52 10 q (snap-back zoom) button 53 11 Lens 2 Parts of the Camera The Camera Body - Nikon COOLPIX P900 | Reference Manual - Page 17
) button 21 Power connector cover (for optional 13 AC adapter 172 14 Lock lever 12 Battery-chamber/ 15 memory card slot cover 12 16 Tripod socket 179 * In this manual, pressing up, down, left, or right on the multi selector is expressed as H, I, J, or K. 3 Parts of the Camera The Camera Body - Nikon COOLPIX P900 | Reference Manual - Page 18
information that is displayed on the shooting or playback screen changes depending on the camera's settings and state of use. Switching the Information Displayed on the Screen (s Button) To switch the information displayed on the screen during shooting or playback, press the s (display) button. For - Nikon COOLPIX P900 | Reference Manual - Page 19
indicator 47 18 Number of exposures remaining (still images 17 19 Internal memory indicator 17 20 F-number 54 21 Shutter speed 54 22 ISO sensitivity 110 23 Battery level indicator 17 Charging AC Adapter connection 24 indicator AC Adapter connection indicator 5 Parts of the Camera - Nikon COOLPIX P900 | Reference Manual - Page 20
136 26 Travel destination icon 133 27 "Date not set" indicator 149 Wi-Fi communication indicator 28 130 Bluetooth communication indicator 29 131 30 Bluetooth remote control connected 175 31 Obtaining location 81 40 Vividness 25 41 Framing grid 135 6 Parts of the Camera The Monitor - Nikon COOLPIX P900 | Reference Manual - Page 21
31 47 Self-timer indicator 49 48 Pet portrait auto release 34 49 Smile timer 43 50 Self-Collage 44, 115 51 Still image capture (during movie recording 79 Framing border (Moon or Bird52 watching scene mode, or snap-back zoom 35, 53 53 Focus area (manual, center).......58, 111 54 - Nikon COOLPIX P900 | Reference Manual - Page 22
guide Movie playback guide 19 Quick effects guide 20 Time of recording 21 Date of recording 22 Battery level indicator 17 Charging AC Adapter connection 23 indicator AC Adapter connection indicator 24 Recorded location data indicator ...144 25 File number and type 171 8 Parts of the Camera - Nikon COOLPIX P900 | Reference Manual - Page 23
9 File number and type 171 10 Exposure compensation value .......... 51 11 Shooting mode 24 12 Shutter speed 54 13 F-number 54 1 A histogram is a graph showing the distribution of tones in the number of pixels. 2 The tone level indicates the brightness level. 9 Parts of the Camera The Monitor - Nikon COOLPIX P900 | Reference Manual - Page 24
Getting Started How to Attach the Strap and Lens Cap 11 Inserting the Battery and Memory Card 12 Charging the Battery...13 Camera Setup ...14 10 Getting Started - Nikon COOLPIX P900 | Reference Manual - Page 25
How to Attach the Strap and Lens Cap Attach the lens cap to the strap, and then attach the strap to the camera. Attach the strap at two places. B Lens Cap When the camera is not in use, attach the lens cap to the lens to protect it. 11 Getting Started How to Attach the Strap and Lens Cap - Nikon COOLPIX P900 | Reference Manual - Page 26
card in the setup menu (A97). Removing the Battery or Memory Card Turn the camera off and make sure that the power-on lamp and screen have turned off, and then open the battery-chamber/memory card slot cover. • Move the battery latch to eject the battery. • Gently push the memory card into the - Nikon COOLPIX P900 | Reference Manual - Page 27
the country or region of purchase. The shape of the plug adapter varies with the country or region of purchase. • Charging starts when the camera is connected to an electrical outlet while the battery is inserted, as shown in the illustration. The power-on lamp (charge lamp) slowly flashes while the - Nikon COOLPIX P900 | Reference Manual - Page 28
this precaution could result in overheating or in damage to the camera. Camera Setup When the camera is turned on for the first time, screens to set the display language and camera clock are displayed. 1 Turn on the camera. • Use the multi selector to select and adjust settings. Multi selector Up - Nikon COOLPIX P900 | Reference Manual - Page 29
confirm the setting. Date and time DM Y hm 01 01 2019 00 00 Edit 6 When prompted, select Yes and press the k button. • The camera switches to the shooting screen when setup is complete. C Setting the Language The language can be set at any time in Language in the z setup menu (A97). C To - Nikon COOLPIX P900 | Reference Manual - Page 30
Basic Shooting and Playback Operations Shooting Images...17 Playing Back Images...20 Deleting Images...21 16 Basic Shooting and Playback Operations - Nikon COOLPIX P900 | Reference Manual - Page 31
the internal memory. • Press the s (display) button to switch the information displayed on the screen each time. 25m 0s 500 Battery level indicator Number of exposures remaining 2 Hold the camera steady. • Keep fingers and other objects away from the lens, flash, AF-assist illuminator, microphone - Nikon COOLPIX P900 | Reference Manual - Page 32
or focus indicator is displayed in green. • When you are using digital zoom, the camera focuses in the center of the frame and the focus area is not displayed. • If the focus area or focus indicator flashes, the camera is unable to focus. Modify the composition and try pressing the shutter-release - Nikon COOLPIX P900 | Reference Manual - Page 33
mode for about three minutes. • To turn the screen back on while the camera is in standby mode, perform an operation such as pressing the power switch or shutter-release button. C When Using a Tripod • We recommend using a tripod to stabilize the camera in the following situations: - When the flash - Nikon COOLPIX P900 | Reference Manual - Page 34
the c button while the camera is turned off, the camera turns on in playback mode. 2 Use the multi selector to select an screen each time. • To play back a recorded movie, press the k button. • To return to shooting mode, press the c button or shutter-release button. • When e is displayed in full - Nikon COOLPIX P900 | Reference Manual - Page 35
l (delete) button to delete the image currently displayed on the screen. 2 Use the multi selector HI to select the desired deletion method and press the l button. C Deleting the Image Captured While in Shooting Mode When using shooting mode, press the l button to delete the last image that was - Nikon COOLPIX P900 | Reference Manual - Page 36
The Image Selection Screen for Deletion 1 Use the multi selector JK to select the image that you want to delete. • Move the zoom control (A2) toward g (i) to switch to full-frame playback, or f (h) to switch to thumbnail playback. Erase selected images 2 Use HI to select ON or OFF. • When ON is - Nikon COOLPIX P900 | Reference Manual - Page 37
-timer, Macro Mode, and Exposure Compensation ...46 Flash Mode...47 Self-timer ...49 Macro Mode (Taking Close-up Pictures 50 Exposure Compensation (Adjusting Brightness 51 Using the Zoom ...52 Focusing ...54 Default Settings (Flash Mode, Self-timer, and Macro Mode 59 Functions That Cannot Be - Nikon COOLPIX P900 | Reference Manual - Page 38
indicator mark on the camera body. Use this mode to shoot backlit subjects. - d (sports): Use this mode to shoot sports photos. • s (Creative) mode The camera screen is displayed. Press the shutter-release button halfway to quickly switch to shooting mode. You can show or hide the descriptions using - Nikon COOLPIX P900 | Reference Manual - Page 39
to perform general shooting in a variety of shooting conditions. • The focus area for autofocus varies depending on the setting of AF area mode (A111). The and Active D-Lighting when shooting. 1 Press the multi selector K (o). 2 Use JK to select an item. Brightness (Exp. +/-) • F Hue: Adjust the - Nikon COOLPIX P900 | Reference Manual - Page 40
+2.0 +0.3 -2.0 Histogram 4 Press the k button when setting is complete. • The settings are applied and the camera returns to the shooting screen. C Creative Slider Settings • When using Active D-Lighting, noise (randomly-spaced bright pixels, fog, lines) may be emphasized, dark shadows may appear - Nikon COOLPIX P900 | Reference Manual - Page 41
Moon2 (A35) l Bird-watching2 (A35) 1 The camera focuses at infinity. 2 The camera focuses on the area in the center of the frame. 3 Use of a tripod is recommended because the shutter speed is slow. 4 Use of a tripod is recommended because the shutter speed is slow. Set Photo VR (A138) to Off in the - Nikon COOLPIX P900 | Reference Manual - Page 42
all the way to capture one image. - Once the shutter-release button is pressed all the way, hold the camera still until a still image is displayed. After taking a picture, do not turn the camera off before the screen switches to the shooting screen. - The angle of view (i.e., the area visible in the - Nikon COOLPIX P900 | Reference Manual - Page 43
one image. - Once the shutter-release button is pressed all the way, hold the camera still until a still image is displayed. After taking a picture, do not turn the camera off before the screen switches to the shooting screen. - If the subject moves while the camera is shooting continuously, the - Nikon COOLPIX P900 | Reference Manual - Page 44
in highlights or shadows is minimized - Once the shutter-release button is pressed all the way, hold the camera still until a still image is displayed. After taking a picture, do not turn the camera off before the screen switches to the shooting screen. - The angle of view (i.e., the area visible in - Nikon COOLPIX P900 | Reference Manual - Page 45
Use to capture the flow of car lights against a night landscape background. • The camera focuses on the area in the center of the frame. • Shots are taken at a shutter turns on while the screen is off. • To end shooting before it automatically ends, press the k button while the screen is on. • When - Nikon COOLPIX P900 | Reference Manual - Page 46
the effects of camera shake, hold the camera steady. Set Photo VR (A138) to Off in the setup menu when using a tripod to stabilize the camera during shooting. y M k Close-up • Macro mode (A50) is enabled and the camera automatically zooms to the closest position at which it can focus. • You can move - Nikon COOLPIX P900 | Reference Manual - Page 47
setting is saved in the camera's memory even after the camera is turned off. • You can move the focus area. Press the k button, use the multi selector HIJK to move the focus area, and press the k button to apply the setting. 25m 0s 500 y M m Fireworks show • The shutter speed is fixed at 4 seconds - Nikon COOLPIX P900 | Reference Manual - Page 48
Pet portrait • When you point the camera at a dog or cat, the camera detects the face of a dog or cat and focuses on it. By default, the shutter is automatically released when the face of a dog or cat is detected (pet portrait auto release). • On the screen displayed when O Pet portrait is selected - Nikon COOLPIX P900 | Reference Manual - Page 49
While the shutter-release button is held all the way down, images are captured continuously. The camera can capture up to about 7 images continuously at a rate of about 7.7 fps (when Image mode is set to P 4608×3456). • At the wide-angle zoom position, the framing border is displayed to indicate the - Nikon COOLPIX P900 | Reference Manual - Page 50
. • The camera focuses in the center of the frame. 3 Press the shutter-release button all the way, and then remove your finger from the shutter-release button. • KLJI are displayed to indicate the direction of camera movement. 4 Move the camera in one of the four directions until the guide indicator - Nikon COOLPIX P900 | Reference Manual - Page 51
Camera Movement • Using your body as the axis of rotation, move the camera slowly in an arc, in the direction of the marking (KLJI). • Shooting stops if the guide saved image is narrower than that seen on the screen at the time of shooting. • If the camera is moved too quickly or shaken too much, or - Nikon COOLPIX P900 | Reference Manual - Page 52
using easy panorama in full-frame playback mode, and then press the k button to scroll the image in the direction that was used when shooting. Playback controls are displayed on the screen during playback. Use with another make or model of digital camera. B Notes About Printing Panorama Images The - Nikon COOLPIX P900 | Reference Manual - Page 53
effects and one image without effects simultaneously in one shot. • The camera focuses in the center of the frame. 1 Press the k button. Variety • The effect group selection screen is displayed. 25m 0s Select effect 500 2 Use the multi selector HI to select the Variety desired effect group - Nikon COOLPIX P900 | Reference Manual - Page 54
Functions Available in Creative Mode • Flash mode (A47) • Self-timer (A49) • Macro mode (A50) • Exposure compensation (A51) • Shooting menu (common across shooting modes) (A104) 40 Shooting Features Creative Mode (Applying Effects When Shooting) - Nikon COOLPIX P900 | Reference Manual - Page 55
2 Apply an effect. • Use JK to select the desired effect. • Use HI to select the amount of Skin softening Effects 3 Frame the picture and press the shutter-release button. Slider 5 4 3 2 1 OFF of effect may differ between the image on the shooting screen and the saved image. • When Soft is set, - Nikon COOLPIX P900 | Reference Manual - Page 56
timer (A43) • Self-Collage (A44) • Flash mode (A47) • Self-timer (A49) • Smart portrait menu (A115) Using Skin Softening and Foundation Makeup In the following shooting modes, if human faces are detected, the camera processes the image to soften facial skin tones before saving the image (up to three - Nikon COOLPIX P900 | Reference Manual - Page 57
is terminated. Smile timer B Notes About Smile Timer Under some shooting conditions, the camera may be unable to detect faces or smiles (A56). The shutter-release button can also be used for shooting. C When the Self-timer Lamp Flashes When using smile timer, the self-timer lamp flashes when the - Nikon COOLPIX P900 | Reference Manual - Page 58
shutter is automatically released. • The camera automatically releases the shutter for the remaining pictures. A countdown starts about three seconds before shooting. 2 • The number of shots is indicated by U on the screen , and a one-frame collage image is used as the key picture (A67). • When - Nikon COOLPIX P900 | Reference Manual - Page 59
first image. • If you perform the operations listed below before the camera takes the specified number of shots, shooting is canceled and the collage Press the shutter-release button - Raise or lower the flash - Rotate the mode dial - Press the power switch • If images are captured using Date stamp - Nikon COOLPIX P900 | Reference Manual - Page 60
Flash Mode, Self-timer, Macro Mode, and Exposure Compensation When the shooting screen is displayed, you can press the multi selector H (m) J (n) I 2 The camera releases the shutter when the set number of seconds elapses after you press the shutter-release button. 3 Macro mode Use macro mode - Nikon COOLPIX P900 | Reference Manual - Page 61
pressing the k button, the selection will be canceled. B The Flash-ready Indicator While the flash is charging, Q flashes. The camera cannot shoot images. If charging is complete, Q is displayed steadily when you press the shutter-release button halfway. 47 Shooting Features Flash Mode 25m 0s 500 - Nikon COOLPIX P900 | Reference Manual - Page 62
• The flash mode indicator is only displayed immediately after setting on the shooting screen. Auto with red the main subject; slow shutter speeds are used to capture background at night saved in the camera's memory even after the camera is turned off. C Red-eye Reduction If the camera detects red-eye - Nikon COOLPIX P900 | Reference Manual - Page 63
occasions, such as weddings. • n3s (3 seconds): Use to prevent camera shake. • If the setting is not applied by pressing the k button, the selection will be canceled. 3 Frame the picture and press the shutter-release button halfway. • Confirm that the subject is in focus. 4 Press the shutter - Nikon COOLPIX P900 | Reference Manual - Page 64
Macro Mode (Taking Close-up Pictures) Use macro mode when you take close-up pictures. 1 Press the where F and the zoom indicator are displayed in green. • When the zoom ratio is set to a position where F and the zoom indicator are displayed in green, the camera can focus on subjects as close as - Nikon COOLPIX P900 | Reference Manual - Page 65
shooting mode is smart portrait mode, the glamour retouch screen is displayed instead of the exposure compensation screen (A41). • When the shooting mode is A ( graph showing the distribution of tones in the image. Use as a guide when using exposure compensation and shooting without the flash. • The - Nikon COOLPIX P900 | Reference Manual - Page 66
A zoom indicator, focal length (in 35mm [135] format), and digital zoom magnification are displayed on the Optical Digital shooting screen when the side zoom control all the way). • When using the ML-L7 Remote Control (available separately), the camera zooms in when the + button on the remote - Nikon COOLPIX P900 | Reference Manual - Page 67
Using the Snap While pressing the q button, frame the subject inside the framing border of the shooting screen. To change the visible area, move the zoom control or side zoom control while situations. - While pressing the shutter-release button halfway - During movie recording 53 Shooting Features - Nikon COOLPIX P900 | Reference Manual - Page 68
all the way" means to press the button down completely. • The shutter is released when the shutter-release button is pressed all the way. • Do not use force when pressing the shutter-release button, as this may result in camera shake and blurred images. Press the button gently. 54 Shooting Features - Nikon COOLPIX P900 | Reference Manual - Page 69
Using Target Finding AF When AF area mode (A111) is set to Target finding AF in A (auto) mode, the camera focuses in the manner described below when you press the shutter-release button halfway. • The camera detects the main subject and focuses on it. When the subject is in focus, the focus area is - Nikon COOLPIX P900 | Reference Manual - Page 70
Detection In the following settings, the camera uses face detection to automatically focus on human faces. • B (scene camera detects more than one face, a double border is displayed around the face that the camera focuses on, and single borders are displayed around the other faces. If the shutter - Nikon COOLPIX P900 | Reference Manual - Page 71
Subjects Not Suitable for Autofocus The camera may not focus as expected in the following situations. In rare cases, the subject may not be in focus despite the fact that the focus area or the focus indicator is displayed in green: • Subject is very dark • Objects of sharply differing brightness are - Nikon COOLPIX P900 | Reference Manual - Page 72
to Center in A (auto) mode (A111). 2 Position the subject in the center of the frame and press the shutter-release button halfway. • The camera focuses on the subject and the focus area is displayed in green. • Exposure is also locked. 3 Without lifting your finger, recompose the picture. • Make - Nikon COOLPIX P900 | Reference Manual - Page 73
Default Settings (Flash Mode, Self-timer, and Macro Mode) The default settings for each shooting mode are listed below. A (auto) B (scene auto selector) j (night landscape) e (night portrait) o (backlighting) d (sports) Scene modes b (portrait) c (landscape) U (multiple exp. lighten) f (party/ - Nikon COOLPIX P900 | Reference Manual - Page 74
conditions it has selected. W (off) can be selected manually. 2 Cannot be changed. The camera enters macro mode when i is selected. 3 Cannot be used (A34). n10s or n3s cannot be used. 8 When Blink proof is set to On, the flash cannot be used. 9 a Smile timer (A43) and n Self-Collage (A44) can be used - Nikon COOLPIX P900 | Reference Manual - Page 75
× 960 pixels) Hue (using the creative slider) (A25) When hue is adjusted using the creative slider, White balance screen to reset the brightness, vividness, hue, and Active D-Lighting. Self-timer (A49) • If the shutter-release button is released after the self-timer countdown starts, the camera - Nikon COOLPIX P900 | Reference Manual - Page 76
) When Subject tracking is selected, digital zoom cannot be used. B Notes About Digital Zoom • Depending on the shooting mode or the current settings, digital zoom may not be available (A139). • When digital zoom is in effect, the camera focuses in the center of the frame. 62 Shooting Features - Nikon COOLPIX P900 | Reference Manual - Page 77
Playback Features Playback Zoom...64 Thumbnail Playback/Calendar Display 65 List by Date Mode ...66 Viewing and Deleting Images in a Sequence 67 Editing Images (Still Images 69 63 Playback Features - Nikon COOLPIX P900 | Reference Manual - Page 78
) in fullframe playback mode (A20) zooms in on the image. g (i) 4/4 g (i) 0004. JPG 15/11/2019 15:30 Full-frame Playback f (h) x3.0 Image is zoomed in. Displayed area guide • You can change the magnification rate by moving the zoom control toward f (h) or g (i). • To view a different area - Nikon COOLPIX P900 | Reference Manual - Page 79
button to display that image in full-frame playback mode. • While using calendar display mode, press HIJK to select a date and then press the k button to display the images captured on that day. B Notes About Calendar Display Images captured when the camera - Nikon COOLPIX P900 | Reference Manual - Page 80
the playback menu (A124) can be 15/11/2019 1 used for the images in the selected shooting date (except Copy). while the 04/11/2019 10 shooting date selection screen is displayed. - d button: The functions listed Images captured when the camera's date is not set are treated as images captured - Nikon COOLPIX P900 | Reference Manual - Page 81
this camera cannot be displayed as a sequence. C Playback Menu Options Available When Using Sequence • When images in a sequence are displayed in full-frame playback mode, press the d button to select functions in playback menu (A124). • If you select a key picture on the image selection screen in - Nikon COOLPIX P900 | Reference Manual - Page 82
selected images: When a key picture is selected on the erase selected images screen (A22), all images in that sequence are deleted. - All images: memory are deleted. • When images in a sequence are displayed in full-frame playback mode: - Current image: The image currently displayed is deleted - Nikon COOLPIX P900 | Reference Manual - Page 83
of effects. You can select Painting, Photo illustration, Soft portrait, Portrait (color + B&W), Fisheye, Cross screen, or Miniature effect. 1 Display the image to which you want to apply an effect in full-frame playback mode and press the k button. 2 Use the multi selector HIJK to select the - Nikon COOLPIX P900 | Reference Manual - Page 84
playback mode M Select an image M d button M Quick retouch M k button Use the multi selector HI to select the desired effect level and press the k button. playback mode M Select an image M d button M D-Lighting M k button Use the multi selector HI to select OK and press the k button. • The edited - Nikon COOLPIX P900 | Reference Manual - Page 85
eye Correction • If no red-eye is detected, a warning is displayed and the screen returns to the playback menu. • Red-eye correction can be applied to pets M Select an image M d button M Glamour retouch M k button 1 Use the multi selector HIJK to select the face that you want to retouch and press - Nikon COOLPIX P900 | Reference Manual - Page 86
use D Redden cheeks • Press the d button to return to the screen for selecting a person. 3 Preview the result and press the k looking, or the brightness of faces, the camera may be unable to accurately detect faces, detected, a warning is displayed and the screen returns to the playback menu. • The - Nikon COOLPIX P900 | Reference Manual - Page 87
Press the c button to enter playback mode M Select an image M d button M Small picture M k button 1 Use the multi selector HI to select the desired copy size and press the k button. • For images captured at an Create small picture file? Yes No 73 Playback Features Editing Images (Still Images) - Nikon COOLPIX P900 | Reference Manual - Page 88
(i) or f (h) to adjust the magnification rate. Set a magnification rate at which u is displayed. x3.0 • Use the multi selector HIJK to scroll to the portion of the image that you want to display. 3 Confirm the area the same as the original. 74 Playback Features Editing Images (Still Images) - Nikon COOLPIX P900 | Reference Manual - Page 89
Movies Basic Operations of Movie Recording and Movie Playback 76 Capturing Still Images While Recording Movies 79 Short Movie Show Mode (Combining Movie Clips to Create Short Movies) ...80 Operations During Movie Playback 83 Editing Movies ...84 75 Movies - Nikon COOLPIX P900 | Reference Manual - Page 90
screen. • Check the remaining amount of movie recording time. • It is recommended that you display the movie frame that indicates camera focuses still image by pressing the shutter-release button while recording a movie (A79). 4 Press the b (e) button again to end recording. 5 Select a movie in full - Nikon COOLPIX P900 | Reference Manual - Page 91
• The remaining recording time for a single movie is displayed on the shooting screen. • The actual remaining recording time may vary depending on the movie content, with a lower Speed Class rating is used. B Camera Temperature • The camera may become hot when recording movies for an extended period - Nikon COOLPIX P900 | Reference Manual - Page 92
are being saved. Do not open the battery-chamber/ memory card slot cover or remove the battery or memory card while an indicator is flashing. Doing this could result in loss of data, or in damage to the camera or the memory card. • When using the camera's internal memory, saving movies may take some - Nikon COOLPIX P900 | Reference Manual - Page 93
) is set to Z 1080/60i, U 1080/50i, g 480/ 30p, W 480/25p, or HS movie • The sounds of operating the shutter-release button when saving a still image may be heard in the recorded movie. • If the camera moves when the shutter-release button is pressed, the image may be blurred. 79 Movies Capturing - Nikon COOLPIX P900 | Reference Manual - Page 94
toward g (i) to preview it. • After the settings are complete, press the d button or shutter-release button to exit the menu. 2 Press the b (e movie-record) button to record a movie clip. • The camera automatically stops recording the movie clip when the time specified in step 1 elapses. • Movie - Nikon COOLPIX P900 | Reference Manual - Page 95
show before the camera finishes recording the specified number of movie clips, press the d button when the shooting standby screen is displayed, and applied to the image. • When Selective color or Cross process is selected, use the multi selector HI to select the desired color, and press the k - Nikon COOLPIX P900 | Reference Manual - Page 96
Show • The camera cannot record movies if a memory card is not inserted. • Do not exchange the memory card until a short movie show is saved. C Pausing Movie Recording • A still image (l 4608×2592) can be captured if you press the shutter-release button when the shooting standby screen is displayed - Nikon COOLPIX P900 | Reference Manual - Page 97
screen. The operations described below can be performed by using the multi selector JK to select a control and then pressing the k button. Volume indicator of a movie and save it as a still image. F Resume playback. G Return to full-frame playback mode. 83 Movies Operations During Movie Playback - Nikon COOLPIX P900 | Reference Manual - Page 98
Editing Movies When editing movies, use a sufficiently charged battery to prevent the camera from turning off during editing. When the battery level indicator is B, movie editing is not possible. Extracting Only the Desired Portion of a Movie The desired portion of a recorded movie can be saved as - Nikon COOLPIX P900 | Reference Manual - Page 99
Save the k button. • Follow the instructions on the screen to save the movie. 30s B Notes About Movie Extracting • A movie that was created by editing cannot be edited again. • The actual trimmed portion of a movie may differ slightly from the portion selected using the start and end points - Nikon COOLPIX P900 | Reference Manual - Page 100
Connecting the Camera to a TV, Printer, or Computer Utilizing Images ...87 Viewing Images on a TV...88 Printing Images Without a Computer 89 Transferring Images to a Computer (ViewNX-i 93 86 Connecting the Camera to a TV, Printer, or Computer - Nikon COOLPIX P900 | Reference Manual - Page 101
or remove the plugs at an angle. • Make sure that the camera battery is sufficiently charged. If the EH-62F AC Adapter (available separately) is used, this camera can be powered from an electrical outlet. Do not, under any circumstances, use an AC adapter other than the EH-62F. Failure to observe - Nikon COOLPIX P900 | Reference Manual - Page 102
to external input. • See the documentation provided with your TV for details. 3 Press and hold down the c (playback) button to turn on the camera. • Images are displayed on the TV. • The camera screen does not turn on. 88 Connecting the Camera to a TV, Printer, or Computer Viewing Images on a TV - Nikon COOLPIX P900 | Reference Manual - Page 103
Printing Images Without a Computer Users of PictBridge-compatible printers can connect the camera directly to the printer and print images without using a computer. Connecting the Camera to a Printer 1 Turn on the printer. 2 Turn off the camera and connect it to the printer using the USB cable. • - Nikon COOLPIX P900 | Reference Manual - Page 104
• To print with the paper size setting configured on the printer, select Default. • The paper size options available on the camera vary depending on the printer that you use. 4 Select Start print and press the k button. • Printing starts. Print selection 15/11/2019 No. 32 32 PictBridge 1 prints - Nikon COOLPIX P900 | Reference Manual - Page 105
1 When the Print selection screen is displayed, press the d (menu) button. Print selection 15/11/2019 No. 32 32 2 Use the multi selector HI to select Default. • The paper size options available on the camera vary depending on the printer that you use. • To exit the print menu, press the d button - Nikon COOLPIX P900 | Reference Manual - Page 106
, and use HI to specify the number of copies to be printed. 1 1 • Images selected for printing are indicated by a and the number of 3 copies to be printed. To cancel the print Back selection, set the number of copies to 0. • Move the zoom control toward g (i) to switch to full-frame playback - Nikon COOLPIX P900 | Reference Manual - Page 107
-screen instructions to complete installation. https://downloadcenter.nikonimglib.com For system requirements and other information, see the Nikon the camera off and ensure that the memory card is inserted in the camera. Connect the camera to the computer using the USB cable. The camera automatically - Nikon COOLPIX P900 | Reference Manual - Page 108
a large number of images, it may take a while for Nikon Transfer 2 to start. Wait until Nikon Transfer 2 starts. B Notes About Connecting the USB Cable Operation is not guaranteed if the camera is connected to the computer via a USB hub. C Using ViewNX-i Consult online help for more information. 94 - Nikon COOLPIX P900 | Reference Manual - Page 109
connection. • If you are using a card reader or card slot, choose the appropriate option in the computer operating system to eject the removable disk card slot. • If the camera is connected to the computer, turn the camera off and disconnect the USB cable. 95 Connecting the Camera to a TV, Printer, - Nikon COOLPIX P900 | Reference Manual - Page 110
Using the Menu Menu Operations...97 Menu Lists ...100 The Shooting Menu (Common Across Shooting Modes 104 The Shooting Menu (for A (Auto) Mode 106 The Smart Portrait Menu 115 The Movie Menu ...117 The Playback Menu...124 The Network Menu ...129 The Setup Menu...133 96 Using the Menu - Nikon COOLPIX P900 | Reference Manual - Page 111
depending on the status of the camera (during shooting or playback). • Menu items are categorized by the icons on the left side of the screen. When shooting During playback Shooting menu Image mode White balance Continuous ISO sensitivity AF area mode Autofocus mode Playback menu Mark for upload - Nikon COOLPIX P900 | Reference Manual - Page 112
of the camera. 6 Press HI to select a setting, and press the k button to confirm the selection. • When you are finished using the menu, by pressing the shutter-release button or b (e movie-record) button. Time zone and date Monitor settings Date stamp Self-timer: after release Photo VR AF assist - Nikon COOLPIX P900 | Reference Manual - Page 113
screen such as the one Protect shown on the right is displayed while operating the camera menu, follow the procedures described below to select the images. Back 1 Use the multi selector JK to select the Protect desired image. • Move the zoom control (A2) toward g (i) to switch to full - Nikon COOLPIX P900 | Reference Manual - Page 114
108 ISO sensitivity Auto 110 AF area mode Target finding AF 111 Autofocus mode Pre-focus 114 For Smart Portrait Mode Option Default setting A Self-Collage • Number of shots: 4 • Interval: Medium 115 • Shutter sound: Magic Blink proof Off 116 100 Using the Menu Menu Lists - Nikon COOLPIX P900 | Reference Manual - Page 115
Option Default setting A Movie options e 1080/30p or S 1080/25p 117 Autofocus mode Single AF 121 Movie VR On (hybrid) 122 Wind noise reduction Off 128 1 Select an image on the image selection screen. See "The Image Selection Screen" (A99) for more information. 2 Edited images - Nikon COOLPIX P900 | Reference Manual - Page 116
The Network Menu Press the d button M select J (network menu) M k button Option A Airplane mode 130 Choose connection 130 Connect to smart device 130 Connection to remote 130 Send while shooting 130 Wi-Fi 130 Bluetooth 131 Restore default settings 131 102 Using the Menu Menu Lists - Nikon COOLPIX P900 | Reference Manual - Page 117
A Time zone and date 133 Monitor settings 135 Date stamp 136 Self-timer: after release 137 Photo VR 138 AF assist 138 Digital zoom 139 Sound settings 139 Auto off 140 Format card/Format memory 146 Conformity marking 146 Firmware version 146 103 Using the Menu Menu Lists - Nikon COOLPIX P900 | Reference Manual - Page 118
button Select the combination of image size and compression ratio to be used when saving images. The higher the image mode setting, the larger the Approx. 1:8 16:9 s 3456×3456 Approx. 1:8 1:1 * The numerical values indicate the number of pixels that are captured. Example: P 4608×3456 = approx. - Nikon COOLPIX P900 | Reference Manual - Page 119
number of images that can be saved can be checked on the screen when shooting (A17). • Note that due to JPEG compression, the number of images that can be saved may vary greatly depending on the image content, even when using memory cards with the same capacity and the same image mode - Nikon COOLPIX P900 | Reference Manual - Page 120
make the colors in images match what you see with your eyes. Option a Auto (default setting) b Preset manual c Daylight d Incandescent e Fluorescent f Cloudy g Flash Description White balance is automatically adjusted. Use when the desired result is not achieved with Auto, Incandescent, etc. (A107 - Nikon COOLPIX P900 | Reference Manual - Page 121
the value. • The shutter is released and measurement is complete (no image is saved). Cancel Measure Preset manual Cancel Measure Measuring window B Notes About Preset Manual A white balance value for flash lighting cannot be measured with Preset manual. When shooting using the flash, set White - Nikon COOLPIX P900 | Reference Manual - Page 122
m Continuous L While the shutter-release button is held all the way down, images are captured continuously. • The camera can capture up to about camera can capture up to about 25 images continuously at a rate of about 60 fps. • Image mode is fixed at M (image size: 1280 × 960 pixels). 108 Using - Nikon COOLPIX P900 | Reference Manual - Page 123
B Notes About Continuous Shooting • Focus, exposure and white balance are fixed at the values determined with the way • The pre-shooting cache icon (Q) on the shooting screen changes to green while the shutter-release button is pressed halfway. 109 Using the Menu The Shooting Menu (for A (Auto) Mode) - Nikon COOLPIX P900 | Reference Manual - Page 124
of similar brightness, pictures can be taken at faster shutter speeds, and blurring caused by camera shake and subject movement can be reduced. • function may not be available to use in combination with other functions (A61). C ISO Sensitivity Display on the Shooting Screen • When Auto is selected, - Nikon COOLPIX P900 | Reference Manual - Page 125
AF area mode M k button Set how the camera selects the focus area for autofocus. Option Description When the camera detects a human face, it focuses on that face. See "Using Face Detection" (A56) for more information. a Face priority x Manual When framing a composition with no human subjects or - Nikon COOLPIX P900 | Reference Manual - Page 126
) for more information. M Target finding AF (default setting) When the camera detects the main subject, it focuses on that subject. See "Using Target Finding AF" (A55). Focus area 25m 0s 500 Start 25m 0s 500 1 / 2 5 0 F 3.3 Focus areas B Notes About AF Area Mode • When digital zoom is in - Nikon COOLPIX P900 | Reference Manual - Page 127
no longer track the registered subject, the focus area disappears. Register the subject again. 2 Press the shutter-release button all the way to take the picture. • If the shutter-release button is pressed while the focus area is not displayed, the camera focuses on the subject in the center of the - Nikon COOLPIX P900 | Reference Manual - Page 128
select A (shooting menu) M Autofocus mode M k button Set how the camera focuses when shooting still images. Option A Single AF B Full-time AF a Pre-focus (default setting) Description The camera focuses only when the shutter-release button is pressed halfway. The camera always focuses even if the - Nikon COOLPIX P900 | Reference Manual - Page 129
Number of shots Interval Shutter sound Description Set the number of shots that the camera automatically captures (number of shutter sound when shooting with the self-collage function. • Standard, SLR, Magic (default setting), or Off can be selected. • The setting that is specified for Shutter - Nikon COOLPIX P900 | Reference Manual - Page 130
automatically releases the shutter twice with every shot and saves one image in which the subject's eyes are open. • If the camera saved an image in which the subject's eyes may have been closed, the dialog shown on the right is displayed for a few seconds. • The flash cannot be used. Off (default - Nikon COOLPIX P900 | Reference Manual - Page 131
/25p g 480/30p W 480/25p Image size 1920 × 1080 1920 × 1080 1280 × 720 640 × 480 Aspect ratio (horizontal to vertical) 16:9 16:9 16:9 4:3 1 Interlaced format uses Fields per second. 2 The setting is not available when using certain effects in creative mode (A39) or glamour retouch (A41). 117 - Nikon COOLPIX P900 | Reference Manual - Page 132
available when using certain effects in creative mode (A39) or glamour retouch (A41). 2 While recording movies, the camera can be Still images cannot be saved during movie recording. • Movie recording cannot be paused. • Zoom position and focus are locked when movie recording starts. 118 Using - Nikon COOLPIX P900 | Reference Manual - Page 133
/0.5×: Movies are recorded at 1/2 normal speed. They are played back in fast motion at 2× faster speed. Recording time 10 s Playback time 5 s Fast motion playback 119 Using the Menu The Movie Menu - Nikon COOLPIX P900 | Reference Manual - Page 134
motion at twice the normal playback speed. 1 Use the multi selector HI to select an HS movie press the d button to return to the shooting screen. Movie options 1080/30p 1080/60i 720/30p 480/30p start recording. • The camera starts recording an HS movie. • The camera switches between normal speed - Nikon COOLPIX P900 | Reference Manual - Page 135
will change significantly during recording. The sound of the camera focusing may be heard in the recorded movie. Use of Single AF is recommended to prevent the sound of the camera focusing from interfering with recording. C Notes About Autofocus Mode When an HS movie option is selected in Movie - Nikon COOLPIX P900 | Reference Manual - Page 136
image processing. The angle of view (i.e., the area seen in the frame) becomes narrower. Performs compensation for camera shake using lens shift VR. Off Compensation is not performed. B Notes About Movie VR • When an HS movie option is selected in Movie options, the setting is - Nikon COOLPIX P900 | Reference Manual - Page 137
Frame Rate Enter shooting mode M d button M select D (movie menu) M Frame rate M k button Select the frame rate (fields per second for the interlaced format) used when recording movies. When the frame rate setting is switched, options that can be set in Movie options (A117) change. Option 30 fps - Nikon COOLPIX P900 | Reference Manual - Page 138
mode M d button M Mark for upload M k button Select still images on the camera's playback screen to automatically upload them to a smart device. For connections with smart devices or use of the SnapBridge app, see the included "SnapBridge Connection Guide" and SnapBridge online help. 1 On the image - Nikon COOLPIX P900 | Reference Manual - Page 139
in the slide show, only the first frame of each movie is displayed. 1 Use the multi selector HI to select Slide show Start and press the k button. • even if Loop is enabled. 2 End or restart the slide show. • The screen shown on the right is displayed after the slide show ends or is paused. To - Nikon COOLPIX P900 | Reference Manual - Page 140
the image selection screen (A99). Note that formatting the memory card or the camera's internal memory Still images can be rotated 90 degrees clockwise or 90 degrees counterclockwise. Select an image from the image selection screen (A99). When the Rotate image screen Using the Menu The Playback Menu - Nikon COOLPIX P900 | Reference Manual - Page 141
Camera to card Card to camera 2 Select a copy option and press the k button. • When you choose Selected images, use the image selection screen to specify images (A99). Camera in full-frame playback mode, Camera to card cannot be selected. • When images in a sequence are displayed in full-frame - Nikon COOLPIX P900 | Reference Manual - Page 142
mode M d button M Sequence display M k button Select the method used to display images in the sequence (A67). Option Q Individual pictures V Displays each image in a sequence individually. F is displayed on the playback screen. Displays only the key picture for images in a sequence. Settings are - Nikon COOLPIX P900 | Reference Manual - Page 143
images captured with the camera to the smart device or operate the camera remotely with the smart still images (2 megapixels or original size) and movies to the smart device or perform remote photography. • For connections or use of the SnapBridge app, see the included "SnapBridge Connection Guide - Nikon COOLPIX P900 | Reference Manual - Page 144
an image size of 2 megapixels. To upload at their original size, use Download pictures in the SnapBridge app. • If you use Mark for upload (A124) in the playback menu, you can select still images on the camera's playback screen to automatically upload them to a smart device. Set the conditions for - Nikon COOLPIX P900 | Reference Manual - Page 145
or delete paired smart devices. • This camera can be paired with up to five smart to set whether the camera communicates with the smart device when the camera is off or in Indicator and Wi-Fi Communication Indicator on the Shooting Screen • About the Bluetooth communication indicator - When the camera - Nikon COOLPIX P900 | Reference Manual - Page 146
Operating the Text Input Keyboard • Use the multi selector HIJK to select alphanumeric characters. Press the k button to enter the selected character • To apply the setting, select P on the keyboard and press the k button. Text field SSID Back Delete Keyboard 132 Using the Menu The Network Menu - Nikon COOLPIX P900 | Reference Manual - Page 147
Zone and Date Press the d button M select z (setup) M Time zone and date M k button Set the camera clock. Option Date and time Description • Select a field: Press the multi selector JK. • Edit the date and the date and time are saved for the selected region. 133 Using the Menu The Setup Menu - Nikon COOLPIX P900 | Reference Manual - Page 148
button. • The date and time displayed on the screen changes depending on whether the home time zone or travel destination is selected. 3 Press K. 4 Use JK to select the time zone. • Press H Casablanca 15/11/2019 15:30 New York, Toronto, Lima 10:30 -05:00 Back 134 Using the Menu The Setup Menu - Nikon COOLPIX P900 | Reference Manual - Page 149
Image review Brightness View/hide framing grid Description The descriptions of functions are displayed while changing the shooting mode or while the setting screen is or not to display a boxed guide for framing on the shooting screen. • Default setting: Off 135 Using the Menu The Setup Menu - Nikon COOLPIX P900 | Reference Manual - Page 150
. B Notes About Date Stamp • Stamped date and time form a permanent part of image data and cannot be deleted. The date and time cannot be stamped 60 fps - When recording movies - When saving still images during movie recording - When creating still images by editing movies • The stamped date and - Nikon COOLPIX P900 | Reference Manual - Page 151
button Set whether to cancel the self-timer after using it to shoot (A49). Option Exit self-timer manually set the self-timer setting to k. • Pet portrait auto release and Smile timer are not canceled. Stay in self-timer mode The self-timer photography continues after shooting. • When the camera - Nikon COOLPIX P900 | Reference Manual - Page 152
button M select z (setup) M Photo VR M k button Select the vibration reduction setting used when shooting still images. Select Off when using a tripod to stabilize the camera during shooting. Option g On (default setting) Off Description Performs compensation for camera shake using lens shift VR - Nikon COOLPIX P900 | Reference Manual - Page 153
sound Shutter sound Description When On (default setting) is selected, the camera produces one beep when operations are performed, two beeps when focus is acquired on the subject, and three beeps when an error occurs. The welcome screen sound is also produced. • Sounds are disabled when using Pet - Nikon COOLPIX P900 | Reference Manual - Page 154
min. C Setting the Auto Off Function The time that passes before the camera enters standby mode is fixed in the following situations: • When a menu 1 min) • When shooting using Pet portrait auto release: 5 minutes (when auto off is set to 30 s or 1 min) • When shooting using Smile timer: 5 minutes ( - Nikon COOLPIX P900 | Reference Manual - Page 155
in the setup menu and then press the k button. To start formatting, select Format on the screen that is displayed and press the k button. • Do not turn the camera off or open the battery-chamber/memory card slot cover during formatting. Language Press the d button M select z (setup) M Language - Nikon COOLPIX P900 | Reference Manual - Page 156
comment of up to 36 alphanumeric characters. • Select Input comment, press K, and the input screen is displayed. See "Operating the Text Input Keyboard" (A132) for information about the input method are not displayed even if images are played back on the camera. 142 Using the Menu The Setup Menu - Nikon COOLPIX P900 | Reference Manual - Page 157
Artist, press K, and the input screen is displayed. See "Operating the Text Nikon is not responsible for any kind of trouble or damage resulting from the use of Copyright information. C Copyright Information Display • Copyright information is not displayed even if images are played back on the camera - Nikon COOLPIX P900 | Reference Manual - Page 158
Guide" and SnapBridge online help. 1 Use the SnapBridge app to establish a Bluetooth connection between the camera and smart device. 2 In the A tab of the SnapBridge app M Auto link M enable Synchronize location data. • When obtaining location information, z is displayed on the shooting screen - Nikon COOLPIX P900 | Reference Manual - Page 159
Charge by computer M k button Option a Auto (default setting) Off Description When the camera is connected to a computer that is running (A93), the battery inserted into the camera is automatically charged using power supplied by the computer. • The power-on lamp (charge lamp) slowly flashes while - Nikon COOLPIX P900 | Reference Manual - Page 160
setup) M Reset all M k button When Reset is selected, the camera's settings are restored to their default values. • The network menu settings ) M Conformity marking M k button View some of the conformity markings that the camera complies with. Firmware Version Press the d button M select z (setup) M - Nikon COOLPIX P900 | Reference Manual - Page 161
If There Is a Problem Troubleshooting ...148 Error Messages ...157 147 If There Is a Problem - Nikon COOLPIX P900 | Reference Manual - Page 162
Troubleshooting If the camera fails to function as expected, check the following before consulting your retailer or Nikon-authorized service representative. • Turning off the camera once may solve the issue. • If you cannot find a relevant entry, also check "Error Messages" (A157) or the Nikon - Nikon COOLPIX P900 | Reference Manual - Page 163
the camera clock with that of a more accurate timepiece and reset as required. No information displayed on the screen. Shooting and photo information or when using certain settings in other functions. • The date cannot be stamped on movies. 61, 136 149 If There Is a Problem Troubleshooting - Nikon COOLPIX P900 | Reference Manual - Page 164
for several days even after the camera battery is removed. The camera makes sound. When Autofocus mode is set to Full-time AF or while in some shooting modes, the camera may produce an audible focusing sound. 24, 114, 121 Shooting Issues Problem Cause/Solution Cannot switch to shooting - Nikon COOLPIX P900 | Reference Manual - Page 165
Problem Cause/Solution A Images are blurred. • Use the flash. 47 • Increase the ISO sensitivity value. 110 • Enable Photo VR when shooting still images. Enable 122, Movie VR when recording movies. 138 • Use a tripod to stabilize the camera (using position of the focus area or the current - Nikon COOLPIX P900 | Reference Manual - Page 166
too bright Adjust exposure compensation. 51 (overexposed). Areas other than red eyes are corrected. Use any shooting mode other than Night portrait, and change the flash mode to any setting other 41, 42 • When using continuous shooting mode 108 152 If There Is a Problem Troubleshooting - Nikon COOLPIX P900 | Reference Manual - Page 167
memory. • This camera is unable to edit images captured with other cameras. • Editing functions used for images are not available for movies. This camera cannot rotate images captured with another make or model of digital camera. A - - 38, 69 - - - - 153 If There Is a Problem Troubleshooting - Nikon COOLPIX P900 | Reference Manual - Page 168
Guide". • Use a sufficiently charged battery. - • Insert a memory card with sufficient free space into 12 the camera camera. • If multiple cameras are registered in the SnapBridge - app, switch to the camera you want to connect using the SnapBridge app. 154 If There Is a Problem Troubleshooting - Nikon COOLPIX P900 | Reference Manual - Page 169
For Send while shooting and Mark for upload in the camera, still images are uploaded at an image size of 2 megapixels. To upload at their original size, use Download pictures in the SnapBridge app. - Cannot perform remote photography from a smart device that is connected with the SnapBridge app - Nikon COOLPIX P900 | Reference Manual - Page 170
sizes specified by the camera. • The printer automatically selects the paper size. 1 See the included "SnapBridge Connection Guide" and SnapBridge online help. 2 Refer to the User's Manual provided with the ML-L7 Remote Control (available separately). 156 If There Is a Problem Troubleshooting - Nikon COOLPIX P900 | Reference Manual - Page 171
entry, also check "Troubleshooting" (A148). Display Cause/Solution A Battery temperature is elevated. The camera The camera turns off automatically. Wait until the will turn off. camera or battery temperature has cooled before - The camera will turn off resuming use. to prevent overheating - Nikon COOLPIX P900 | Reference Manual - Page 172
and reconnect the USB cable. System error An error occurred in the camera's internal circuitry. Turn the camera off, remove and reinsert the battery, and turn the camera on. If the error persists, contact 148 your retailer or Nikon-authorized service representative. Printer error: check printer - Nikon COOLPIX P900 | Reference Manual - Page 173
- Printer error: out of paper. Load the specified size of paper, select Resume, and press the k button to resume printing.* - There is a problem with the printer's ink. Printer error: check ink. Check the ink, select Resume, and press the k - button to resume printing.* Printer error: out - Nikon COOLPIX P900 | Reference Manual - Page 174
About Wireless Communication Functions 163 Caring for the Product ...166 The Camera ...166 The Battery ...167 The Charging AC Adapter 168 Memory Cards...169 Cleaning and Storage ...170 Cleaning ...170 Storage ...170 File Names...171 Accessories ...172 ML-L7 Remote Control 173 Specifications...177 - Nikon COOLPIX P900 | Reference Manual - Page 175
pursuant to Part 15 of the FCC rules. These limits are designed to provide reasonable protection against harmful interference in a residential installation. This equipment generates, uses, and can radiate radio frequency energy and, if not installed and used in accordance with the instructions, may - Nikon COOLPIX P900 | Reference Manual - Page 176
B Part 15 of the FCC rules. Nikon Inc., 1300 Walt Whitman Road, Melville, New York 11747-3064, U.S.A. Tel: 631-547-4200 Notice for Customers in Canada CAN ICES-3 B / NMB-3 B Notices for Customers in Europe CAUTION: RISK OF EXPLOSION IF BATTERY IS REPLACED BY AN INCORRECT TYPE. This symbol indicates - Nikon COOLPIX P900 | Reference Manual - Page 177
for use in other countries (products purchased in the EU or EFTA can be used anywhere within the EU and EFTA). Nikon does not accept liability for use in other countries. Users who are unsure as to the original country of sale should consult with their local Nikon service center or Nikon-authorized - Nikon COOLPIX P900 | Reference Manual - Page 178
Canada Federal Communications Commission (FCC) and Innovation, Science and Economic Development Canada (ISED) Declaration of Conformity This device complies with part in the microwave range while being used. Whereas high levels of RF can additional research. This product has been tested and found to - Nikon COOLPIX P900 | Reference Manual - Page 179
radio equipment type COOLPIX B600 is in compliance with Directive 2014/53/EU. The full text of the EU declaration of conformity is available at the following internet address: https://imaging.nikon.com/support/pdf/DoC_N1811.pdf. • Maximum output power: - Wi-Fi: 11.3 dBm (EIRP) - Bluetooth: 3.1 dBm - Nikon COOLPIX P900 | Reference Manual - Page 180
Observe the precautions described below in addition to the warnings in "For Your Safety" (Avi-ix) when using or storing the device. The Camera Do Not Apply Strong Impact to the Camera The product may malfunction if subjected to strong shock or vibration. In addition, do not touch or apply force to - Nikon COOLPIX P900 | Reference Manual - Page 181
possible, carry fully charged spare batteries when taking pictures on important occasions. Using the Battery When Cold On cold days, the capacity of batteries tends to decrease. If an exhausted battery is used at a low temperature, the camera may not turn on. Keep spare batteries in a warm place and - Nikon COOLPIX P900 | Reference Manual - Page 182
in hot or extremely cold locations. Battery Life A marked drop in the time a fully charged battery retains its charge, when used at room temperature, indicates that the battery needs to be replaced. Purchase a new battery. Recycling Used Batteries Recycle rechargeable batteries in accord with local - Nikon COOLPIX P900 | Reference Manual - Page 183
used in another device into this camera, be sure to format it with this camera. We recommend formatting new memory cards with this camera before using them with this camera Card is not formatted. Format card? is displayed when the camera is turned on, the memory card must be formatted. If there - Nikon COOLPIX P900 | Reference Manual - Page 184
covered by the warranty. Storage Remove the battery if the camera will not be used for an extended period. To prevent mold or mildew, take the camera out of storage at least once a month. Turn the camera on and release the shutter a few times before putting the camera away again. Do not store the - Nikon COOLPIX P900 | Reference Manual - Page 185
Identifier (2) File number (3) Extension Not shown on the screen of the camera. • DSCN: Original still images, movies, still images created by the movie editing function • SSCN: Small and ending with "9999." Indicates file format. • .JPG: Still images • .MP4: Movies 171 Technical Notes File Names - Nikon COOLPIX P900 | Reference Manual - Page 186
minutes for a fully exhausted battery. EH-62F AC Adapter (connect as shown) AC adapter Remote control accessories Hand strap Make sure that cable is fully inserted in the battery chamber slot before closing the batterychamber/memory card slot cover. If part of the cable protrudes from the - Nikon COOLPIX P900 | Reference Manual - Page 187
camera is paired with a different remote control, only the most recent paired remote control is enabled. • Refer to the User's Manual provided with the ML-L7 Remote Control. Parts the multi selector on the camera, enabling you to configure settings on the shooting screen, such as the creative slider - Nikon COOLPIX P900 | Reference Manual - Page 188
to search for a new pairing camera. To turn off the remote control, press the button again. 5 Status lamp Indicates the remote control Shutter-release button Functions similarly to the shutter-release button on the camera. • Half-press and press-and-hold operations are not available. • When using - Nikon COOLPIX P900 | Reference Manual - Page 189
time, it must be paired with the camera. • Make sure that the remaining battery level is sufficient. 1 Press the d button on the camera. 2 Press the multi selector J, use HI to select J (network menu), and smart device Connection to remote Send while shooting Wi-Fi 175 Technical Notes Accessories - Nikon COOLPIX P900 | Reference Manual - Page 190
smart devices are connected to the camera through Bluetooth when the SnapBridge app is launched. L is displayed on the shooting screen of the camera. • For connections with smart devices, see the included "SnapBridge Connection Guide" and SnapBridge online help. 176 Technical Notes Accessories - Nikon COOLPIX P900 | Reference Manual - Page 191
35mm [135] format) Vibration reduction Lens shift (still images) Combination of lens shift and electronic VR (movies) Autofocus (AF) Contrast-detect AF Focus center of front surface of lens) Focus-area selection Face priority, manual with 99 focus areas, center, subject tracking, target - Nikon COOLPIX P900 | Reference Manual - Page 192
HS 1080/0.5× • ISO 125-1600 • ISO 3200, 6400 (available when using Auto mode) Exposure Metering mode Matrix, center-weighted (digital zoom less than 2×), spot (digital zoom 2× or more) Exposure control Shutter Speed Programmed auto exposure and exposure compensation (-2.0 - +2.0 EV in steps of - Nikon COOLPIX P900 | Reference Manual - Page 193
power Power sources Charging time Battery life1 Still images Movie recording (actual battery life for recording)2 Tripod socket Camera and Imaging Products Association (CIPA) standards or guidelines. 1 Battery life does not reflect the use of SnapBridge and may vary with the conditions of use, - Nikon COOLPIX P900 | Reference Manual - Page 194
EN-EL12 Rechargeable Li-ion Battery Type Rechargeable lithium-ion battery Rated capacity DC 3.7 V, 1050 mAh Operating camera and the images and illustrations in the manual are for illustrative purposes only. C Notices for Customers in Europe Distributor (Importer for EU Countries) Nikon - Nikon COOLPIX P900 | Reference Manual - Page 195
Used The camera supports SD, SDHC, and SDXC memory cards. • Memory cards with an SD Speed Class rating of 6 (Video Speed Class V6) or faster are recommended for recording movies. When using use of such marks by Nikon Corporation Systems, Inc., in the United States and/or other countries and is used - Nikon COOLPIX P900 | Reference Manual - Page 196
-Fi Alliance. • All other trade names mentioned in this manual or the other documentation provided with your Nikon product are the trademarks or registered trademarks of their respective holders. Use of the Made for Apple badge means that an accessory has been designed to connect specifically to the - Nikon COOLPIX P900 | Reference Manual - Page 197
A AC adapter 87, 172 Accessories 172 Active D-Lighting 25 AF area Battery charger 172 Battery level 17 Battery-chamber/memory card slot cover 3, 13 Beach Z 27 Bird-watching l 35 Blink proof 100, 116 Bluetooth 102, 131 Brightness 135 Button sound 139 C Calendar display 65 Capturing still - Nikon COOLPIX P900 | Reference Manual - Page 198
52, 177 Focus 54 Focus area 18 Focus indicator 5 Focus lock 58 Food u 27, 33 Format 12, 141 Format card 12, 103, 141 Format internal memory 141 Format memory 103, 141 Format memory cards 12, 141 Foundation makeup 41, 42 Frame rate 101, 123 Full-frame playback 20 Full-time AF 114 - Nikon COOLPIX P900 | Reference Manual - Page 199
Language 103, 141 Lens 2, 177 Li-ion rechargeable battery vi, 12, 13, 167, 180 List by date Photo VR 103, 138 PictBridge 87, 89 Playback 20, 67, 83 Playback menu 97, 124 Playback mode 20 Playback zoom 20, 64 Portrait b 27 Power switch/power-on lamp...... 2, 14 Pre-focus 114 Preset manual - Nikon COOLPIX P900 | Reference Manual - Page 200
76 Shooting information 4 Shooting menu 97, 104, 106 Shooting mode 24 Short movie show menu 80 Short movie show mode 24, 80 Shutter sound 115, 139 Shutter speed 54 Shutter-release button 2, 18, 54 Side zoom control 2, 18, 52 Single 108 Single AF 114, 121 Skin softening 41, 42 Slide show - Nikon COOLPIX P900 | Reference Manual - Page 201
No reproduction in any form of this manual, in whole or in part (except for brief quotation in critical articles or reviews), may be made without written authorization from NIKON CORPORATION. 2019 CT0B04(11) 6MQ01911-04
-
 1
1 -
 2
2 -
 3
3 -
 4
4 -
 5
5 -
 6
6 -
 7
7 -
8
-
9
-
10
-
11
-
12
-
13
-
14
-
15
-
16
-
17
-
18
-
19
-
20
-
21
-
22
-
23
-
24
-
25
-
26
-
27
-
28
-
29
-
30
-
31
-
32
-
33
-
34
-
35
-
36
-
37
-
38
-
39
-
40
-
41
-
42
-
43
-
44
-
45
-
46
-
47
-
48
-
49
-
50
-
51
-
52
-
53
-
54
-
55
-
56
-
57
-
58
-
59
-
60
-
61
-
62
-
63
-
64
-
65
-
66
-
67
-
68
-
69
-
70
-
71
-
72
-
73
-
74
-
75
-
76
-
77
-
78
-
79
-
80
-
81
-
82
-
83
-
84
-
85
-
86
-
87
-
88
-
89
-
90
-
91
-
92
-
93
-
94
-
95
-
96
-
97
-
98
-
99
-
100
-
101
-
102
-
103
-
104
-
105
-
106
-
107
-
108
-
109
-
110
-
111
-
112
-
113
-
114
-
115
-
116
-
117
-
118
-
119
-
120
-
121
-
122
-
123
-
124
-
125
-
126
-
127
-
128
-
129
-
130
-
131
-
132
-
133
-
134
-
135
-
136
-
137
-
138
-
139
-
140
-
141
-
142
-
143
-
144
-
145
-
146
-
147
-
148
-
149
-
150
-
151
-
152
-
153
-
154
-
155
-
156
-
157
-
158
-
159
-
160
-
161
-
162
-
163
-
164
-
165
-
166
-
167
-
168
-
169
-
170
-
171
-
172
-
173
-
174
-
175
-
176
-
177
-
178
-
179
-
180
-
181
-
182
-
183
-
184
-
185
-
186
-
187
-
188
-
189
-
190
-
191
-
192
-
193
-
194
-
195
-
196
-
197
-
198
-
199
-
200
-
201
 |
 |
DIGITAL CAMERA
Reference Manual
•
Read this manual thoroughly before using the camera.
•
To ensure proper use of the camera, be sure to read “For
Your Safety” (page vi).
•
After reading this manual, keep it in a readily accessible
place for future reference.