Nikon Coolpix S4 User Manual - Page 16
First Steps, Inserting the Batteries - new
 |
UPC - 410000220139
View all Nikon Coolpix S4 manuals
Add to My Manuals
Save this manual to your list of manuals |
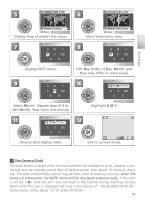
Page 16 highlights
First Steps First Steps Inserting the Batteries The camera uses two AA batteries. Depending on the country or region of purchase, the package will include either alkaline batteries or an MH-71 battery charger with rechargeable EN-MH1-B2 batteries. 1 Charge the batteries (EN-MH1-B2 batteries only) If the camera came with a battery charger and rechargeable Nikon EN-MH1-B2 NiMH batteries, charge the batteries as described below. If the camera came with a pair of alkaline batteries, skip to Step 2 on the following page. 1.1 Plug the charger in Connect the power cable to the charger (ቢ) and then plug it into a power outlet (ባ). The CHARGE lamp will light (ቤ). 1.2 Charge the batteries Insert the batteries as indicated on the charger. The CHARGE lamp will start to blink. Charging is complete when the lamp stops blinking. A pair of new or fully exhausted batteries will charge in about two and a half hours. Batteries Read and follow the warnings and cautions on pages ii-iii and 84 of this manual. The camera can be used with AA alkaline (LR6) batteries, Nikon rechargeable EN-MH1-B2 NiMH batteries, ZR6 oxy-nickel batteries, and FR6/L91 lithium batteries. Do not mix old and new batteries or batteries of different makes or types. Batteries with the following defects can not be used: Peeling or damaged insulation Insulation does not reach negative terminal Flat negative terminal EN-MH1-B2 Batteries Charge EN-MH1-B2 batteries before first use. Charge and use as a set: do not charge batteries one at a time or mix batteries from different pairs. Note that the batteries may tend to discharge more quickly when new or after a long period of disuse. The batteries will retain a charge longer once they have been used and recharged several times. "Memory" effects that result in reduced battery capacity can be avoided by periodically refreshing the batteries as described in the Appendix ( 93). 6
-
 1
1 -
2
-
3
-
4
-
5
-
6
-
7
-
8
-
9
-
10
-
 11
11 -
 12
12 -
 13
13 -
 14
14 -
 15
15 -
 16
16 -
 17
17 -
 18
18 -
 19
19 -
 20
20 -
 21
21 -
22
-
23
-
24
-
25
-
26
-
27
-
28
-
29
-
30
-
31
-
32
-
33
-
34
-
35
-
36
-
37
-
38
-
39
-
40
-
41
-
42
-
43
-
44
-
45
-
46
-
47
-
48
-
49
-
50
-
51
-
52
-
53
-
54
-
55
-
56
-
57
-
58
-
59
-
60
-
61
-
62
-
63
-
64
-
65
-
66
-
67
-
68
-
69
-
70
-
71
-
72
-
73
-
74
-
75
-
76
-
77
-
78
-
79
-
80
-
81
-
82
-
83
-
84
-
85
-
86
-
87
-
88
-
89
-
90
-
91
-
92
-
93
-
94
-
95
-
96
-
97
-
98
-
99
-
100
-
101
-
102
-
103
-
104
-
105
-
106
-
107
-
108
 |
 |
