Nokia 002F4W8 N79 User Guide - Page 52
GPS data, Route guidance, Retrieve position information
 |
UPC - 758478013861
View all Nokia 002F4W8 manuals
Add to My Manuals
Save this manual to your list of manuals |
Page 52 highlights
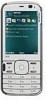
Positioning (GPS) You can sort your landmarks into preset categories, and create new categories. To edit and create new landmark categories, open the categories tab, and select Options > Edit categories. Route guidance uses a rotating compass on the device display. A red ball shows the direction to the destination, and the approximate distance to it is shown inside the compass ring. Route guidance is designed to show the straightest GPS data Press , and select Tools > Connectivity > GPS route and the shortest distance to the destination, measured in a straight line. Any obstacles on the route, such as buildings and natural obstacles, are ignored. data. Differences in altitude are not taken into account when The coordinates in the GPS are expressed in degrees and decimal degrees format using the international calculating the distance. Route guidance is active only when you move. WGS-84 coordinate system. To set your trip destination, select Options > Set To use GPS data, the GPS receiver of your device must destination and a landmark as the destination, or initially receive position information from at least four enter the latitude and longitude coordinates. satellites to calculate the coordinates of your location. When the initial calculation has been made, it may be possible to continue calculating the coordinates of To clear the destination set for your trip, select Stop navigation. your location with three satellites. However, the accuracy is generally better when more satellites are found. Retrieve position information Press , and select Tools > Connectivity > GPS data > Position. Route guidance In the position view, you can view the position Press and select Tools > Connectivity > Navigation. Start the route guidance outdoors. If started indoors, the GPS receiver may not receive the necessary information from the satellites. 52 information of your current location. An estimate of the accuracy of the location is displayed. To save your current location as a landmark, select Options > Save position. Landmarks are saved locations with more information, and they can be used in other compatible applications and transferred between compatible devices.
-
 1
1 -
2
-
3
-
4
-
5
-
6
-
7
-
8
-
9
-
10
-
11
-
12
-
13
-
14
-
15
-
16
-
17
-
18
-
19
-
20
-
21
-
22
-
23
-
24
-
25
-
26
-
27
-
28
-
29
-
30
-
31
-
32
-
33
-
34
-
35
-
36
-
37
-
38
-
39
-
40
-
41
-
42
-
43
-
44
-
45
-
46
-
 47
47 -
 48
48 -
 49
49 -
 50
50 -
 51
51 -
 52
52 -
 53
53 -
 54
54 -
 55
55 -
 56
56 -
 57
57 -
58
-
59
-
60
-
61
-
62
-
63
-
64
-
65
-
66
-
67
-
68
-
69
-
70
-
71
-
72
-
73
-
74
-
75
-
76
-
77
-
78
-
79
-
80
-
81
-
82
-
83
-
84
-
85
-
86
-
87
-
88
-
89
-
90
-
91
-
92
-
93
-
94
-
95
-
96
-
97
-
98
-
99
-
100
-
101
-
102
-
103
-
104
-
105
-
106
-
107
-
108
-
109
-
110
-
111
-
112
-
113
-
114
-
115
-
116
-
117
-
118
-
119
-
120
-
121
-
122
-
123
-
124
-
125
-
126
-
127
-
128
-
129
-
130
-
131
-
132
-
133
-
134
-
135
-
136
-
137
-
138
-
139
-
140
-
141
-
142
-
143
-
144
-
145
-
146
-
147
-
148
-
149
-
150
-
151
-
152
-
153
-
154
-
155
-
156
-
157
-
158
-
159
-
160
-
161
-
162
-
163
-
164
-
165
-
166
-
167
-
168
-
169
-
170
-
171
-
172
-
173
-
174
-
175
-
176
-
177
-
178
-
179
-
180
-
181
-
182
-
183
 |
 |
