Nokia 2652 User Guide
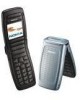
Nokia 2652 - Cell Phone - GSM Manual
 |
View all Nokia 2652 manuals
Add to My Manuals
Save this manual to your list of manuals |
Nokia 2652 manual content summary:
- Nokia 2652 | User Guide - Page 1
User Guide for Nokia 2652 phone 9243402 Issue 1 - Nokia 2652 | User Guide - Page 2
declare under our sole responsibility that the product RH-53 is in conformity with the provisions of the following Council Directive: 1999/5/EC. A copy of the Declaration of Conformity can be found from http://www.nokia.com/phones/declaration_of_conformity/. The crossed-out wheeled bin means that - Nokia 2652 | User Guide - Page 3
the right to make changes and improvements to any of the products described in this document without prior notice. Under no circumstances shall Nokia be responsible for any loss of data or income or any special, incidental, consequential or indirect damages howsoever caused. The contents of this - Nokia 2652 | User Guide - Page 4
9 General information 14 Sticker in the sales package ...14 Access codes ...14 Light alerts...15 Downloading content and applications 15 GPRS...16 Nokia support and contact information 16 1. Getting started 18 Keys ...18 Inserting a SIM card ...19 Inserting a battery...21 Putting on the wrist - Nokia 2652 | User Guide - Page 5
calls ...49 Call counters and call timers...50 Contacts (Menu 3) ...50 Alternative ways to access the functions in this menu 50 Selecting the settings for contacts 51 Saving names and phone numbers 51 Adding an image to a saved name or number 53 Copyright © 2005 Nokia. All rights reserved. 5 - Nokia 2652 | User Guide - Page 6
a name in the contacts 53 Deleting contacts...54 Editing a name, number or text item 54 Copying contacts...54 Other functions related to the contacts list 55 Speed dials...55 Business cards ...56 Settings (Menu 4)...56 Profiles ...57 Tone settings ...58 Adding new tones to your phone 59 Display - Nokia 2652 | User Guide - Page 7
the pages of a service ...83 Using the phone keys while browsing 83 Options while browsing ...83 Disconnecting from a browser service 84 Bookmarks...84 Receiving a bookmark ...85 Service inbox ...85 Emptying the cache memory ...86 Browser security...86 Copyright © 2005 Nokia. All rights reserved - Nokia 2652 | User Guide - Page 8
Security module ...86 Certificates ...87 Go to (Menu 10) ...88 SIM services (Menu 11) ...88 6. Battery information 89 Charging and discharging ...89 Nokia battery authentication guidelines 90 Care and maintenance 93 Additional safety information 95 Copyright © 2005 Nokia. All rights reserved. - Nokia 2652 | User Guide - Page 9
user guide for further information. SWITCH ON SAFELY Do not switch the phone on when wireless phone use is phone at a refueling point. Do not use near fuel or chemicals. SWITCH OFF NEAR BLASTING Follow any restrictions. Do not use the phone where blasting is in progress. Copyright © 2005 Nokia - Nokia 2652 | User Guide - Page 10
guide for detailed safety instructions. Do not connect incompatible products. EMERGENCY CALLS Ensure the phone is switched on and in service. guide is approved for use on the EGSM 900 and GSM 1800 networks. Contact your service provider for more information about networks. Copyright © 2005 Nokia - Nokia 2652 | User Guide - Page 11
instructions for their use and explain what charges will apply. Some networks may have limitations that affect how you can use network services. For instance, some networks may not support all language-dependent characters and services. Your service provider may have requested that certain features - Nokia 2652 | User Guide - Page 12
and Javatm games and applications. Use of one or more of these features may reduce the memory available for the remaining features sharing memory. For example, saving many images may use all of the available memory. Your device may display a message that the memory is full when you try to use a - Nokia 2652 | User Guide - Page 13
battery indicator bar starts scrolling. When the battery is fully charged, the bar stops scrolling. 3. Disconnect the charger from the phone and the AC outlet. A few practical rules about accessories must be made by qualified personnel only. Copyright © 2005 Nokia. All rights reserved. 13 - Nokia 2652 | User Guide - Page 14
the sales package The sticker contains important information for service and customer- support purposes. Keep this sticker in a safe place. Attach the sticker to your warranty card. ■ Access codes • Security code: This code, which is supplied with your phone, protects your phone against unauthorised - Nokia 2652 | User Guide - Page 15
Change the security code, PIN code, and PIN2 code in Access codes in the Security settings menu. Keep the new codes secret and in a safe place separate from your phone. • PUK and PUK2 codes: These codes may be supplied with the SIM card. If this is not the case, contact your service provider. • - Nokia 2652 | User Guide - Page 16
: Only install and use applications and other software from sources that offer adequate security and protection against harmful software. ■ GPRS GPRS (General Packet Radio Service) is a network service that allows mobile phones to be used for sending and receiving data over an Internet Protocol (IP - Nokia 2652 | User Guide - Page 17
get information on the use of Nokia products and services. If you need to contact customer service, check the list of local Nokia contact centers at www.nokia.com/customerservice. For maintenance services, check your nearest Nokia service center location at www.nokia.com/repair. Copyright © 2005 - Nokia 2652 | User Guide - Page 18
option. 5. Right selection key option. The right selection key can be Contacts or the function selected in the Right selection key setting in the Personal shortcuts menu, or it may be a name or logo specific to a network operator. 6. Selection keys and , each key performs the function displayed - Nokia 2652 | User Guide - Page 19
various purposes in different functions. ■ Inserting a SIM card Keep all SIM cards out of the reach of small children. For availability and information on using SIM card services, contact your SIM card vendor. This may be the service provider, network operator, or other vendor. Copyright © 2005 - Nokia 2652 | User Guide - Page 20
and bending it down (1). Insert the SIM card into the phone with the bevelled corner facing right (2). Push the SIM card in and close the SIM cover (3). Note that if you remove your SIM card while using the phone, Insert SIM card appears on the display. Reinsert your SIM card and enter your PIN to - Nokia 2652 | User Guide - Page 21
switch the device off and disconnect the charger before removing the battery. Release the catch (1). Remove the back cover (2). Insert the battery (3). Replace the back cover (4). ■ Putting on the wrist strap Connect the wrist strap as indicated. Copyright © 2005 Nokia. All rights reserved. 21 - Nokia 2652 | User Guide - Page 22
If the phone asks for a PIN code or security code, key in the code and press OK. • If the phone displays Insert SIM card even though the SIM card is properly inserted, or SIM card not supported, contact your network operator or service provider. Your phone does not support 5-Volt SIM cards and the - Nokia 2652 | User Guide - Page 23
that you have called or attempted to call, press once in standby mode, scroll to the phone number or name you want, and press . Calling your voice mailbox To call your voice mailbox (network service) in standby mode, press and hold , or press and . Copyright © 2005 Nokia. All rights reserved. 23 - Nokia 2652 | User Guide - Page 24
: Mute or Unmute, End call, End all calls, Contacts, Menu, Hold or Unhold, New call (network service), Conference (network service), Private call (network service), Answer, Reject, Swap (network service), Send DTMF, Lock keypad, Transfer (network service), Headset, Auto volume on or Auto volume off - Nokia 2652 | User Guide - Page 25
accessory is connected to the phone. To make another call during a call (network service), press Options and select New call. Key in the phone number, or search for it in the contacts, and press Call or . a call divert option such as Divert if busy. Copyright © 2005 Nokia. All rights reserved. 25 - Nokia 2652 | User Guide - Page 26
have activated the Call waiting function in the Call settings menu (network service). To answer the waiting call, press Answer or . The unlock the keypad, press Unlock and quickly. When the keypad is locked, you can answer a call by pressing . During a call, the phone Nokia. All rights reserved. 26 - Nokia 2652 | User Guide - Page 27
1. Key in the word that you want by pressing each key once for one letter. The word changes after each keystroke. For example, to write 'Nokia' when the English dictionary is selected, press , , , , . 2. If the displayed word is the one that you want, press next word. and start writing the • If - Nokia 2652 | User Guide - Page 28
new letter. • Predictive: To add a compound word, key in the first half of the word, press , and then key in the second half. Copyright © 2005 Nokia. All rights reserved. 28 - Nokia 2652 | User Guide - Page 29
help text. To view the help text, scroll to the desired menu function and wait for about 15 seconds. For information on switching the Help text activation function on or off, see the Phone settings menu on page shown at the top right of the display. Copyright © 2005 Nokia. All rights reserved. 29 - Nokia 2652 | User Guide - Page 30
Press Menu in standby mode. Within two seconds, key in the shortcut number of the main menu that you want to open. Repeat this for the submenu and setting option. Copyright © 2005 Nokia. All rights reserved. 30 - Nokia 2652 | User Guide - Page 31
Info service 2. Topics 3. Language 4. Info topics saved on SIM card1 5. Read2 5. Message settings 1. Text messages 2. Multimedia msgs. 3. Other settings 6. Service Shown only if info message topics can be saved to the SIM card. 2. Shown only if info messages have been received. Copyright © 2005 - Nokia 2652 | User Guide - Page 32
Wallpaper 2. Colour schemes 3. Operator logo 4. Screen saver timeout 5. Display brightness 6. Menu view 5. Time and date settings 1. Clock 1. Shown if supported by your SIM card. For availability, contact your network operator or service provider. Copyright © 2005 Nokia. All rights reserved. 32 - Nokia 2652 | User Guide - Page 33
Connectivity 1. GPRS connection 8. Phone settings 1. Phone language 2. Memory status 3. Automatic keyguard 4. Cell info display 5. Welcome note 6. Operator selection 7. Help text activation 8. Start-up tone 10.Enhancement settings1 11. Security settings 1. PIN code request 2. Call barring service - Nokia 2652 | User Guide - Page 34
1. Games 2. Collection 8. Extras 1. Calculator 2. Stopwatch 3. Countdown timer 9. Services 1. Home 2. Bookmarks 3. Download links 4. Service inbox 5. Settings 6. Go to address 7. Clear the cache 10. Go to 11. SIM services1 1. Only shown if supported by your SIM card. The name and contents vary - Nokia 2652 | User Guide - Page 35
send multi-part messages, which may include pictures, consisting of several ordinary text messages (Network Service). Invoicing may be based upon the number of ordinary messages that are needed for any text input may use special characters. Copyright © 2005 Nokia. All rights reserved. 35 - Nokia 2652 | User Guide - Page 36
supported by your network operator or service provider. Only compatible devices that offer picture message features insert a picture, or a phone number or name from the contacts list into the message, press Options and select: • Insert picture. Scroll to the desired picture, press View and Insert - Nokia 2652 | User Guide - Page 37
supports the sending of text messages beyond the character limit for a single message. Longer messages are sent as a series of two or more messages. Your service provider may charge and send e-mail messages (network service). To save an e-mail address in the phone book, see Saving multiple numbers - Nokia 2652 | User Guide - Page 38
information on deleting messages, see Deleting messages on page 45. 1. Press Show to view the new message immediately. To view the messages later, press Exit. When you want to read the messages, press Menu , select Send, and press OK. OR: Press twice. Copyright © 2005 Nokia. All rights reserved. 38 - Nokia 2652 | User Guide - Page 39
fixed group of people, you can define a distribution list for that purpose in the phone's memory. The phone sends the message separately to each recipient on the list. Therefore, sending a message and select Add list. Enter the name for the list. Copyright © 2005 Nokia. All rights reserved. 39 - Nokia 2652 | User Guide - Page 40
select View list. Press Add (if there are no lists) or press Options and select Add contact. Select a contact from the phone's or SIM card's contact memory (MMS) The phone can send and receive multimedia messages of up to 100 kilobytes (network service). Copyright © 2005 Nokia. All rights reserved. - Nokia 2652 | User Guide - Page 41
. If Allow multimedia reception is set to Yes or In home network, your operator or service provider may charge you for every message you receive. Note that multimedia messages cannot be received during a call, while using a game or another Java application or when you have an active browsing session - Nokia 2652 | User Guide - Page 42
• To insert an image, press Options and select Insert. Open a specific folder in the Gallery menu, scroll to the desired image or sound, press Options and select Insert. • Your phone supports multimedia messages that contain several pages. To add a new slide to the message, press Options and select - Nokia 2652 | User Guide - Page 43
If the transmission is interrupted, the phone tries to re-send the message a few times. If the transmission fails, the message remains in the Outbox folder where you can try to re-send it later. The wireless network may limit the size of MMS messages. If the inserted picture exceeds this limit, the - Nokia 2652 | User Guide - Page 44
or PC. When the phone is receiving a multimedia message View text to view the text part of the message. • Open image to view the image included in the message. Press Options to zoom in or out on the image, save it in the Gallery menu, set its contrast or view its details. Copyright © 2005 Nokia - Nokia 2652 | User Guide - Page 45
. Info messages This network service allows you to receive messages on various topics from your service provider. Press Menu in standby mode, and select Messages and Info messages. For available topics and the relevant topic numbers, contact your service provider. Copyright © 2005 Nokia. All rights - Nokia 2652 | User Guide - Page 46
mail server and it allows you to save the phone number of the e-mail server. • Delivery reports to request the network to send delivery reports on your messages (network service). • Use GPRS and Yes to set the phone to send text messages over a GPRS connection, if this is possible. Also, you can set - Nokia 2652 | User Guide - Page 47
. Select Allowed to set the phone to replace the old text messages network to send delivery reports on your messages (network service). • Scale image down to select whether images are scaled to a smaller size when inserted network (In home network). Copyright © 2005 Nokia. All rights reserved. 47 - Nokia 2652 | User Guide - Page 48
set the phone to automatically also Keying in the service settings manually on page 81. For proper settings, contact your network operator or service provider. • Allow settings and Font size. Service commands You can send service requests to your service provider (network service). To access this - Nokia 2652 | User Guide - Page 49
network supports these functions and the phone is switched on and within the network's service area. • If you press Options in the Missed calls, Received calls or Dialled numbers menu, you can, for example, view the date and time of the call, call the registered phone number, save it in the contacts - Nokia 2652 | User Guide - Page 50
data that has been sent and received during the GPRS connections. • GPRS connection timer to view the approximate duration of GPRS connections. ■ Contacts (Menu 3) You can save names and phone numbers (contacts) in the phone's memory and in the SIM card's memory. To access this menu: Press Menu in - Nokia 2652 | User Guide - Page 51
Phone and SIM. In this case, the names and numbers will be saved in the phone's memory. • Contacts view to select how the names, numbers and images are displayed in the contacts list. For example, select Name and image to view the names with the attached images. • Memory status to view how much free - Nokia 2652 | User Guide - Page 52
select a name from the contacts list, for example to make a call, the default number is used unless you select another number. 1. Make sure that the selected memory is Phone or Phone and SIM. 2. Press or in then Exit to return to standby mode. Copyright © 2005 Nokia. All rights reserved. 52 - Nokia 2652 | User Guide - Page 53
the first letter(s) of the desired name, if you want. 3. Scroll to the desired name, and press Details. If the name is saved on the SIM card, is shown at the top of the display. 4. Scroll through the phone numbers and text items added to the name. Copyright © 2005 Nokia. All rights reserved. 53 - Nokia 2652 | User Guide - Page 54
detail to edit a text item. Copying contacts You can copy names and phone numbers from the phone to the SIM card and vice versa. Text items or images saved in the phone will not be copied to the SIM card. Press Menu in standby mode and select Contacts and Copy. Select the copying direction. Select - Nokia 2652 | User Guide - Page 55
provider if they are available on your SIM card (network service). • My numbers to view the phone numbers assigned to your SIM card if this is allowed by the card. • Caller groups to arrange the names and phone numbers saved in the Contacts menu into caller groups. For each group, you can select - Nokia 2652 | User Guide - Page 56
Via multimedia. (network service). When you receive a business card, press Show and Save to save the business card in the phone's memory. To discard the business card, press Exit and OK. ■ Settings (Menu 4) In this menu, you can change various phone settings. You can also reset some menu settings - Nokia 2652 | User Guide - Page 57
has several setting groups, 'profiles', for which you can customise the phone tones for different events and environments. To access this menu: Press Menu in standby mode and select active. If the profile is timed, is shown in front of its name. Copyright © 2005 Nokia. All rights reserved. 57 - Nokia 2652 | User Guide - Page 58
work when the phone is connected to a charger. • Message alert tone to select the tone that you hear when you receive a message. To select the tone from the ringing tone list, select Ringing tone and the desired tone. • Keypad tones to select the volume for keypad tones. Copyright © 2005 Nokia. All - Nokia 2652 | User Guide - Page 59
service, contact your network operator or service provider. The tones are saved in the Gallery menu. Display settings To access this menu: Press Menu in standby mode, and select Settings and Display settings. Select • Wallpaper to set the phone to show a background image, 'wallpaper', when the phone - Nokia 2652 | User Guide - Page 60
is dimmed. For availability of operator logos, contact your network operator or service provider. • Screen saver timeout to set the time after which the screen saver feature is activated. The screen saver is a power saving feature which becomes active if the phone is not used for a certain length - Nokia 2652 | User Guide - Page 61
again. • Auto-update of date & time to set the phone to automatically update the time and date according to the current time zone (network service). Automatic update of date and time does not change the time the function for the right selection key. Copyright © 2005 Nokia. All rights reserved. 61 - Nokia 2652 | User Guide - Page 62
GPRS network is available in your location. If you select When needed, the phone registers and connects to the GPRS network only if you use a function that needs the GPRS service. In this case, establishing the connection may take longer than when Always online is selected. Copyright © 2005 Nokia - Nokia 2652 | User Guide - Page 63
GPRS service, the phone connects to the GPRS network, is shown and data transfer is possible. If you receive a call or a text message, or make a call, during a GPRS or to another phone number (network service). Divert options that are not supported by your SIM card or your network operator may not - Nokia 2652 | User Guide - Page 64
duration of the last call. • Send my caller ID to show (Yes) your phone number to the person you are calling or to hide it (No). If you select Set by network, the setting agreed upon with your service provider is used. This is a network service. Copyright © 2005 Nokia. All rights reserved. 64 - Nokia 2652 | User Guide - Page 65
to select the language for the display texts. If you select Automatic, the phone selects the language according to the information on the SIM card. • Memory status to view the total amount of free and used shared memory and the amount of memory used by different functions. • Automatic keyguard - Nokia 2652 | User Guide - Page 66
with your home operator's network. If No network access is displayed, select another network. The phone stays in manual mode until automatic mode is selected or another SIM card is inserted into the phone. • Help text activation to set the phone to show help texts that guide you in using the menu - Nokia 2652 | User Guide - Page 67
calls that can be made or received with the phone (network service). • Fixed dialling to restrict calls and text messages from your phone to selected phone numbers, if allowed by your SIM card (network service). When the fixed dialling option is on, GPRS connections can only be used for sending text - Nokia 2652 | User Guide - Page 68
Phone, the phone asks for the security code when a new SIM card is inserted into the phone. If you select Memory, the security code is requested when the memory in use is SIM card and you want to change the memory to Phone or Phone and SIM or when you want to copy names and numbers from one contacts - Nokia 2652 | User Guide - Page 69
download images and tones (network service). A list of bookmarks is shown. Select More bookmarks if you want to view the bookmarks available in the Services menu. Select the bookmark of the browser page that you want to access. Follow the instructions provided by the service. Copyright © 2005 Nokia - Nokia 2652 | User Guide - Page 70
and select Insert. Move the inserted image with the scroll keys and press OK. To save the modified image in GIF format, press Options, select Save, edit the image's name, press OK and select the desired folder. • Details to view, for example, the size of the file. Copyright © 2005 Nokia. All rights - Nokia 2652 | User Guide - Page 71
of the file can be updated. Copyright protections may prevent some images, music (including ringing tones), and other content from being copied, . ■ Organiser (Menu 6) In this menu, you can use the phone's built-in alarm clock and calendar. To access this menu: Press Nokia. All rights reserved. 71 - Nokia 2652 | User Guide - Page 72
If you let the phone alarm for a minute select Yes when wireless phone use may cause interference Organiser and Calendar. The month view is shown. You can . Using the different calendar views • Month view: This view shows the weeks of a bold. To view the notes set for a day ('day view'), scroll - Nokia 2652 | User Guide - Page 73
the phone to delete old notes automatically after a certain length of time. • Day view: This view shows . Press Options and select View to open the selected note ('note view'). Pressing Options also allows repeated. • Note view: This view shows the note that you opened in the day view. You can press - Nokia 2652 | User Guide - Page 74
you can use and manage the Java games and applications installed in the phone. To access this menu: Press Menu in standby mode and select Applications. The phone supports Java 2 Micro Edition (J2METM) which is a version of Java technology specifically designed for small consumer electronics products - Nokia 2652 | User Guide - Page 75
want to access. Follow the instructions provided by the service. When downloading a game, it may be saved in the Collection menu instead of the Games menu. Collection In this menu, you can use and manage the Java applications installed in the phone. Copyright © 2005 Nokia. All rights reserved. 75 - Nokia 2652 | User Guide - Page 76
of the page. • Web access to restrict the application from accessing the network. Select Ask first to set the phone to ask for access, Allowed to allow the access, or Not allowed not to allow the access. • Connect via to set the phone to use specific service settings if the application needs them - Nokia 2652 | User Guide - Page 77
page you want to access. Follow the instructions provided by the service. • Press Menu in standby mode and select Services to access a browser page from which you can download the Java application that you want. • Use the Game downloads function in the Games menu. Important: Only install and use - Nokia 2652 | User Guide - Page 78
Making a calculation 1. Use to to insert a digit. Press for a decimal point. 2. Press once to add, twice to stopped, you can press Options for Start, Save, or Reset. If you select Start, timing continues from the previous stop time. Reset stops the current timing and sets the time to zero. Copyright © - Nokia 2652 | User Guide - Page 79
using other features increases the Services. Check the availability, pricing and tariffs of these browser services with your network operator and/or the service provider. They will also give you instructions on how to use their services. With your phone's multi-mode browser you can view services - Nokia 2652 | User Guide - Page 80
phone for a browser service You may receive the service settings as an Over The Air (OTA) message from the network operator or service provider that offers the service you want to use. You can also key in the settings manually. For more information and the appropriate settings, contact your network - Nokia 2652 | User Guide - Page 81
line if it cannot be shown on one line. • Font size to select the size for text shown on browser pages. • Show images to show or hide the images on browser pages. Cookie settings You can set the phone to allow or prevent the receipt of cookies. Copyright © 2005 Nokia. All rights reserved. 81 - Nokia 2652 | User Guide - Page 82
saves in the cache memory of your phone. Cookies are deleted if you clear the cache memory, see page 86. 1. While browsing, press Options and select Other options, Security and Cookie settings. Or in the Services menu, select Settings, Security settings and Cookies. 2. Select Allow or Reject. Making - Nokia 2652 | User Guide - Page 83
browsing its pages. The functions of the phone keys may vary in different services. Follow the text guides on the display. If GPRS is selected as the data bearer, see GPRS connection on page 62 for the GPRS indicators shown during the connection. Using the phone keys while browsing • Use the scroll - Nokia 2652 | User Guide - Page 84
image, Use detail (to copy, for example, a phone number from the page), Go to address, Service inbox (see page 85), Appear. settings (see page 81), Security (for security or services you phone's memory: 1. While browsing, press Options and select Bookmarks, or select Bookmarks in the Services - Nokia 2652 | User Guide - Page 85
as an OTA message, press Exit. Service inbox The phone is able to receive service messages ('pushed messages') from your service provider (network service). To set the phone to receive service messages: In the Services menu, select Settings, Service inbox settings, Service messages, and On. To set - Nokia 2652 | User Guide - Page 86
security Security features may be required for some services, such as banking services. For such connections you need security certificates and possibly a security module which may be available on your SIM card. For more information, contact your service provider. Security module The security - Nokia 2652 | User Guide - Page 87
• Module PIN request and On to set the phone to ask for the module PIN when using services provided by the security module. • Change module PIN to change the module PIN, if allowed by the security module. Certificates The phone supports three kinds of certificates: server certificates, authority - Nokia 2652 | User Guide - Page 88
Menu in standby mode and select Go to. To remove functions from or add more functions to the list, see Personal shortcuts on page 61. ■ SIM services (Menu 11) For more information, contact your service provider. Copyright © 2005 Nokia. All rights reserved. 88 - Nokia 2652 | User Guide - Page 89
. The battery can be charged and discharged hundreds of times, but it will eventually wear out. When the talk and standby times are noticeably shorter than normal, replace the battery. Use only Nokia approved batteries, and recharge your battery only with Nokia approved chargers designated for this - Nokia 2652 | User Guide - Page 90
cold battery may not work temporarily, even when the battery is fully charged. Battery performance is particularly limited in temperatures well below freezing. Do not it to the nearest authorized Nokia service point or dealer for assistance. Your authorized Nokia service point or dealer will inspect - Nokia 2652 | User Guide - Page 91
one angle and the Nokia Original Enhancements logo when looking from another angle. 2. When you angle the hologram left, right, down, and up, you should see 1, 2, 3, and 4 dots on each side respectively. 3. Scratch the side of the label to reveal a 20-digit code, for example, 12345678919876543210 - Nokia 2652 | User Guide - Page 92
4. Confirm that the 20-digit code is valid by following the instructions at www.nokia.com/batterycheck. To create a text message enter the 20-digit code, for example, 12345678919876543210, and send to +44 7786 200276. National and international operator charges will apply. You should receive a - Nokia 2652 | User Guide - Page 93
circuit boards. • Do not attempt to open the device other than as instructed in this guide. • Do not drop, knock, or shake the device. Rough handling want to keep, such as contacts and calendar notes, before sending your device to a service facility. Copyright © 2005 Nokia. All rights reserved. 93 - Nokia 2652 | User Guide - Page 94
All of the above suggestions apply equally to your device, battery, charger, or any enhancement. If any device is not working properly, take it to the nearest authorized service facility for service. Copyright © 2005 Nokia. All rights reserved. 94 - Nokia 2652 | User Guide - Page 95
or messages, this device requires a quality connection to the network. In some cases, transmission of data files or messages may be delayed until such a connection is available. Ensure that the above separation distance instructions are followed until the transmission is completed. Parts of the - Nokia 2652 | User Guide - Page 96
instruct you to do so. Hospitals or health care facilities may be using equipment that could be sensitive to external RF energy. Pacemakers Pacemaker manufacturers recommend that a minimum separation of 15.3 centimeters (6 inches) be maintained between a wireless phone consult your service provider. - Nokia 2652 | User Guide - Page 97
the aircraft, disrupt the wireless telephone network, and may be illegal. ■ Potentially , and obey all signs and instructions. Potentially explosive atmospheres include areas such as near gas pumps at service stations. Observe restrictions on the use of radio equipment Nokia. All rights reserved. 97 - Nokia 2652 | User Guide - Page 98
. Some networks may require that a valid SIM card is properly inserted in the features are in use, you may first need to turn those features off before you can make an emergency call. Consult this guide or your service SAR) THIS MOBILE DEVICE MEETS GUIDELINES FOR EXPOSURE TO RADIO WAVES Your mobile - Nokia 2652 | User Guide - Page 99
The exposure guidelines for mobile devices employ a unit of measurement known as the Specific Absorption Rate or SAR. The SAR limit stated in the ICNIRP guidelines is 2.0 watts/ kilogram (W/kg) averaged over 10 grams of tissue. Tests for SAR are conducted using standard operating positions with the
-
 1
1 -
 2
2 -
 3
3 -
 4
4 -
 5
5 -
 6
6 -
 7
7 -
8
-
9
-
10
-
11
-
12
-
13
-
14
-
15
-
16
-
17
-
18
-
19
-
20
-
21
-
22
-
23
-
24
-
25
-
26
-
27
-
28
-
29
-
30
-
31
-
32
-
33
-
34
-
35
-
36
-
37
-
38
-
39
-
40
-
41
-
42
-
43
-
44
-
45
-
46
-
47
-
48
-
49
-
50
-
51
-
52
-
53
-
54
-
55
-
56
-
57
-
58
-
59
-
60
-
61
-
62
-
63
-
64
-
65
-
66
-
67
-
68
-
69
-
70
-
71
-
72
-
73
-
74
-
75
-
76
-
77
-
78
-
79
-
80
-
81
-
82
-
83
-
84
-
85
-
86
-
87
-
88
-
89
-
90
-
91
-
92
-
93
-
94
-
95
-
96
-
97
-
98
-
99
 |
 |
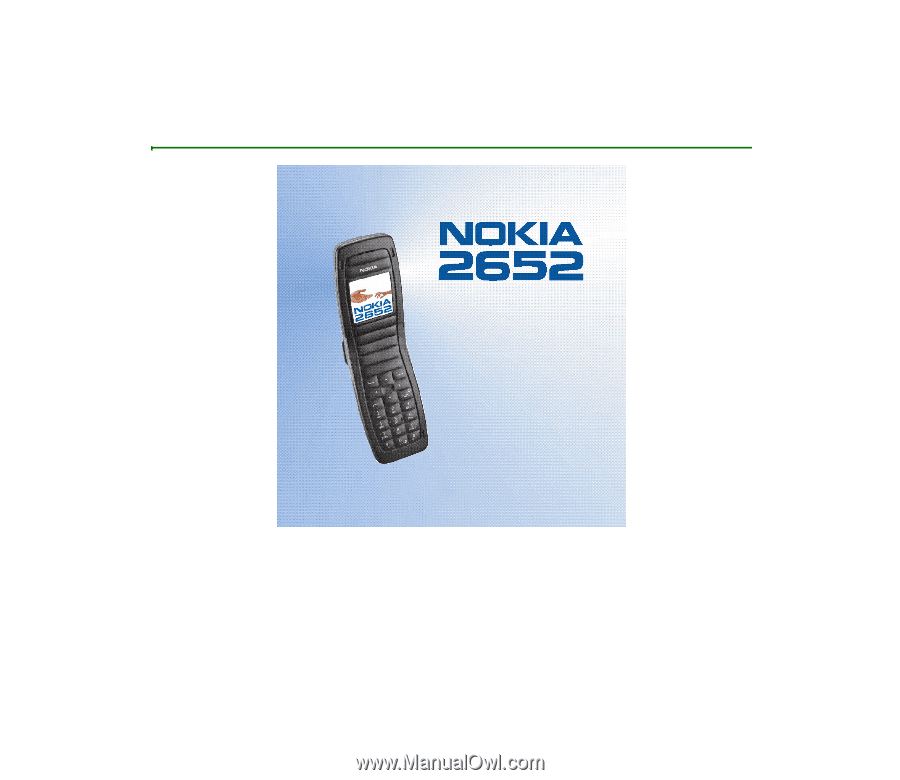
User Guide for Nokia 2652 phone
9243402
Issue 1