Nokia 7610 User Guide - Page 51
Settings needed for multimedia messaging, Settings needed for e-mail, Options, Messaging
 |
View all Nokia 7610 manuals
Add to My Manuals
Save this manual to your list of manuals |
Page 51 highlights
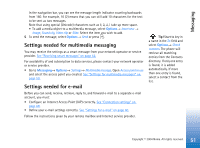
Messaging In the navigation bar, you can see the message length indicator counting backwards from 160. For example, 10 (2) means that you can still add 10 characters for the text to be sent as two messages. Note that using special (Unicode) characters such as take up more space. • To add a media object to a multimedia message, select Options→ Insert new → Image, Sound clip, Video clip or Slide. Select the item you wish to add. 5 To send the message, select Options→ Send or press . Settings needed for multimedia messaging You may receive the settings as a smart message from your network operator or service provider. See "Receiving smart messages" on page 52. For availability of and subscription to data services, please contact your network operator or service provider. • Go to Messaging→ Options→ Settings→ Multimedia message. Open Access point in use and select the access point you created. See "Settings for multimedia messages" on page 59. Settings needed for e-mail Before you can send, receive, retrieve, reply to, and forward e-mail to a separate e-mail account, you must: • Configure an Internet Access Point (IAP) correctly. See "Connection settings" on page 68. • Define your e-mail settings correctly. See "Settings for e-mail" on page 60. Follow the instructions given by your remote mailbox and Internet service provider. Tip! Start to key in a name in the To: field and select Options→ Check contacts. The phone will retrieve all matching entries from the Contacts directory. If only one entry is found, it is added automatically. If more than one entry is found, select a contact from the list. 51 Copyright © 2004 Nokia. All rights reserved.
-
 1
1 -
2
-
3
-
4
-
5
-
6
-
7
-
8
-
9
-
10
-
11
-
12
-
13
-
14
-
15
-
16
-
17
-
18
-
19
-
20
-
21
-
22
-
23
-
24
-
25
-
26
-
27
-
28
-
29
-
30
-
31
-
32
-
33
-
34
-
35
-
36
-
37
-
38
-
39
-
40
-
41
-
42
-
43
-
44
-
45
-
 46
46 -
 47
47 -
 48
48 -
 49
49 -
 50
50 -
 51
51 -
 52
52 -
 53
53 -
 54
54 -
 55
55 -
 56
56 -
57
-
58
-
59
-
60
-
61
-
62
-
63
-
64
-
65
-
66
-
67
-
68
-
69
-
70
-
71
-
72
-
73
-
74
-
75
-
76
-
77
-
78
-
79
-
80
-
81
-
82
-
83
-
84
-
85
-
86
-
87
-
88
-
89
-
90
-
91
-
92
-
93
-
94
-
95
-
96
-
97
-
98
-
99
-
100
-
101
-
102
-
103
-
104
-
105
-
106
-
107
-
108
-
109
-
110
-
111
-
112
-
113
-
114
-
115
-
116
-
117
-
118
-
119
-
120
-
121
-
122
-
123
-
124
-
125
-
126
-
127
-
128
-
129
-
130
-
131
 |
 |