Nokia Lumia 830 User Guide - Page 71
Record a video, Save your photos and videos to a memory card
 |
View all Nokia Lumia 830 manuals
Add to My Manuals
Save this manual to your list of manuals |
Page 71 highlights
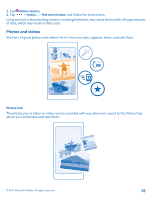
To download Lumia Selfie, go to www.windowsphone.com/s?appid=40b6a721-15d2-4843a746-774bd7b9bda9. 1. Tap Lumia Selfie. 2. To take a selfie, tap the screen. Tip: To take a high-quality selfie using the main camera, look into the main camera lens, follow the beeps to line up the shot, and hold still as the camera takes your photo. If your phone has 2 cameras, tap to switch to the main camera. Tip: To avoid camera shake, tap > timer, and select a delay. 3. To reframe the selfie, slide your fingers apart or together, and tap . 4. To enhance your selfie, tap . 5. To apply a filter to your selfie, tap . Tip: To remove all enhancements and filters from the selfie, tap > clear all effects. 6. To save your selfie, tap . Record a video Besides taking photos with your phone, you can also capture your special moments as videos. 1. Tap Nokia Camera. 2. To switch from photo to video mode, tap . 3. To zoom in, swipe up, and to zoom out, swipe down. 4. To start recording, tap . The timer starts to run. 5. To stop recording, tap . The timer stops. To view the video you just recorded, tap . The video is saved in Photos. Save your photos and videos to a memory card If there is a memory card in your phone, and your phone memory is filling up, save the photos you take and videos you record to the memory card. For the best video quality, record videos to your phone memory. If you record videos to the memory card, it is recommended that the microSD card you use is a fast 4-128GB card by a well-known manufacturer. 1. On the start screen, swipe down from the top of the screen, tap ALL SETTINGS, and swipe to storage sense. 2. Switch Store new photos on my to SD card. Use only compatible memory cards approved for use with this device. Incompatible cards may damage the card and the device and corrupt data stored on the card. Save location info to your photos and videos If you want to remember exactly where you were when you took a particular photo or video, you can set your phone to automatically record the location. 1. On the start screen, swipe down from the top of the screen, and tap ALL SETTINGS. 2. Swipe to applications, and tap photos+camera > Use location info. © 2014 Microsoft Mobile. All rights reserved. 71
-
 1
1 -
2
-
3
-
4
-
5
-
6
-
7
-
8
-
9
-
10
-
11
-
12
-
13
-
14
-
15
-
16
-
17
-
18
-
19
-
20
-
21
-
22
-
23
-
24
-
25
-
26
-
27
-
28
-
29
-
30
-
31
-
32
-
33
-
34
-
35
-
36
-
37
-
38
-
39
-
40
-
41
-
42
-
43
-
44
-
45
-
46
-
47
-
48
-
49
-
50
-
51
-
52
-
53
-
54
-
55
-
56
-
57
-
58
-
59
-
60
-
61
-
62
-
63
-
64
-
65
-
 66
66 -
 67
67 -
 68
68 -
 69
69 -
 70
70 -
 71
71 -
 72
72 -
 73
73 -
 74
74 -
 75
75 -
 76
76 -
77
-
78
-
79
-
80
-
81
-
82
-
83
-
84
-
85
-
86
-
87
-
88
-
89
-
90
-
91
-
92
-
93
-
94
-
95
-
96
-
97
-
98
-
99
-
100
-
101
-
102
-
103
-
104
-
105
-
106
-
107
-
108
-
109
-
110
-
111
-
112
-
113
-
114
-
115
-
116
-
117
-
118
 |
 |
