Nokia N82 Nokia N82 User Guide in English - Page 29
Active toolbar, Camera - white
 |
UPC - 758478012468
View all Nokia N82 manuals
Add to My Manuals
Save this manual to your list of manuals |
Page 29 highlights
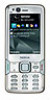
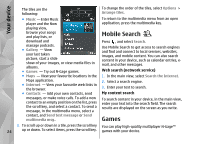
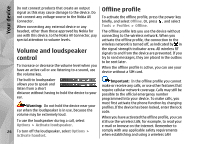
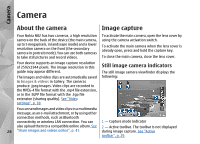
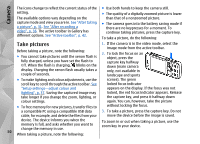
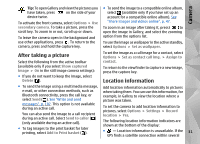
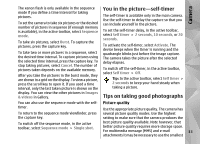
Camera 3 - Battery charge level indicator 4 - Image resolution indicator, which indicates the quality of the image. The quality of a digitally zoomed picture is lower than that of an unzoomed picture. 5 - Image counter, which displays the estimated number of images you can capture using the current image quality setting and memory in use. The counter is not displayed during image capture. 6 - The device memory ( ) and memory card ( ) indicators, which show where images are saved. 7 - Xenon flash indicator, which is shown blinking only when the xenon flash is charging. To view the active toolbar before and after taking a picture or recording a video, select Options > Show icons. To view the active toolbar only when you need it, select Options > Hide icons. Only the capture mode and battery level indicators are shown on the display. To activate the active toolbar, press the scroll key. The toolbar is visible for 5 seconds. Before taking a picture or recording a video, in the active toolbar, select from the following: to switch between the video and image modes to select the scene to select the flash mode (images only) 8 - GPS indicator, which is only shown when Record location is activated in the camera settings. See "Location information", p. 31. to activate the self-timer (images only). See "You in the picture-self-timer", p. 33. to activate the sequence mode (images only). Active toolbar The active toolbar provides you with shortcuts to different items and settings before and after taking a picture or recording a video. Scroll to items, and See "Take pictures in a sequence", p. 32. to select a colour effect to show or hide the viewfinder grid (images only) select them by pressing the scroll key. You can also to adjust white balance define when the active toolbar is visible on the display. to adjust the exposure compensation (images only) The settings in the active toolbar return to the to adjust sharpness (images only) default settings after you close the camera. to adjust contrast (images only) 29 to adjust light sensitivity (images only)
-
 1
1 -
2
-
3
-
4
-
5
-
6
-
7
-
8
-
9
-
10
-
11
-
12
-
13
-
14
-
15
-
16
-
17
-
18
-
19
-
20
-
21
-
22
-
23
-
 24
24 -
 25
25 -
 26
26 -
 27
27 -
 28
28 -
 29
29 -
 30
30 -
 31
31 -
 32
32 -
 33
33 -
 34
34 -
35
-
36
-
37
-
38
-
39
-
40
-
41
-
42
-
43
-
44
-
45
-
46
-
47
-
48
-
49
-
50
-
51
-
52
-
53
-
54
-
55
-
56
-
57
-
58
-
59
-
60
-
61
-
62
-
63
-
64
-
65
-
66
-
67
-
68
-
69
-
70
-
71
-
72
-
73
-
74
-
75
-
76
-
77
-
78
-
79
-
80
-
81
-
82
-
83
-
84
-
85
-
86
-
87
-
88
-
89
-
90
-
91
-
92
-
93
-
94
-
95
-
96
-
97
-
98
-
99
-
100
-
101
-
102
-
103
-
104
-
105
-
106
-
107
-
108
-
109
-
110
-
111
-
112
-
113
-
114
-
115
-
116
-
117
-
118
-
119
-
120
-
121
-
122
-
123
-
124
-
125
-
126
-
127
-
128
-
129
-
130
-
131
-
132
-
133
-
134
-
135
-
136
-
137
-
138
-
139
-
140
-
141
-
142
-
143
-
144
-
145
-
146
-
147
-
148
-
149
-
150
-
151
-
152
-
153
-
154
-
155
-
156
-
157
-
158
-
159
-
160
-
161
-
162
-
163
-
164
-
165
-
166
-
167
-
168
-
169
-
170
-
171
 |
 |