NordicTrack 1600 Treadmill English Manual - Page 10
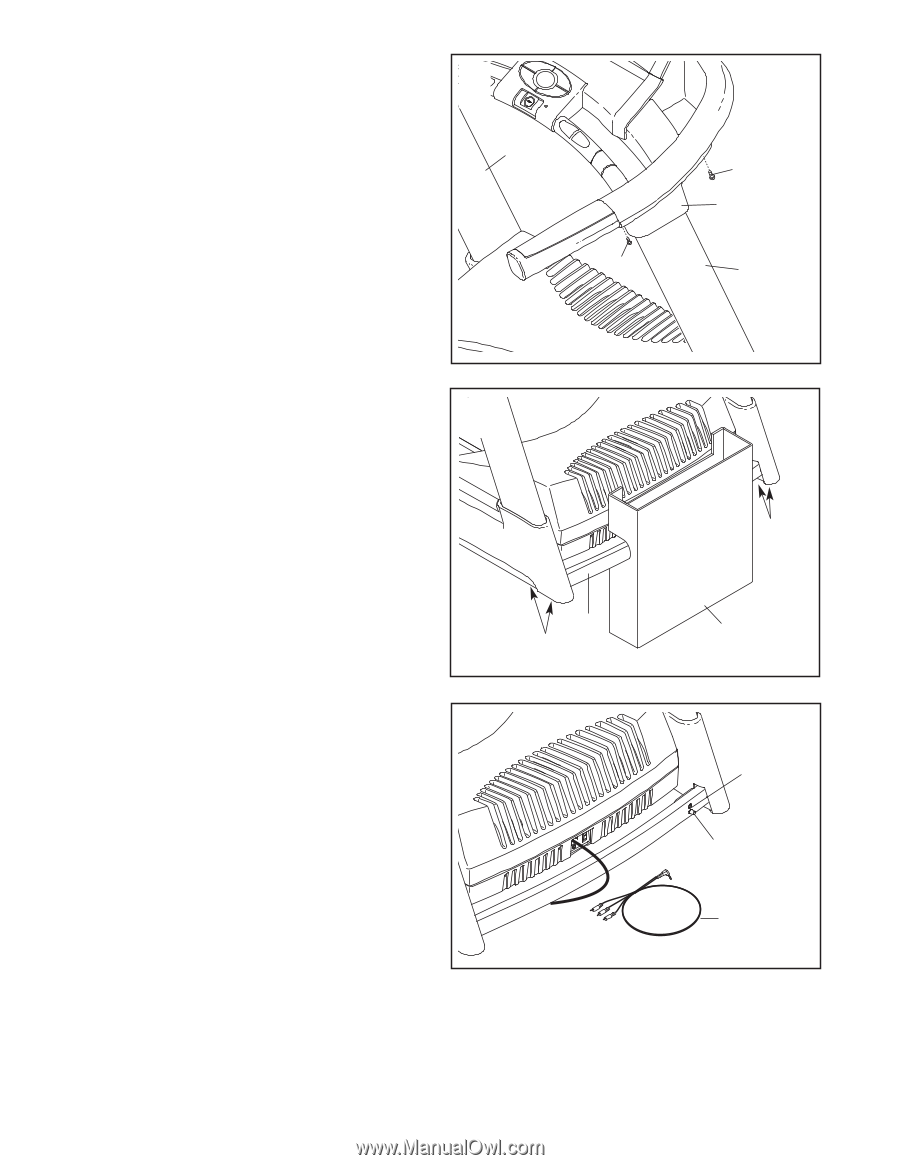
Slide the Right Upright Sleeve 96 up against
 |
View all NordicTrack 1600 Treadmill manuals
Add to My Manuals
Save this manual to your list of manuals |
Page 10 highlights
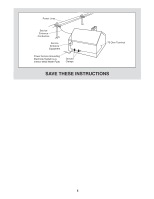
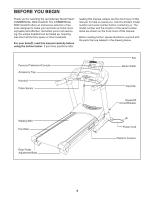
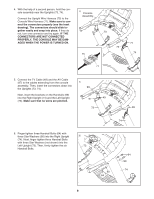
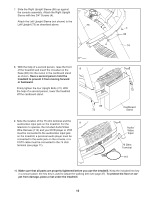
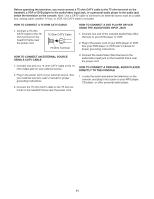
7. Slide the Right Upright Sleeve (96) up against the console assembly. Attach the Right Upright Sleeve with two 3/4" Screws (4). Attach the Left Upright Sleeve (not shown) to the Left Upright (73) as described above. 7 73 4 4 96 74 8. With the help of a second person, raise the front of the treadmill and insert the crossbar on the 8 Base (83) into the cutout in the cardboard stand as shown. Have a second person hold the treadmill to prevent it from moving forward or backward. Firmly tighten the four Upright Bolts (72). With the help of a second person, lower the treadmill off the cardboard stand. 9. Note the location of the 75 ohm terminal and the audio/video input jack on the treadmill. For the 9 television to operate, the included Audio/Video Wire Harness (115) and your DVD player or VCR must be connected to the audio/video input jack on the treadmill, a personal audio player must be connected to the audio jack on the console, or a CATV cable must be connected to the 75 ohm terminal (see page 11). 83 72 72 Cardboard Stand Audio/ Video Input 75 Ohm Terminal 115 10. Make sure that all parts are properly tightened before you use the treadmill. Keep the included hex key in a secure place; the hex key is used to adjust the walking belt (see page 27). To protect the floor or carpet from damage, place a mat under the treadmill. 10
-
 1
1 -
2
-
3
-
4
-
 5
5 -
 6
6 -
 7
7 -
 8
8 -
 9
9 -
 10
10 -
 11
11 -
 12
12 -
 13
13 -
 14
14 -
 15
15 -
16
-
17
-
18
-
19
-
20
-
21
-
22
-
23
-
24
-
25
-
26
-
27
-
28
-
29
-
30
-
31
-
32
-
33
-
34
 |
 |