NordicTrack Audiorider U300 Bike Canadian English Manual - Page 7
Console to the Upper Wire Harness 51. Next, con
 |
View all NordicTrack Audiorider U300 Bike manuals
Add to My Manuals
Save this manual to your list of manuals |
Page 7 highlights
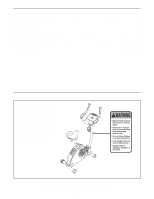
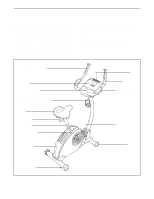
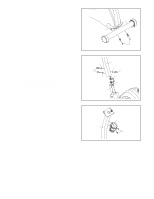
5. The Console (9) requires four 1.5V "D" batteries (not included); alkaline batteries are recommended. IMPORTANT: If the exercise cycle has been exposed to cold temperatures, allow it to warm to room temperature before inserting batteries into the Console. If you do not do this, the console displays or other electronic components may become damaged. Press the tabs on the battery covers and remove the battery covers. Next, insert four batteries into the Console; make sure that the batteries are oriented as shown by the diagrams inside the Console. Then, reattach the battery covers. Note: The Console (9) can be operated with an optional power supply instead of batteries. To purchase a power supply, call the toll-free telephone number on the front cover of this manual. Plug one end of the power supply into the jack at the front of the exercise cycle. Plug the other end of the power supply into an appropriate outlet that is properly installed in accordance with all local codes and ordinances. 6. Attach the Handlebar (7) to the Handlebar Post (6) with four M6 x 30mm Button Screws (46). Be careful to avoid pinching the wires in the Handlebar and the Handlebar Post. 5 Batteries 6 6 Battery Covers Batteries 9 46 7 7. While another person holds the Console (9) near the Handlebar (7), connect the wire harness on the Console to the Upper Wire Harness (51). Next, connect the pulse wire on the Console to the Pulse Grip Wire (10). Note: The remaining wire on the Console is used during the manufacturing process; disregard this wire. Insert the excess wiring downward into the Handlebar Post (6). Attach the Console (9) to the Handlebar (7) with four M4 x 16mm Screws (54). Be careful to avoid pinching the wires. 7 7 9 Pulse Wire 10 54 Wire Harness 51 6 7
-
 1
1 -
 2
2 -
 3
3 -
 4
4 -
 5
5 -
 6
6 -
 7
7 -
 8
8 -
 9
9 -
 10
10 -
 11
11 -
 12
12 -
13
-
14
-
15
-
16
-
17
-
18
-
19
-
20
 |
 |
