Oki B6100 Guide: Installation (B6100)
Oki B6100 Manual
 |
View all Oki B6100 manuals
Add to My Manuals
Save this manual to your list of manuals |
Oki B6100 manual content summary:
- Oki B6100 | Guide: Installation (B6100) - Page 1
Oki B6100 Installation Guide Oct 02 - Oki B6100 | Guide: Installation (B6100) - Page 2
on this publication to: Mailing Address Oki Data Americas Training and Publications Department 2000 Bishops Gate Boulevard Mount Laurel, NJ 08054-4620 e-Mail Address [email protected] Web Site Please visit Oki Data's multilingual web site at: http://www.okidata.com Trademark Information The following - Oki B6100 | Guide: Installation (B6100) - Page 3
Contents Chapter 1 Preface I-v About the Printer I-vi Available Configuration I-vi Features I-vi About this Guide I-vii Printer Orientation I-vii Conventions I-vii Installation Guide Contents I-vii Installation Procedure 1-1 Safety Precautions 1-2 Step 1: Inspecting Package Contents 1-3 Step 2: - Oki B6100 | Guide: Installation (B6100) - Page 4
2-6 Menu Structure 2-8 Chapter 3 Troubleshooting 3-1 Power On Problems 3-2 Warning Messages and Error Messages 3-3 Appendix A Customer Support and Part Numbers A-1 Oki Data on the Internet A-2 Service and Support A-3 Service Centers A-4 Oki Data Contact Locations A-5 Oki Part Numbers A-6 Oct 02 - Oki B6100 | Guide: Installation (B6100) - Page 5
Preface In this Chapter . . . ■ "Welcome" on page vi ■ "About the Printer" on page vi ■ "About this Guide" on page vii Oct 02 - Oki B6100 | Guide: Installation (B6100) - Page 6
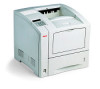
Thank you for selecting the Oki B6100. This Guide provides information and procedures to help you set up and install your printer. Please read this guide and keep it at hand for later reference. About the Printer Available Configuration Oki B6100 Printer The printer is available in the following - Oki B6100 | Guide: Installation (B6100) - Page 7
Oki B6100 Installation Guide vii About this Guide ■ Network-readiness An Ethernet Network Interface Card is available as an option. About this Guide Printer Orientation Throughout this guide, the four sides of the printer are referred to as front, rear, right, and left. The front of the printer is - Oki B6100 | Guide: Installation (B6100) - Page 8
viii Oki B6100 Installation Guide About this Guide Chapter 3: Troubleshooting Chapter 3 lists the error messages that may appear on the control panel display while you are setting up and installing the printer, and also explains the possible causes of such errors and the procedures for correcting - Oki B6100 | Guide: Installation (B6100) - Page 9
" on page 1-19 ■ "Step 9: Printing a Test Page or Configuration Summary" on page 1-20 ■ "Step 10: Connecting the Printer to Host Computer" on page 1-22 ■ "Step 11: Installing Printer Drivers" on page 1-23 ■ "Step 12: Locating User Documentation" on page 1-40 ■ "Step 13: Printing a Test Document" on - Oki B6100 | Guide: Installation (B6100) - Page 10
2 Oki B6100 Installation Guide Safety Precautions About this Chapter This chapter guides you through the process of setting up and installing the printer. Complete the entire installation procedure to ensure a proper installation. Safety Precautions This printer is available in either of the - Oki B6100 | Guide: Installation (B6100) - Page 11
Oki B6100 Installation Guide 3 Step 1: Inspecting Package Contents Step 1: Inspecting Package Contents NOTE: If you have not unpacked your printer, please refer to the pictorial unpacking instructions included in the printer packaging. If you have completed the entire procedure shown on the - Oki B6100 | Guide: Installation (B6100) - Page 12
4 Oki B6100 Installation Guide Step 2: Preparing a Location for the Printer Step 2: Preparing a Location for the Printer Printer Weight and Dimensions This printer weighs approximately 51 lbs (23 kg) and should always be lifted by two people. The dimensions of the printer are listed below. ■ Printer - Oki B6100 | Guide: Installation (B6100) - Page 13
Oki B6100 Installation Guide 5 Step 2: Preparing a Location for the Printer Environment Use the following guidelines to determine the best location for the printer: Horizontal, sturdy, and stable surface Location with good ventilation Location with stable temperature and humidity Exposed to - Oki B6100 | Guide: Installation (B6100) - Page 14
6 Oki B6100 Installation Guide Step 3: Locating Parts of the Printer Step 3: Locating Parts of the Printer The following figures indicate the names and functions of the main parts of the printer Figure 1-3: Front of the Printer. 1. Paper Exit Slot 2. Paper Output Tray 1 2 3 3. Control Panel 4 - Oki B6100 | Guide: Installation (B6100) - Page 15
Cartridge Integrated cartridge contains the toner and the photosensitive drum. 15. Front Cover Provides access to the interior of the printer. Allows you to replace the print cartridge or remove jammed paper. Oki B6100 Installation Guide 7 Step 3: Locating Parts of the Printer 14 15 CAUTION: The - Oki B6100 | Guide: Installation (B6100) - Page 16
8 Oki B6100 Installation Guide Step 4: Installing the Print Cartridge Step 4: Installing the Print Cartridge General Information The print cartridge contains the dry ink as well as the xerographic drum - Oki B6100 | Guide: Installation (B6100) - Page 17
Oki B6100 Installation Guide 9 Step 4: Installing the Print Cartridge Installation Procedure Use the following procedure to replace the print cartridge: 1. Press the button on the top of the printer to open the front cover, and pull the cover all the way open. 2. Remove the orange plastic shipping - Oki B6100 | Guide: Installation (B6100) - Page 18
10 Oki B6100 Installation Guide Step 4: Installing the Print Cartridge 4. Rock the print cartridge back and forth. Then, shake it horizontally to ensure that the toner is evenly distributed. 5. On level surface, firmly hold down the print cartridge. Pull the plastic sealing tape straight out ( - Oki B6100 | Guide: Installation (B6100) - Page 19
Oki B6100 Installation Guide 11 Step 4: Installing the Print Cartridge 7. Close the front cover. Verify that it securely locks into place.. Oct 02 - Oki B6100 | Guide: Installation (B6100) - Page 20
12 Oki B6100 Installation Guide Step 5: Installing Optional Printer Accessories Step 5: Installing Optional Printer Accessories The following figure shows all of the available accessories as installed on the printer. NOTE: The printer automatically recognizes an option after the option is - Oki B6100 | Guide: Installation (B6100) - Page 21
Oki B6100 Installation Guide 13 Step 6: Loading the Universal Paper Tray Step 6: Loading the Universal Paper Tray The 550-sheet universal paper tray that sits inside the printer can accommodate paper sizes from postcard to legal. The 550-sheet universal paper tray has two width guides that are - Oki B6100 | Guide: Installation (B6100) - Page 22
14 Oki B6100 Installation Guide Step 6: Loading the Universal Paper Tray 3. If the paper you are using is longer than A4 (11.7 inches tray out to extend it. This is known as the extended position. 4. Squeeze the right-side width guide, lift it up, and slide the guides to the sides of the tray. Oct 02 - Oki B6100 | Guide: Installation (B6100) - Page 23
Oki B6100 Installation Guide release the plate, or push the paper tray completely into the printer and then remove it. CAUTION: Do not overload the tray. : To avoid paper jams and other paper transportation problems, make sure the length and width guides are adjusted to match the paper size and are - Oki B6100 | Guide: Installation (B6100) - Page 24
16 Oki B6100 Installation Guide Step 6: Loading the Universal Paper Tray 7. Squeeze the right width guide, lift it up, and adjust the guides to match the paper width. 8. Squeeze the length guide, lift it up, and adjust the guide to match the paper length. Verify that the length guide is firmly - Oki B6100 | Guide: Installation (B6100) - Page 25
Oki B6100 Installation Guide 17 Step 6: Loading the Universal Paper Tray 10. Push the paper tray completely into the printer. Verify that the tray is properly seated. 11. Use the paper level indicator on the front right of the printer to determine when the paper supply is low. Oct 02 - Oki B6100 | Guide: Installation (B6100) - Page 26
18 Oki B6100 Installation Guide Step 7: Connecting the Power Cord and Turning the Printer On Step 7: Connecting the Power Cord and Turning the Printer On Use the following procedure to connect the power cord and turn the printer on. 1. Insert the power cord into the AC connector on the rear of the - Oki B6100 | Guide: Installation (B6100) - Page 27
Oki B6100 Installation Guide 19 Step 8: Selecting the Control Panel Language Step 8: Selecting the Control Panel Language English is the default language for all control panel error and status - Oki B6100 | Guide: Installation (B6100) - Page 28
20 Oki B6100 Installation Guide Step 9: Printing a Test Page or Configuration Summary Step 9: Printing a Test Page or Configuration Summary Test Page Printing a test page verifies that the printer is operating correctly. Use the following procedure to print a test page. 1. Press the MENU button on - Oki B6100 | Guide: Installation (B6100) - Page 29
Oki B6100 Installation Guide 21 Step 9: Printing a Test Page or Configuration Summary Configuration Summary A configuration summary lists the current printer settings. Use the following procedure to print a configuration summary. 1. Press the MENU button on the control panel. 2. Press the NEXT - Oki B6100 | Guide: Installation (B6100) - Page 30
22 Oki B6100 Installation Guide Step 10: Connecting the Printer to Host Computer Step 10: Connecting the Printer to Host Computer You must connect the printer to your computer using an IEEE 1284 parallel cable or a USB cable. These cables are user-supplied. The printer does not include either of - Oki B6100 | Guide: Installation (B6100) - Page 31
Oki B6100 Installation Guide 23 Step 11: Installing Printer Drivers Step 11: Installing Printer Drivers Overview The installation procedure(s) you will use for your printer vary according to: • Operating System • Usage of the USB port • Network connection Oct 02 - Oki B6100 | Guide: Installation (B6100) - Page 32
24 Oki B6100 Installation Guide Step 11: Installing Printer Drivers Windows 98 and Me (Parallel) 1. Unpack your printer and complete the hardware setup procedures. 2. Turn on your computer. 3. Turn on the printer. Verify that paper is installed. 4. Insert the CD-ROM provided with your printer. 5. - Oki B6100 | Guide: Installation (B6100) - Page 33
Oki B6100 Installation Guide 25 Step 11: Installing Printer Drivers Windows 98 and Me (Parallel) 23. Files are copied. 24. Select the desired printer port from the list. 25. Click Next. 26. You are prompted to select or add a name for this printer. Your Windows-based programs will use the printer - Oki B6100 | Guide: Installation (B6100) - Page 34
26 Oki B6100 Installation Guide Step 11: Installing Printer Drivers Windows XP (Parallel) 1. Unpack your printer and complete the hardware setup procedures. 2. Turn on your computer. 3. Turn on the printer. Verify that paper is installed. 4. Insert the CD-ROM provided with your printer. 5. Click - Oki B6100 | Guide: Installation (B6100) - Page 35
Oki B6100 Installation Guide 27 Step 11: Installing Printer Drivers Windows XP (Parallel) 26. Files are copied. 27. Select the desired printer port from the list. 28. Click Next. 29. You are prompted to select or add a name for this printer. Your Windows-based programs will use the printer named in - Oki B6100 | Guide: Installation (B6100) - Page 36
28 Oki B6100 Installation Guide Step 11: Installing Printer Drivers Windows 2000 (Parallel) 1. Unpack your printer and complete the hardware setup procedures. 2. Turn on your computer. 3. Turn on the printer. Verify that paper is installed. 4. Insert the CD-ROM provided with your printer. 5. Click - Oki B6100 | Guide: Installation (B6100) - Page 37
Oki B6100 Installation Guide 29 Step 11: Installing Printer Drivers Windows 2000 (Parallel) 20. Files are copied. 21. Select the desired printer port from the list. 22. Click Next. 23. You are prompted to select or add a name for this printer. Your Windows-based programs will use the printer named - Oki B6100 | Guide: Installation (B6100) - Page 38
30 Oki B6100 Installation Guide Step 11: Installing Printer Drivers Windows NT (Parallel) 1. Unpack your printer and complete the hardware setup procedures. 2. Turn on your computer. 3. Turn on the printer. Verify that paper is installed. 4. Insert the CD-ROM provided with your printer. 5. Click - Oki B6100 | Guide: Installation (B6100) - Page 39
Oki B6100 Installation Guide 31 Step 11: Installing Printer Drivers Windows NT (Parallel) 24. Files are copied. 25. Select the desired printer port from the list. 26. Click Next. 27. You are prompted to select or add a name for this printer. Your Windows-based programs will use the printer named in - Oki B6100 | Guide: Installation (B6100) - Page 40
Oki B6100 Installation Guide Step 11: Installing Printer Drivers Windows 98 and Me (USB) Before you use your USB port in Windows 98 or Windows Me, you must complete four steps: Step 1: Setup the Hardware Step 2: Connect to the USB Port. Step 3: Install the USB port driver Step 4: Install the printer - Oki B6100 | Guide: Installation (B6100) - Page 41
33. You may be prompted to insert your Windows CD here. If you are, follow the instructions. 34. The files are copied. Click Finish. 35. On-line documents are provided on the CD-ROM. NOTE: Oki Data drivers may be revised. Updated drivers are available from Oki Data's web site, my.okidata.com. Oct 02 - Oki B6100 | Guide: Installation (B6100) - Page 42
34 Oki B6100 Installation Guide Step 11: Installing Printer Drivers Windows 2000 (USB) Before you use your USB port in Windows 2000, you must complete three steps: Step 1: Setup the Hardware Step 2: Connect to the USB Port. Step 3: Install the printer driver(s) Step 1: Setup the Hardware 1. Unpack - Oki B6100 | Guide: Installation (B6100) - Page 43
B6100 Installation Guide 35 Step 11: Installing Printer Drivers Windows 2000 (USB) 23. You may see a warning message next. If you do, select Yes. 24. Files are copied. 25. To exit, click Finish. 26. On-line documents are provided on the CD-ROM. NOTE: Oki Data drivers may be revised. Updated drivers - Oki B6100 | Guide: Installation (B6100) - Page 44
36 Oki B6100 Installation Guide Step 11: Installing Printer Drivers Windows XP (USB) Before you use your USB port in Windows XP, you must complete three steps: Step 1: Setup the Hardware Step 2: Connect to the USB Port. Step 3: Install the printer driver(s) Step 1: Setup the Hardware 1. Unpack your - Oki B6100 | Guide: Installation (B6100) - Page 45
Oki B6100 Installation Guide 37 Step 11: Installing Printer Drivers Windows XP (USB) 21. Click Next. 22. You may see a warning message next. If you do, select Continue Anyway. 23. Click Finish. 24. On-line documents are provided on the CD-ROM. NOTE: Oki Data drivers may be revised. Updated drivers - Oki B6100 | Guide: Installation (B6100) - Page 46
38 Oki B6100 Installation Guide Step 11: Installing Printer Drivers Network Printer Installation Installing a printer on a network is best handled by someone familiar with networks (such as a Network Administrator)! You MUST install your printer as a Local Printer before you perform any network - Oki B6100 | Guide: Installation (B6100) - Page 47
Oki B6100 Installation Guide 39 Step 11: Installing Printer Drivers MacOS 1. Unpack your printer and complete the hardware setup procedures. 2. Turn on your computer. 3. Turn on the printer. Verify that paper is installed. 4. Insert the CD-ROM provided with your printer. 5. Double-click the CD icon. - Oki B6100 | Guide: Installation (B6100) - Page 48
40 Oki B6100 Installation Guide Step 12: Locating User Documentation Step 12: Locating User Documentation To locate other documentation that will assist you in operating and maintaining your printer, go to the MANUALS folder on the CD-ROM. You can open and read these manuals directly from the CD-ROM - Oki B6100 | Guide: Installation (B6100) - Page 49
Oki B6100 Installation Guide 41 Step 15: Product Registration Step 15: Product Registration my.okidata.com Your Personal Solutions Center Register your printer and create your own personalized support center with my.okidata.com. My.okidata.com is a powerful area of our web site designed to help you - Oki B6100 | Guide: Installation (B6100) - Page 50
Oki B6100 Installation Guide Step 15: Product Registration Service and Support If you need further assistance or have questions ■ See our web site: http://my.okidata.com ■ In the U.S. and Canada, call: 1-800-OKI-DATA (1-800-654-3282) 24 hours a day, 7 days a week. ■ In Latin America, call: Oki Data - Oki B6100 | Guide: Installation (B6100) - Page 51
Chapter 2 Understanding and Navigating the Control Panel Menus In this Chapter . . . ■ "About this Chapter" on page 2-2 ■ "Control Panel Features" on page 2-3 ■ "Navigating the Control Panel Menus" on page 2-6 ■ "Menu Structure" on page 2-8 Oct 02 - Oki B6100 | Guide: Installation (B6100) - Page 52
2 Oki B6100 Installation Guide About this Chapter This chapter explains the control panel and its functions, and also demonstrates how to navigate throughout the various menus and submenus that allow you to view and change the printer settings. NOTE: Settings in your software application will - Oki B6100 | Guide: Installation (B6100) - Page 53
Oki B6100 Installation Guide 3 Control Panel Features Control Panel Features The control panel is located on the front of the printer. It contains the display, indicators, and pushbuttons that allow you to view and change the printer settings. NOTE: Settings in your software application will - Oki B6100 | Guide: Installation (B6100) - Page 54
4 Oki B6100 Installation Guide Control Panel Features LED Indicators The LED indicators also indicate printer status. The four indicators can each be on, off, or blinking, indicating different phases of printer operation. The table below explains the LED indicators. LED Color Green When Off - Oki B6100 | Guide: Installation (B6100) - Page 55
Oki B6100 Installation Guide 5 Control Panel Features Pushbuttons The control panel pushbuttons allow you to access and navigate menus, and also assist you in recovering from printer errors. The table below explains the functions of the eight pushbuttons. Pushbutton Function START/STOP-Push this - Oki B6100 | Guide: Installation (B6100) - Page 56
6 Oki B6100 Installation Guide Navigating the Control Panel Menus Navigating the Control Panel Menus NOTE: Settings in your software application will override any settings in your printer driver. Your printer driver settings will override any settings from the printer menu or printer front panel. - Oki B6100 | Guide: Installation (B6100) - Page 57
Oki B6100 Installation Guide 7 Navigating the Control Panel Menus The following figure shows the NOTE: Settings in your software application will override any settings in your printer driver. Your printer driver settings will override any settings from the printer menu or printer front panel. Oct 02 - Oki B6100 | Guide: Installation (B6100) - Page 58
Oki B6100 Installation Guide Menu Structure Menu Structure NOTE: Settings in your software application will override any settings in your printer driver. Your printer driver settings will override any settings from the printer menu or printer PS Menu Print PS Errors Manual Feed TO PCL Menu - Oki B6100 | Guide: Installation (B6100) - Page 59
Chapter 3 Troubleshooting In this Chapter . . . ■ "Power On Problems" on page 3-2 ■ "Warning Messages and Error Messages" on page 3-3 Oct 02 - Oki B6100 | Guide: Installation (B6100) - Page 60
2 Oki B6100 Installation Guide Power On Problems About this Chapter This chapter provides procedures to identify and solve problems that may occur while you are setting up and installing the printer. Power On Problems If you have problems turning on the printer, check the possible causes listed in - Oki B6100 | Guide: Installation (B6100) - Page 61
Oki B6100 Installation Guide 3 Warning Messages and Error Messages Warning Messages and Error Messages The control panel display shows both warning message and error messages. Warning messages use only the second line of the display and indicate conditions that do not prevent the printer from - Oki B6100 | Guide: Installation (B6100) - Page 62
4 Oki B6100 Installation Guide Warning Messages and Error Messages Warning Messages The following table There is no paper in Tray 3. The output tray is full. The offset output tray is full. The toner is low. Maintenance is required. Action Add paper to the tray. Add paper to the tray. Add paper - Oki B6100 | Guide: Installation (B6100) - Page 63
Oki B6100 Installation Guide TONER CART. Install/Reset The print cartridge is not installed, or an incorrect cartridge is installed. TRAY 1 MISSING Insert Tray Tray 1 is not in the printer /Press The paper size is not Start supported by the printer. OUTPUT TRAY FULL Remove Paper OFFSET TRAY - Oki B6100 | Guide: Installation (B6100) - Page 64
6 Oki B6100 Installation Guide Warning Messages and Error Messages Error Message Line 1 U2 ROS FAILURE U4 FUSER FAILURE ENV UNIT FAILURE Error Message Line 2 Call Service Call Service Chk Feeder OFFSET TRAY FAIL Call Service OPTION TRAY FAIL Call Service DUPLEX FAILURE Call Service MAIN MOTOR - Oki B6100 | Guide: Installation (B6100) - Page 65
Appendix A Customer Support and Part Numbers In this Chapter . . . ■ "About this Chapter" on page A-2 ■ "Oki Data on the Internet" on page A-2 ■ "Service and Support" on page A-3 ■ "Service Centers" on page A-4 ■ "Oki Data Contact Locations" on page A-5 ■ "Oki Part Numbers" on page A-6 Oct 02 - Oki B6100 | Guide: Installation (B6100) - Page 66
and Services www.okidata.com is Oki Data's web site. It provides general information about all of the OKI products and services available to you. You can use our web site to ■ get Web-based support for all OKI products: 24 hours a day, 7 days a week-no waiting! ■ download the printer drivers you - Oki B6100 | Guide: Installation (B6100) - Page 67
B6100 Installation Guide A-3 Service and Support Service and Support United States and Canada Oki Data is firmly committed to the satisfaction of our customers. If you have a problem that your customer documentation cannot solve, contact the listed sources for service or support. Sales and Service - Oki B6100 | Guide: Installation (B6100) - Page 68
B6100 Installation Guide Service Centers Service Centers Authorized Service Providers Oki Data has over 2,000 local Authorized Service Providers in North and South America. For the most comprehensive, up-to-date listing of Oki Data authorized Service Centers: • Consult our web site at www.okidata - Oki B6100 | Guide: Installation (B6100) - Page 69
5263-8785 Brazil Oki Data do Brasil, Ltda. Rua Alexandre Dumas, 2220 - 80 andar Chacara Santo Antonio 04717-004 São Paulo, SP Brazil Phone: (5511) 3444-3500 Fax: (5511) 3444-3501 Support Center: 0800-11-55-77 e-mail: [email protected] Oki B6100 Installation Guide A-5 Oki Data Contact Locations - Oki B6100 | Guide: Installation (B6100) - Page 70
A-6 Oki B6100 Installation Guide Oki Part Numbers Oki Part Numbers The following tables list Oki part numbers for the Oki B6100 printer, options, and consumables. Printers Oki Part Number 62419101 62419102 Description 110V B6100 Laser Printer (North America) 220V B6100 Laser Printer (Europe)
-
 1
1 -
 2
2 -
 3
3 -
 4
4 -
 5
5 -
 6
6 -
 7
7 -
8
-
9
-
10
-
11
-
12
-
13
-
14
-
15
-
16
-
17
-
18
-
19
-
20
-
21
-
22
-
23
-
24
-
25
-
26
-
27
-
28
-
29
-
30
-
31
-
32
-
33
-
34
-
35
-
36
-
37
-
38
-
39
-
40
-
41
-
42
-
43
-
44
-
45
-
46
-
47
-
48
-
49
-
50
-
51
-
52
-
53
-
54
-
55
-
56
-
57
-
58
-
59
-
60
-
61
-
62
-
63
-
64
-
65
-
66
-
67
-
68
-
69
-
70
 |
 |

Oct 02
Oki B6100 Installation
Guide