Oki B6100 Guide: Installation (B6100) - Page 44
Windows XP (USB), Step 1: Setup the Hardware, Step 2: Connect to the USB Port
 |
View all Oki B6100 manuals
Add to My Manuals
Save this manual to your list of manuals |
Page 44 highlights
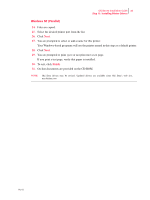
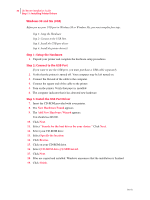
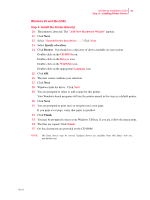
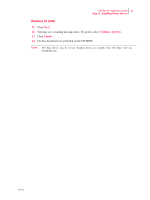
36 Oki B6100 Installation Guide Step 11: Installing Printer Drivers Windows XP (USB) Before you use your USB port in Windows XP, you must complete three steps: Step 1: Setup the Hardware Step 2: Connect to the USB Port. Step 3: Install the printer driver(s) Step 1: Setup the Hardware 1. Unpack your printer and complete the hardware setup procedures. Step 2: Connect to the USB Port If you want to use the USB port, you must purchase a USB cable separately. 2. Verify that the printer is turned off. Your computer may be left turned on. 3. Connect the flat end of the cable to the computer. 4. Connect the square end of the cable to the printer. 5. Turn on the printer. 6. The computer indicates that it has detected new hardware. Step 3: Install the Printer Driver(s) 7. Insert the CD-ROM provided with your printer. 8. The printer is detected. The Found New Hardware Wizard appears. 9. Select Install from a list or specific location (Advanced). 10. Click Next. 11. Select Search for the best driver in these locations. 12. Select Include this location in the search. Click Browse. 13. Scroll to and select your CD-ROM drive. 14. Click Drivers. 15. Click WinXP. 16. Click OK. 17. Confirm your selection. 18. Click Next. 19. Windows searches for and locates the hardware. 20. Select your desired driver from the list. Verify that you select a driver with winxp in the name. Oct 02
-
 1
1 -
2
-
3
-
4
-
5
-
6
-
7
-
8
-
9
-
10
-
11
-
12
-
13
-
14
-
15
-
16
-
17
-
18
-
19
-
20
-
21
-
22
-
23
-
24
-
25
-
26
-
27
-
28
-
29
-
30
-
31
-
32
-
33
-
34
-
35
-
36
-
37
-
38
-
 39
39 -
 40
40 -
 41
41 -
 42
42 -
 43
43 -
 44
44 -
 45
45 -
 46
46 -
 47
47 -
 48
48 -
 49
49 -
50
-
51
-
52
-
53
-
54
-
55
-
56
-
57
-
58
-
59
-
60
-
61
-
62
-
63
-
64
-
65
-
66
-
67
-
68
-
69
-
70
 |
 |