Oki C9600n Banner Tray Installation Instructions
Oki C9600n Manual
 |
View all Oki C9600n manuals
Add to My Manuals
Save this manual to your list of manuals |
Oki C9600n manual content summary:
- Oki C9600n | Banner Tray Installation Instructions - Page 1
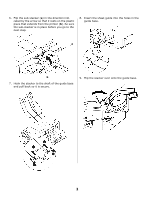
the Banner Tray 1. Press the button on the right side of the printer (a) to open the multi-purpose tray (b). Open the paper supporter (c). a c c b Note: Be sure the paper tray is on top of the extended multipurpose tray. 4. Make sure the guide base is securely in place. 5. Close the top cover. 1 - Oki C9600n | Banner Tray Installation Instructions - Page 2
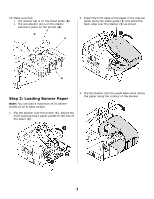
rests on the plastic piece that extends from the printer (b). Be sure the sub-stacker is in place before you go to the next step. 8. Insert the sheet guide into the holes in the guide base. a b 7. Hook the stacker to the shaft of the guide base and pull back so it is secure. 9. Flip - Oki C9600n | Banner Tray Installation Instructions - Page 3
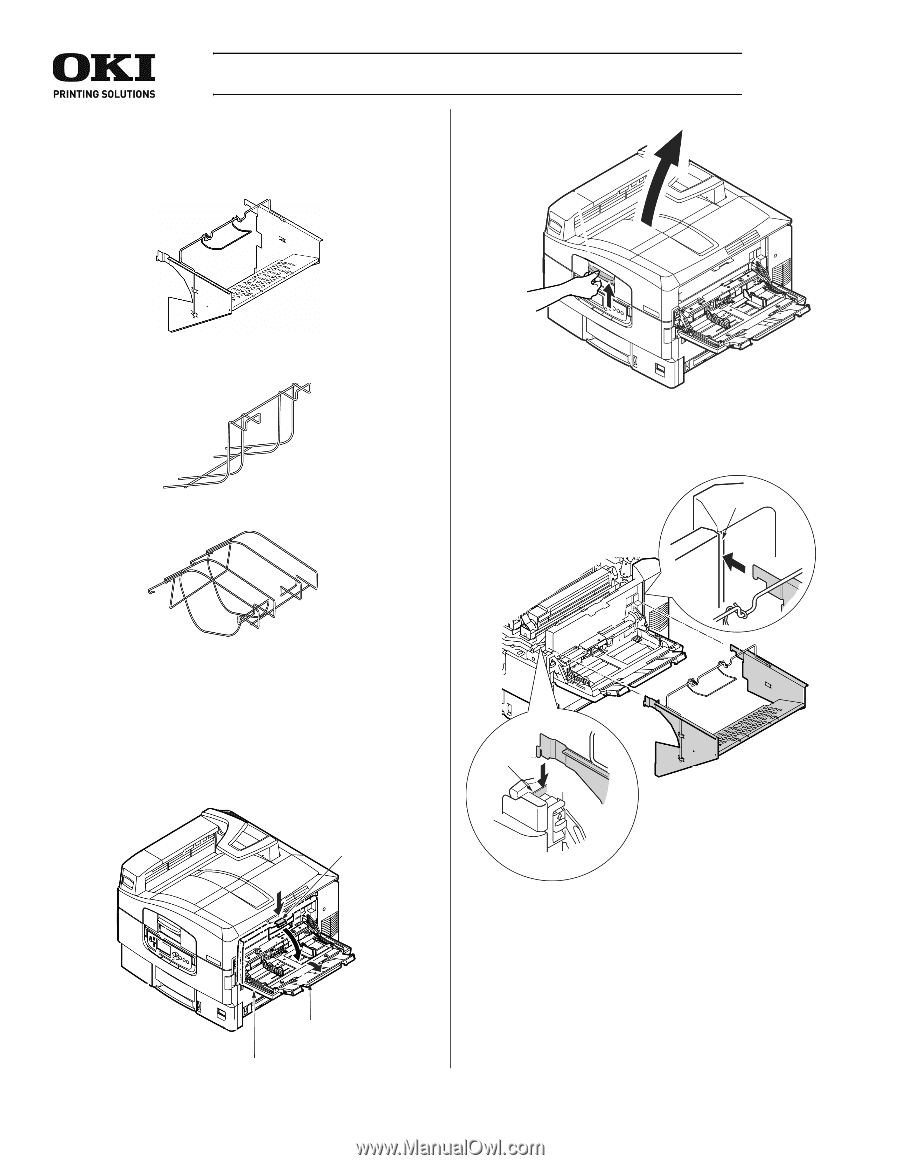
10. Make sure that • the stacker (a) is on the sheet guide (b). • the sub-stacker (c) is on the plastic extension piece on the printer (d). c d a 2. Insert the front edge of the paper in the manual guide along the sheet guide (1) and place the back edge over the stacker (2) as shown. b Step 3: - Oki C9600n | Banner Tray Installation Instructions - Page 4
extension piece on the printer (d). 5. To print, define the banner paper size in the printer driver, and specify Multi-Purpose Tray for paper source. For details, refer to "Custom Page Size" in your online Printing Guide. a b d c • The paper is straight. 58376201 © 2006 Oki Data Americas, Inc. 4
-
 1
1 -
 2
2 -
 3
3 -
 4
4
 |
 |
Banner Tray Installation Guide
1
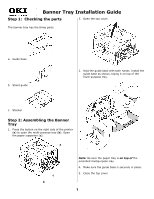
Step 1:
Checking the parts
The banner tray has the three parts.
a.
Guide base
b.
Sheet guide
c.
Stacker
Step 2: Assembling the Banner
Tray
1.
Press the button on the right side of the printer
(
a
) to open the multi-purpose tray (
b
). Open
the paper supporter (
c
).
2.
Open the top cover.
3.
Hold the guide base with both hands. Install the
guide base as shown, laying it on top of the
multi-purpose tray.
Note:
Be sure the paper tray is
on top of
the
extended multipurpose tray.
4.
Make sure the guide base is securely in place.
5.
Close the top cover.
c
a
c
b