Oki C9650dn Network and Configuration Guide - Page 98
Rinter, Aking, Hanges
 |
View all Oki C9650dn manuals
Add to My Manuals
Save this manual to your list of manuals |
Page 98 highlights
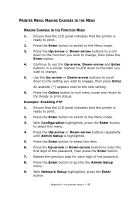
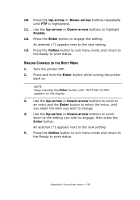
PRINTER MENU: MAKING CHANGES IN THE MENU MAKING CHANGES IN THE FUNCTION MENU 1. Ensure that the LCD panel indicates that the printer is ready to print. 2. Press the Enter button to switch to the Menu mode. 3. Press the Up-arrow or Down-arrow buttons to scroll down to the Function you wish to change, then press the Enter button. 4. Continue to use the Up-arrow, Down-arrow and Enter buttons in a similar manner to drill down to the item you wish to change. 5. Use the Up-arrow or Down-arrow buttons to scroll down to the setting you wish to engage, then press Enter. An asterisk (*) appears next to the new setting. 6. Press the Online button to exit menu mode and return to the Ready to print status. Example: Enabling FTP 1. Ensure that the LCD panel indicates that the printer is ready to print. 2. Press the Enter button to switch to the Menu mode. 3. With Configuration highlighted, press the Enter button to select this menu. 4. Press the Up-arrow or Down-arrow buttons repeatedly until Admin Setup is highlighted. 5. Press the Enter button to select this item. 6. Press the Up-arrow or Down-arrow buttons to enter the first digit of the password, then press the Enter button. 7. Repeat the previous step for each digit of the password. 8. Press the Enter button to go into the Admin Setup menu. 9. With Network Setup highlighted, press the Enter button. Appendix: the printer menu > 98
-
 1
1 -
2
-
3
-
4
-
5
-
6
-
7
-
8
-
9
-
10
-
11
-
12
-
13
-
14
-
15
-
16
-
17
-
18
-
19
-
20
-
21
-
22
-
23
-
24
-
25
-
26
-
27
-
28
-
29
-
30
-
31
-
32
-
33
-
34
-
35
-
36
-
37
-
38
-
39
-
40
-
41
-
42
-
43
-
44
-
45
-
46
-
47
-
48
-
49
-
50
-
51
-
52
-
53
-
54
-
55
-
56
-
57
-
58
-
59
-
60
-
61
-
62
-
63
-
64
-
65
-
66
-
67
-
68
-
69
-
70
-
71
-
72
-
73
-
74
-
75
-
76
-
77
-
78
-
79
-
80
-
81
-
82
-
83
-
84
-
85
-
86
-
87
-
88
-
89
-
90
-
91
-
92
-
 93
93 -
 94
94 -
 95
95 -
 96
96 -
 97
97 -
 98
98 -
 99
99 -
 100
100 -
 101
101 -
 102
102 -
 103
103 -
104
-
105
-
106
-
107
-
108
-
109
-
110
-
111
-
112
-
113
-
114
-
115
-
116
-
117
-
118
-
119
 |
 |