Olympus C-770 Reference Manual - Page 26
Power on/off
 |
UPC - 050332146327
View all Olympus C-770 manuals
Add to My Manuals
Save this manual to your list of manuals |
Page 26 highlights
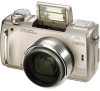
Power on/off 1 Press the tabs on the lens cap as indicated by the arrows and remove the lens cap. 2 Slide the power switch to q, K or n. • The camera and the monitor turn on. • The mode in which the camera turns on varies depending on the position of the power switch. When the power is turned on in the shooting mode, the lens extends. 1 Mode dial Getting started Shooting modes K : For taking still pictures. Use the mode dial to select a shooting mode. g"Shooting modes" (P.47) n : For recording movies. g"Recording movies" (P.56) Playback mode q : For displaying the pictures you have taken. g"Viewing still pictures" (P.124) Power switch 3 To turn the camera off, slide the power switch to OFF. 25
-
 1
1 -
2
-
3
-
4
-
5
-
6
-
7
-
8
-
9
-
10
-
11
-
12
-
13
-
14
-
15
-
16
-
17
-
18
-
19
-
20
-
 21
21 -
 22
22 -
 23
23 -
 24
24 -
 25
25 -
 26
26 -
 27
27 -
 28
28 -
 29
29 -
 30
30 -
 31
31 -
32
-
33
-
34
-
35
-
36
-
37
-
38
-
39
-
40
-
41
-
42
-
43
-
44
-
45
-
46
-
47
-
48
-
49
-
50
-
51
-
52
-
53
-
54
-
55
-
56
-
57
-
58
-
59
-
60
-
61
-
62
-
63
-
64
-
65
-
66
-
67
-
68
-
69
-
70
-
71
-
72
-
73
-
74
-
75
-
76
-
77
-
78
-
79
-
80
-
81
-
82
-
83
-
84
-
85
-
86
-
87
-
88
-
89
-
90
-
91
-
92
-
93
-
94
-
95
-
96
-
97
-
98
-
99
-
100
-
101
-
102
-
103
-
104
-
105
-
106
-
107
-
108
-
109
-
110
-
111
-
112
-
113
-
114
-
115
-
116
-
117
-
118
-
119
-
120
-
121
-
122
-
123
-
124
-
125
-
126
-
127
-
128
-
129
-
130
-
131
-
132
-
133
-
134
-
135
-
136
-
137
-
138
-
139
-
140
-
141
-
142
-
143
-
144
-
145
-
146
-
147
-
148
-
149
-
150
-
151
-
152
-
153
-
154
-
155
-
156
-
157
-
158
-
159
-
160
-
161
-
162
-
163
-
164
-
165
-
166
-
167
-
168
-
169
-
170
-
171
-
172
-
173
-
174
-
175
-
176
-
177
-
178
-
179
-
180
-
181
-
182
-
183
-
184
-
185
-
186
-
187
-
188
-
189
-
190
-
191
-
192
-
193
-
194
-
195
-
196
-
197
-
198
-
199
-
200
-
201
-
202
-
203
-
204
-
205
-
206
-
207
-
208
-
209
-
210
-
211
-
212
-
213
-
214
-
215
-
216
-
217
-
218
-
219
-
220
-
221
-
222
-
223
-
224
-
225
-
226
-
227
-
228
-
229
-
230
-
231
-
232
-
233
-
234
-
235
-
236
-
237
-
238
-
239
-
240
-
241
-
242
-
243
-
244
-
245
-
246
-
247
-
248
-
249
-
250
-
251
-
252
-
253
-
254
-
255
-
256
-
257
-
258
-
259
-
260
-
261
-
262
-
263
-
264
-
265
-
266
 |
 |

25
Getting started
1
Power on/off
1
Press the tabs on the lens cap as
indicated by the arrows and
remove the lens cap.
2
Slide the power switch to
q
,
K
or
n
.
•
The camera and the monitor turn on.
•
The mode in which the camera turns on
varies depending on the position of the
power switch. When the power is turned
on in the shooting mode, the lens
extends.
Shooting modes
K
:
For taking still pictures. Use the
mode dial to select a shooting
mode.
g
“Shooting modes” (P.47)
n
:
For recording movies.
g
“Recording movies” (P.56)
Playback mode
q
:
For displaying the pictures you have
taken.
g
“Viewing still pictures” (P.124)
3
To turn the camera off, slide the power switch to OFF.
Mode dial
Power switch