Olympus Stylus 720 SW Stylus 720 SW Advanced Manual (English)
Olympus Stylus 720 SW Manual
 |
View all Olympus Stylus 720 SW manuals
Add to My Manuals
Save this manual to your list of manuals |
Olympus Stylus 720 SW manual content summary:
- Olympus Stylus 720 SW | Stylus 720 SW Advanced Manual (English) - Page 1
and menus is separately provided. Thank you for purchasing an Olympus digital camera. Before you start to use your new camera, please read these instructions carefully to enjoy optimum performance and a longer service life. Keep this manual in a safe place for future reference. We recommend that - Olympus Stylus 720 SW | Stylus 720 SW Advanced Manual (English) - Page 2
and information Tips before you start taking pictures The camera does not turn on even when a battery is loaded The battery is not fully charged • Charge the battery with the charger. The battery is temporarily unable to function because of the cold • Battery performance declines in low temperatures - Olympus Stylus 720 SW | Stylus 720 SW Advanced Manual (English) - Page 3
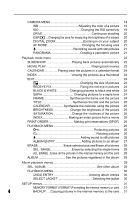
them out on the camera. o button Turning the camera on and off 8 Shutter button Shooting pictures 8 K/h/s button (Shooting Switching the shooting mode 9 K Shooting still pictures 9 h Shooting pictures using digital image stabilization 9 s ..... Shoot pictures by selecting a scene according - Olympus Stylus 720 SW | Stylus 720 SW Advanced Manual (English) - Page 4
of a subject 20 DIGITAL ZOOM Zooming in on your subject 20 AF MODE Changing the focusing area 21 R Recording sound with still pictures 21 PANORAMA Creating a panoramic picture 21 Playback mode menu 22 SLIDESHOW Playing back pictures automatically 22 MOVIE PLAY Playing back movies 23 CALENDAR - Olympus Stylus 720 SW | Stylus 720 SW Advanced Manual (English) - Page 5
zone 35 ALARM CLOCK Setting alarms 35 VIDEO OUT Playing back pictures on a TV 36 3 Printing pictures 37 Learn how to print pictures you have taken. Direct printing (PictBridge 38 Using the direct printing function 38 EASY PRINT 38 Other print modes and print settings (CUSTOM PRINT 40 Print - Olympus Stylus 720 SW | Stylus 720 SW Advanced Manual (English) - Page 6
Master 46 Install the OLYMPUS Master software 47 Connecting the camera to a computer 50 Start up the OLYMPUS Master software 51 Displaying camera images on a computer 52 Downloading and saving images 52 Viewing still pictures and movies 54 Printing pictures 55 To download and save images to - Olympus Stylus 720 SW | Stylus 720 SW Advanced Manual (English) - Page 7
66 Functions available in shooting modes and scenes 68 Glossary of terms 70 6 Miscellaneous 72 Read about convenient functions and safety precautions on how to use your camera more effectively. Camera care 72 Battery and charger 73 Useful use of the accessories 74 The card 74 AC adapter 76 - Olympus Stylus 720 SW | Stylus 720 SW Advanced Manual (English) - Page 8
on and off Power on: The camera is turned on in the shooting mode. • Monitor turns on • The lens cover opens. 2 Shutter button Shooting pictures Shooting still pictures Press the K/h/s button to select the shooting mode from P, AUTO, h or s, and lightly press the shutter button (halfway). The - Olympus Stylus 720 SW | Stylus 720 SW Advanced Manual (English) - Page 9
determines the optimum settings and shoots the picture. h Shooting pictures using digital image stabilization This function stabilizes the blur caused by a moving subject or camera movement when taking pictures. • By switching to the other mode, most settings will be changed to the default settings - Olympus Stylus 720 SW | Stylus 720 SW Advanced Manual (English) - Page 10
still pictures/Selecting playback mode The last picture taken is displayed. • Press the arrow pad (43) to view other pictures. • Use the zoom button to switch among close-up playback, index display and calendar display. g Movie playback "MOVIE PLAY Playing back movies" (P. 23) • The camera is - Olympus Stylus 720 SW | Stylus 720 SW Advanced Manual (English) - Page 11
T on the zoom button. HQ 3072×2304 4 HQ 3072×2304 4 Playback mode: Switching the picture display Single-frame playback • Use the arrow pad (1243) to browse pictures. [IN] ʼnŒ W T [IN] T W ĵ IJ ij Ĵ T [IN] IJ ij ĵ Ķ ĸ Ĺ T [IN] ĵ W Index display Ĵ • Use the arrow pad ķ (1243 - Olympus Stylus 720 SW | Stylus 720 SW Advanced Manual (English) - Page 12
mode/ a Super macro mode [IN] 4 1 9 1F button P Ĭġijįı Changing picture brightness Press the 1F button in shooting mode to mode to select the flash mode. Press o for setting. AUTO (Auto-flash) ! Red-eye reduction flash # Fill-in flash $ Flash off The flash fires automatically in low light - Olympus Stylus 720 SW | Stylus 720 SW Advanced Manual (English) - Page 13
be erased during the close-up playback / index playback. 1 b 4& button Shooting pictures close to the subject Press the 4& button in shooting mode to select the macro mode. Press o for setting. & Macro mode % Super macro mode This mode lets you shoot from as close as 20cm/7.8 in. (when the zoom - Olympus Stylus 720 SW | Stylus 720 SW Advanced Manual (English) - Page 14
menu differ according to the mode. Top menu in the shooting mode Top menu in the playback mode RESET IMAGE QUALITY ŔņŕŖő SLIDESHOW EDIT PPRINT ORDER PLAYBACK CALENDAR MENU SETUP EXIT MENU SCN SET OK INDEX ERASE ALBUM EXIT MENU SET OK • When [CAMERA MENU], [PLAYBACK MENU], [EDIT - Olympus Stylus 720 SW | Stylus 720 SW Advanced Manual (English) - Page 15
ŔņŕŖő EXIT MENU SCN SET OK Operation guide m button 1243 on the arrow pad o o m button CAMERA MENU IJ WB AUTO ij ISO DRIVE AUTO o ESP DIGITAL ZOOM OFF BACK MENU SET OK This mark is displayed when there are more menu items on 2 1 the next page. CAMERA MENU IJ AF MODE SPOT ijR OFF - Olympus Stylus 720 SW | Stylus 720 SW Advanced Manual (English) - Page 16
MENU IJ AF MODE ŪņŔő ijR SPOT PANORAMA BACK MENU SET OK Page display CAMERA MENU IJ WB AUTO ij ISO DRIVE AUTO o ESP DIGITAL ZOOM OFF BACK MENU SET OK When there are more menu items on the next page, press 4 on the procedure 2 screen to move the cursor to the page display. Press 12 - Olympus Stylus 720 SW | Stylus 720 SW Advanced Manual (English) - Page 17
Shooting mode menu K h s Menu operations 1 CAMERA MENU 2*2 RESET IMAGE QUALITY ŔņŕŖő 4 WB ISO DRIVE ESP/n SCN DIGITAL ZOOM AF MODE R PANORAMA*1 EXIT MENU SET OK 3*3 2 *1 A card is required. *2 [RESET] cannot be selected when the shooting mode is set to s or h. *3 s can be selected - Olympus Stylus 720 SW | Stylus 720 SW Advanced Manual (English) - Page 18
Flash Y Function F & IMAGE QUALITY WB ISO DRIVE ESP/n DIGITAL ZOOM AF MODE R Factory default setting Ref. Page AUTO YOFF P. 12 P. Scene) Shooting pictures by selecting a scene according to the situation The scene selection screen displays sample images and the shooting mode to best - Olympus Stylus 720 SW | Stylus 720 SW Advanced Manual (English) - Page 19
. BACK MENU SET OK ERASE S 2 Pictures with a R mark are erased. Select the pictures to be erased. 4 CAMERA MENU WB Adjusting the color of a picture AUTO 5 3 1 w x y The white balance is adjusted automatically for natural color, regardless of the light source. Sunny day For shooting under - Olympus Stylus 720 SW | Stylus 720 SW Advanced Manual (English) - Page 20
/ON The digital zoom can be used to take close-up pictures with stronger magnification than the optical zoom. (Optical zoom × Digital zoom: the maximum 15x) Optical zoom P Digital zoom P [] [IN] 4 [] [IN] 4 Zoom bar White area: The optical zoom area Red area: The digital zoom area - Olympus Stylus 720 SW | Stylus 720 SW Advanced Manual (English) - Page 21
. When recording, aim the camera microphone at the source of the sound you want to record. PANORAMA Creating a panoramic picture Panorama shooting lets you create a panoramic picture, using the OLYMPUS Master software from the provided CD-ROM. An Olympus xD-Picture Card is required for panorama - Olympus Stylus 720 SW | Stylus 720 SW Advanced Manual (English) - Page 22
mode menu EDIT*1 Q REDEYE FIX BLACK & WHITE 2 SEPIA FRAME TITLE CALENDAR BRIGHTNESS SATURATION EDIT*1 INDEX *1A card is required. When a still picture ENTRY*1 *2This is not displayed when a movie is selected. *3This cannot be selected when the movie is selected. g "SETUP menus" (P. 31 - Olympus Stylus 720 SW | Stylus 720 SW Advanced Manual (English) - Page 23
] from the top menu, and press o to play back the movie. Another option is to select a picture with the movie icon (n), and press o to play back the movie. [IN] 2 MOVIE PLAY OK ĵ Operations during movie playback [IN] ʼnŒ Playing time/Total recording time 1 : Increases the - Olympus Stylus 720 SW | Stylus 720 SW Advanced Manual (English) - Page 24
it as a new file. REDEYE FIX Fixing the red-eye in pictures This function corrects the red-eye look that often occurs when taking pictures with a flash. BLACK & WHITE Changing pictures to black and white This changes the picture to black and white and saves it as a new file. SEPIA Changing - Olympus Stylus 720 SW | Stylus 720 SW Advanced Manual (English) - Page 25
adjust the vividness of the picture, and store it as a new picture. S AT U R AT I O N Select the picture with 43, and press o. • Adjust the vividness with 12, and press o. BACK MENU SET OK INDEX Making an index picture from a movie This extract 9 frames from a movie and saves them as a new - Olympus Stylus 720 SW | Stylus 720 SW Advanced Manual (English) - Page 26
printing data (the number of prints and the date and time information) with the pictures stored on the card. g"Print settings (DPOF)" (P. 43) 7 PLAYBACK MENU 0 Protecting pictures 2 OFF /ON 0 Ŝ Ŋ ŏ Ş Protected pictures cannot be erased with [ERASE]/ [SEL.IMAGE]/[ALL ERASE], but they are all - Olympus Stylus 720 SW | Stylus 720 SW Advanced Manual (English) - Page 27
pictures to an album Pictures recorded to the card can be organized by sorting them into albums. Pictures stored in the internal memory pictures taken on the same day Use the arrow pad (1243) to select the date with pictures to enter in the album, and press o. [SET ALL] SET ALL ŜŹŅŞ PHOTO MOVIE - Olympus Stylus 720 SW | Stylus 720 SW Advanced Manual (English) - Page 28
cannot be restored. Check each picture before erasing to avoid accidentally erasing pictures you want to keep. • When erasing the picture in the internal memory, do not insert the card into the camera. • When erasing the picture from the card, insert a card into the camera in advance. 2 SEL. IMAGE - Olympus Stylus 720 SW | Stylus 720 SW Advanced Manual (English) - Page 29
Menu operations Album playback menus • A card is required. When the still picture is selected 2 SLIDESHOW EDIT PP RINT ORDER 1 PLAYBACK SEL. ALBUM MENU SETUP INDEX EXIT MENU ERASE CLOSE ALBUM SET OK When the move is selected 2 MOVIE PLAY EDIT PRINT ORDER 1 PLAYBACK SEL. ALBUM MENU SETUP - Olympus Stylus 720 SW | Stylus 720 SW Advanced Manual (English) - Page 30
UNDO ENTRY Undoing album entries Even if a picture is removed from an album, the picture remains in the card. SEL. IMAGE Select one frame at a time to undo. SEL. IMAGE ŜŹŅŞ IJ ij Ĵ ĵ • Press the arrow pad (1243) to select a picture, and press o to add R. 2 Ķ ķ ĸ Ĺ • Press o again to - Olympus Stylus 720 SW | Stylus 720 SW Advanced Manual (English) - Page 31
*1 A card is required. ALARM CLOCK *2 [SCREEN SETUP] can be selected when playing VIDEO OUT back still pictures. *3 [SHUTTER SOUND] can be selected when shooting still pictures. *4 You cannot select this item when taking movies. *5 You cannot select this item in playback mode. MEMORY FORMAT - Olympus Stylus 720 SW | Stylus 720 SW Advanced Manual (English) - Page 32
then on the camera when [LOW] or [HIGH] is selected for [VOLUME] of [PW ON SETUP]. If you do not want to emit beep, set [VOLUME] to [OFF] in advance. SCREEN SETUP Registering a picture as the startup screen Still pictures in the internal memory or the card can be registered to screen [2] for [PW ON - Olympus Stylus 720 SW | Stylus 720 SW Advanced Manual (English) - Page 33
is inserted, the folder number and file number are retained from the previous card. This helps you to manage multiple cards. File names and their folder names for recorded pictures are automatically generated by the camera. File names and folder names respectively include file numbers (0001 to 9999 - Olympus Stylus 720 SW | Stylus 720 SW Advanced Manual (English) - Page 34
one minute after taking or viewing pictures to allow the pixel mapping function to perform properly. If you turn the camera off during to the previous or next setting. 12 : Sets the date and time. • The first two digits of the year are fixed. • The time is displayed in the 24-hour format. • For - Olympus Stylus 720 SW | Stylus 720 SW Advanced Manual (English) - Page 35
or next setting. 12 : Sets the date and time. 2 MOVE SET OK • The date format is the same as that set with [X]. • The first two digits of the year are fixed. • The time is displayed in the 24-hour format. • For a more accurate setting, press o when the time signal hits 00 - Olympus Stylus 720 SW | Stylus 720 SW Advanced Manual (English) - Page 36
(white) terminals. AV cable (provided) Settings on the camera Press the q button to turn on the camera. • The last picture taken is displayed on the TV. Use the arrow pad (43) to select the picture you want to display. 36 Settings on the TV Turn the TV on, and set it to video input mode. • For - Olympus Stylus 720 SW | Stylus 720 SW Advanced Manual (English) - Page 37
reservation data on the card first. With print reservation, you can print out pictures easily either at home using a personal DPOF-compatible printer or at a photo store that supports DPOF. DPOF is a standard format used to record automatic print information from digital cameras. It allows you - Olympus Stylus 720 SW | Stylus 720 SW Advanced Manual (English) - Page 38
1 Display the picture you want to print out on the LCD monitor in the playback mode. 2 Turn the printer on and plug the USB cable provided with the camera into the multi-connector of the camera and the printer's USB port. Multi-connector USB cable • The [EASY PRINT START] screen is displayed. • For - Olympus Stylus 720 SW | Stylus 720 SW Advanced Manual (English) - Page 39
USB cable from the camera with the picture selection screen displayed. 3 EXIT PRINT 4 Remove the USB cable from the camera. 5 Remove the USB cable from the printer. You can use [EASY PRINT] even when the camera is turned off or in shooting mode. With the camera turned off or in shooting mode - Olympus Stylus 720 SW | Stylus 720 SW Advanced Manual (English) - Page 40
guide. Operation guide Selecting the picture to print (available only when a card is inserted) ALL IMAGES SEL. ALBUM SET OK ALL IMAGES ALBUM Allows you to select from all pictures in the card to print. Select an album and the pictures in the album to print. Selecting a print mode PRINT MODE - Olympus Stylus 720 SW | Stylus 720 SW Advanced Manual (English) - Page 41
up to 10 prints. If you select [WITH], pictures are printed with the date. ) If you select [WITH], pictures are printed with the file name. 4 Select [OK], and press o. • Printing starts. • When printing is finished, the [PRINT MODE SELECT] screen is displayed. PRINT ŜŊŏŞ OK CANCEL BACK MENU SET - Olympus Stylus 720 SW | Stylus 720 SW Advanced Manual (English) - Page 42
5 In the [PRINT MODE SELECT] screen, press m button. PRINT MODE SELECT PRINT • A message is displayed. 3 ALL PRINT MULTI PRINT ALL INDEX EXIT MENU SET OK 6 Disconnect the USB cable from the camera. • The camera turns off. 7 Disconnect the USB cable from the printer. Printing pictures 42 - Olympus Stylus 720 SW | Stylus 720 SW Advanced Manual (English) - Page 43
using this camera may overwrite the previous reservations. • You can make DPOF print reservations for up to 999 images per card. • Not all functions may be available on all printers, or at all photo stores. To use print services without using DPOF • Pictures stored in the internal memory cannot be - Olympus Stylus 720 SW | Stylus 720 SW Advanced Manual (English) - Page 44
Printing pictures Follow the operation guide to make a print reservation for a selected picture. 1 Press the m button in the playback mode and Reserves all the pictures stored on the card. The number of prints is set at one print per picture. 1 Press the m button in the playback mode and display the - Olympus Stylus 720 SW | Stylus 720 SW Advanced Manual (English) - Page 45
the shooting time. 4 Select [SET], and press o. Resetting print reservation data You can reset all the print reservation data or just for selected pictures. 1 Select top menu [PRINT ORDER], and press o. • Playing back the album:Top menu [PRINT ORDER] To reset the print reservation data for all - Olympus Stylus 720 SW | Stylus 720 SW Advanced Manual (English) - Page 46
What is OLYMPUS Master? OLYMPUS Master is application software for editing images taken with a digital camera on a computer. Installing it on your computer lets you do the following: Connecting the camera to a computer Download images from the camera or other media View images and movies You can - Olympus Stylus 720 SW | Stylus 720 SW Advanced Manual (English) - Page 47
the trash icon) before performing the following operations. Failure to do so could result in unstable computer operation and the need to reboot. • Disconnect the cable connecting the camera to the computer • Turn off the camera • Open the camera's battery compartment/card cover 47 - Olympus Stylus 720 SW | Stylus 720 SW Advanced Manual (English) - Page 48
. • The OLYMPUS Master installation screen is displayed. 4 Follow the on-screen instructions. • When the OLYMPUS Master licensing agreement is displayed, read the agreement and click "Yes" to proceed with the installation. Connecting the camera to a computer • When the "User Information" dialog - Olympus Stylus 720 SW | Stylus 720 SW Advanced Manual (English) - Page 49
Connecting the camera to a computer • A screen asking whether or not you want to install Adobe Reader is displayed. Adobe Reader is required to read the OLYMPUS Master instruction manual. If this screen is not displayed, Adobe Reader is already installed on your computer. To install Adobe Reader, - Olympus Stylus 720 SW | Stylus 720 SW Advanced Manual (English) - Page 50
is closed. 2 Connect the multi-connector on the camera to the USB port on the computer using the provided USB cable. Monitor Multi-connector • Refer to your computer's instruction manual to locate the position of the USB port. 4 • The camera turns on automatically. • The monitor turns on and - Olympus Stylus 720 SW | Stylus 720 SW Advanced Manual (English) - Page 51
• After the "User Information" dialog box, the "Registration" dialog box is displayed. Follow the prompts and fill in the registration form. OLYMPUS Master main menu Connecting the camera to a computer 7 1 6 2 3 5 4 1 "Transfer Images" button Downloads images from the camera or other media - Olympus Stylus 720 SW | Stylus 720 SW Advanced Manual (English) - Page 52
camera to a computer Displaying camera images on a computer Downloading and saving images 1 Click "Transfer Images" on the OLYMPUS Master main menu. • The menu for selecting the source is displayed. 2 Click "From Camera" . • The window for selecting images is displayed. All the images in the camera - Olympus Stylus 720 SW | Stylus 720 SW Advanced Manual (English) - Page 53
the eject icon when the "Untitled" or "NO_NAME" icon on the desktop is dragged. Drag and drop it on the eject icon. 3 Disconnect the USB cable from the camera. Note • Windows Me/2000/XP: When you click "Unplug or Eject Hardware", a warning message may be displayed. Make sure that image data is not - Olympus Stylus 720 SW | Stylus 720 SW Advanced Manual (English) - Page 54
the camera to a computer To view a movie 1 Double-click the movie thumbnail that you want to see in the "Browse" window. • Olympus Master switches to view mode and the first frame of the movie is displayed. 2 To play back the movie, click the playback button at the bottom of the screen. The - Olympus Stylus 720 SW | Stylus 720 SW Advanced Manual (English) - Page 55
. 1 Click "Print Images at Home" on the OLYMPUS Master main menu. • The print menu is displayed. 2 Click "Photo" . • The "Photo Print" window is displayed. 3 Click "Settings" in the "Photo Print" 4 window. • The printer settings screen is displayed. Make the necessary printer settings. 4 Select - Olympus Stylus 720 SW | Stylus 720 SW Advanced Manual (English) - Page 56
and save images to a computer without using OLYMPUS Master This camera is compatible with USB mass storage. You can connect the camera to your computer using the USB cable provided with the camera to download and save images without using OLYMPUS Master. The following environment is required to use - Olympus Stylus 720 SW | Stylus 720 SW Advanced Manual (English) - Page 57
and information Tips before you start taking pictures The camera does not turn on even when a battery is loaded The battery is not fully charged • Charge the battery with the charger. The battery is temporarily unable to function because of the cold • Battery performance declines in low temperatures - Olympus Stylus 720 SW | Stylus 720 SW Advanced Manual (English) - Page 58
default settings if the camera is left without batteries for approximately 1 day. Before taking important pictures, check that the date recompose your picture. • Set [AF MODE] to [iESP]. 5 g "AF MODE Changing the focusing area" (P. 21) The subject is moving quickly • Focus the camera on a - Olympus Stylus 720 SW | Stylus 720 SW Advanced Manual (English) - Page 59
flash in this type of situation. Set the camera to h mode • Because the sensitivity of the CCD increases automatically, you can hold the camera and take pictures in darker places with the flash off. g "h Shooting pictures using digital image stabilization" (P. 9) 5 Increase the [ISO] setting - Olympus Stylus 720 SW | Stylus 720 SW Advanced Manual (English) - Page 60
by both natural light and indoor lighting, such as when near a window • When there is no white in the center of the frame g "WB Adjusting the color of a picture" (P. 19) Taking pictures of a white beach or snow scene • Take pictures with K in s mode. Suitable for taking pictures on a sunny day - Olympus Stylus 720 SW | Stylus 720 SW Advanced Manual (English) - Page 61
then erase the pictures from the internal memory. Using a card (optional) • Pictures are recorded to the card when inserted in the camera. When the card is full, you download the pictures to a computer, and then either erase the pictures from the card or use a new card. • Pictures are not recorded - Olympus Stylus 720 SW | Stylus 720 SW Advanced Manual (English) - Page 62
Status Self-timer lamp The lamp lights for approximately 10 seconds, blinks for approximately 2 seconds, and then the picture is taken. Card access lamp Blinking: A picture is being recorded, the camera is reading a movie, or images are being downloaded (when connected to a computer). • Do - Olympus Stylus 720 SW | Stylus 720 SW Advanced Manual (English) - Page 63
been set: [%], [FLASH MODE], etc. • Items that cannot be set because the pictures taken by other camera will be edited. • Some functions cannot be used when there is no card in the camera. [PANORAMA], [FORMAT], [BACKUP], [PRINT ORDER], [Q], [REDEYE FIX], [BLACK & WHITE], [SEPIA],[FRAME], [TITLE - Olympus Stylus 720 SW | Stylus 720 SW Advanced Manual (English) - Page 64
the internal memory cannot be played back. Pull out the card before operating the camera. 5 Quickly displaying a desired picture • Use the album function. You can create up to 12 albums and enter the pictures on a card to the albums. To view the pictures, press the m button in the playback mode, and - Olympus Stylus 720 SW | Stylus 720 SW Advanced Manual (English) - Page 65
screen. View the picture using image browsing software • Install the OLYMPUS Master software from the provided CD-ROM. Change the monitor setting • The icons on the computer desktop may be rearranged. For details of changing the settings on your computer, refer to the computer's instruction manual - Olympus Stylus 720 SW | Stylus 720 SW Advanced Manual (English) - Page 66
. L NO PICTURE There are no pictures in The internal memory or the card the internal memory or contains no pictures. on the card. Record pictures. r PICTURE ERROR There is a problem with the selected picture and it cannot be played back on this camera. Use image processing software to view - Olympus Stylus 720 SW | Stylus 720 SW Advanced Manual (English) - Page 67
SET OK This card cannot be Format the card or replace. used in this camera. Or, • Select [POWER OFF] and press o. the card is not formatted. Insert a new card. • Select [FORMAT] [YES] and press o. All data on the card is erased. MEMORY SETUP ŜŊŏŞ POWER OFF MEMORY FORMAT SET OK There - Olympus Stylus 720 SW | Stylus 720 SW Advanced Manual (English) - Page 68
9 9 9 9 9 9 Optical zoom 9 9 9 WB 9 - 9 5 ISO DRIVE ESP/n 9 - - 9 - 9 9 - 9 IMAGE QUALITY DIGITAL ZOOM 9 9 9 9 - 9 AF MODE R PANORAMA 9 - 9 9 - 9 9 - 9 MEMORY FORMAT (FORMAT) 9 9 9 BACKUP W 9 9 9 9 9 9 Kq 9 9 9 PW ON SETUP 9 9 9 COLOR BEEP - Olympus Stylus 720 SW | Stylus 720 SW Advanced Manual (English) - Page 69
mode K h Function P AUTO ALARM CLOCK 9 9 9 VIDEO 9 9 9 9 9 DIGITAL ZOOM 9 9 9 9 -- 9 9 9 9 9 - 9 9 9 9 9 AF MODE 9 9 9 9 9 - picture quality below [2048 x 1536] is available. *3 The picture quality is fixed to [640 x480]. *4 AF lock is on. *5 Excluding [!]. Getting to know your camera - Olympus Stylus 720 SW | Stylus 720 SW Advanced Manual (English) - Page 70
Order Format) This is for saving desired print settings on digital cameras. By entering which images to print and the number of copies of each, the user can easily have the desired images printed by a printer or print lab that supports the DPOF format. Eclipsing (Vignetting) This refers to when - Olympus Stylus 720 SW | Stylus 720 SW Advanced Manual (English) - Page 71
in low-light conditions. JPEG (Joint Photographic Experts Group) A compression format for still images. Photographs (pictures) taken using this camera are recorded onto the card in JPEG format. By downloading these images to a computer, users can edit them using graphics application software or - Olympus Stylus 720 SW | Stylus 720 SW Advanced Manual (English) - Page 72
camera at the beach, use a cloth soaked in clean water and wrung well. Monitor: • Wipe gently with a soft cloth. Lens: • Blow dust off the lens with a commercial blower, then wipe gently with a lens cleaner. Battery/Charger the camera for extended periods, remove the battery, AC adapter and card, and - Olympus Stylus 720 SW | Stylus 720 SW Advanced Manual (English) - Page 73
button is pressed halfway repeatedly in shooting mode, activating the auto focus. • A picture is displayed on the monitor for an extended period of time. • The camera is connected to a computer or printer. (Using an exhausted battery may cause the camera to turn off without displaying the - Olympus Stylus 720 SW | Stylus 720 SW Advanced Manual (English) - Page 74
Useful use of the accessories The card Pictures can be recorded on the optional card. The internal memory and card are the camera's media for recording pictures, similar to film in a film camera. Pictures recorded to the internal memory or card can be easily erased on the camera or processed using a - Olympus Stylus 720 SW | Stylus 720 SW Advanced Manual (English) - Page 75
Inserting and removing the card 1 Turn off the camera 2 Open the battery compartment/card cover. 2 1 Miscellaneous Inserting the card 3 Orient the card as shown, and insert it into the card slot as shown in the illustration. • Insert the card straight in. • Insert the card until it clicks - Olympus Stylus 720 SW | Stylus 720 SW Advanced Manual (English) - Page 76
while the camera is reading the images. Reading of images may take some time. Do not open the battery compartment/card cover while the card access lamp is blinking. Doing so may damage the data in the internal memory or the card and render the internal memory or card unusable. Card access lamp - Olympus Stylus 720 SW | Stylus 720 SW Advanced Manual (English) - Page 77
operating environment restrictions described in the camera's manual. Battery Handling Precautions • This camera uses a lithium ion battery specified by Olympus. Do not use any other type of battery. For safe and proper use, read the battery's instruction manual carefully before using it. • If the - Olympus Stylus 720 SW | Stylus 720 SW Advanced Manual (English) - Page 78
monitor. This is not a malfunction; it will be less noticeable in playback mode. • In places subject to low temperatures, the LCD monitor may take a long time to turn on or its color may change temporarily. When using the camera in extremely cold places, it is a good idea to occasionally place it - Olympus Stylus 720 SW | Stylus 720 SW Advanced Manual (English) - Page 79
user's authority to operate this equipment. This equipment has been tested and found to comply with the limits for a Class B digital used in accordance with the instructions, may cause harmful interference Only the OLYMPUS-supplied USB cable should be used to connect the camera to USB enabled - Olympus Stylus 720 SW | Stylus 720 SW Advanced Manual (English) - Page 80
(Full auto mode 10 AUTO (ISO 19 AUTO (WB) WB AUTO 19 Auto focus 58 AV cable 36 B BACKUP 31 Battery 73, 75 Battery compartment/card cover . . 75 80 BEEP 32 BGM 22 BLACK & WHITE 24 BRIGHTNESS 25 C CALENDAR 24, 25 Calendar display 11 CAMERA MENU 19 Card 21, 31, 74 Card access lamp 52 - Olympus Stylus 720 SW | Stylus 720 SW Advanced Manual (English) - Page 81
71 L Lithium ion battery 73 M m button (MENU 11, 14 MEMORY FORMAT 31 Memory gauge 57 Menu 14 Microphone 26 Monitor brightness adjustment s 34 MOVIE PLAY 23 MULTI PRINT 40 Multi-connector 36, 38, 50 N NTSC 36, 71 Number of storable still pictures . . . 61 O OLYMPUS Master 46 Optical zoom - Olympus Stylus 720 SW | Stylus 720 SW Advanced Manual (English) - Page 82
Turning on the camera Kq . . . . 32 TYPE 22 U Under Water Macro H 8 Under Water Snap T 8 Under Water Wide1k 8 UNDO ALL 30 UNDO ENTRY (ALBUM ENTRY) . . 30 USB cable 38, 46, 50, 53 USB driver 47, 56 V VIDEO OUT 36 VOLUME 33 W Warning sound 8 32 White balance WB 19 X xD-Picture Card 21, 74 - Olympus Stylus 720 SW | Stylus 720 SW Advanced Manual (English) - Page 83
: Tel. 1-888-553-4448 (Toll-free) Our phone customer support is available from 8 am to 10 pm (Monday to Friday) ET E-Mail: [email protected] Olympus software updates can be obtained at: http://www.olympus.com/digital Premises: Wendenstrasse 14-18, 20097 Hamburg, Germany Tel: +49 40-23 77 3-0 / Fax
-
 1
1 -
 2
2 -
 3
3 -
 4
4 -
 5
5 -
 6
6 -
 7
7 -
8
-
9
-
10
-
11
-
12
-
13
-
14
-
15
-
16
-
17
-
18
-
19
-
20
-
21
-
22
-
23
-
24
-
25
-
26
-
27
-
28
-
29
-
30
-
31
-
32
-
33
-
34
-
35
-
36
-
37
-
38
-
39
-
40
-
41
-
42
-
43
-
44
-
45
-
46
-
47
-
48
-
49
-
50
-
51
-
52
-
53
-
54
-
55
-
56
-
57
-
58
-
59
-
60
-
61
-
62
-
63
-
64
-
65
-
66
-
67
-
68
-
69
-
70
-
71
-
72
-
73
-
74
-
75
-
76
-
77
-
78
-
79
-
80
-
81
-
82
-
83
 |
 |
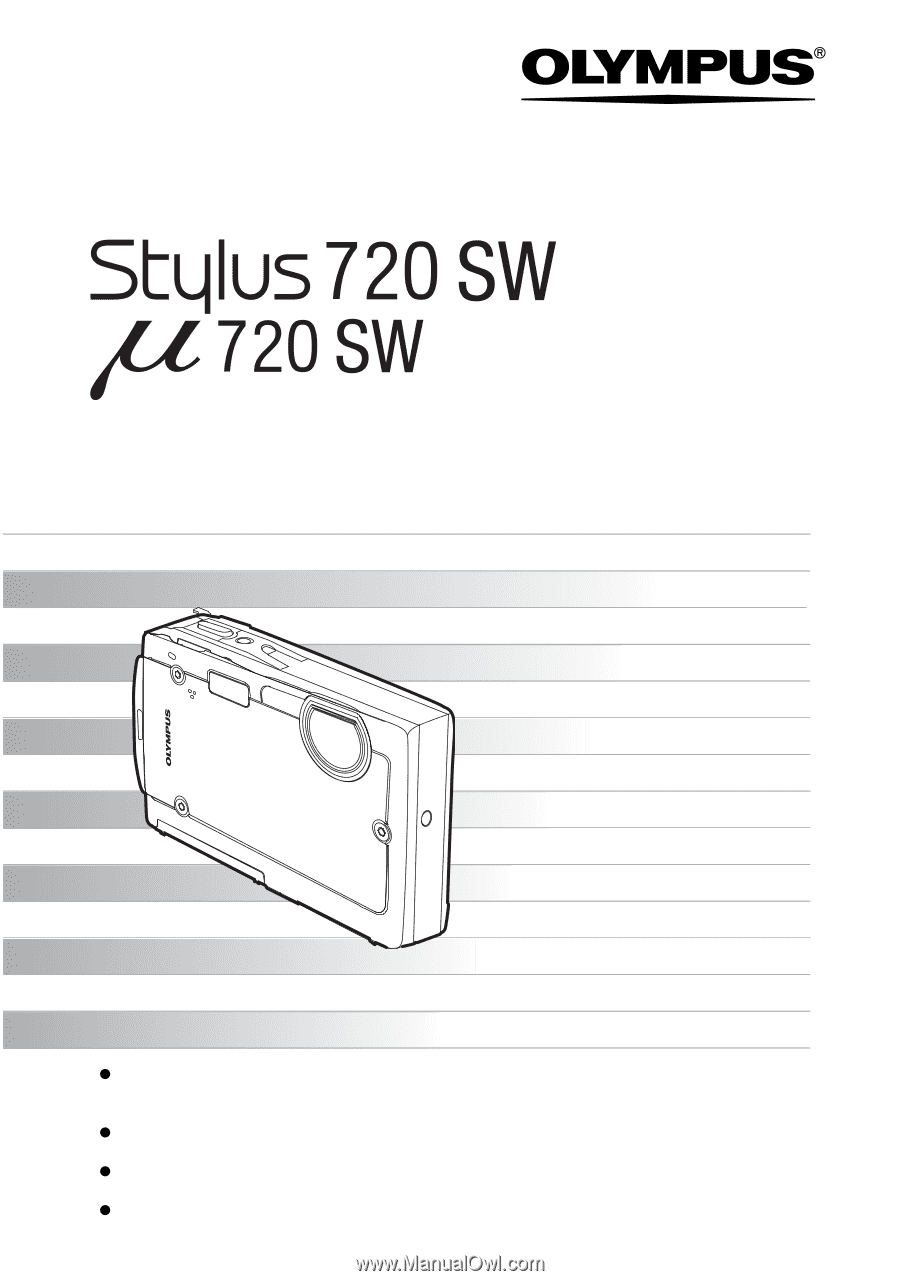
DIGITAL CAMERA
Detailed explanation for each function such
as camera buttons and menus is separately
provided.
Advanced
Manual
Thank you for purchasing an Olympus digital camera. Before you start to use your new
camera, please read these instructions carefully to enjoy optimum performance and a
longer service life. Keep this manual in a safe place for future reference.
We recommend that you take test shots to get accustomed to your camera before taking
important photographs.
In the interest of continually improving products, Olympus reserves the right to update or
modify information contained in this manual.
The screen and camera illustrations shown in this manual were produced during the
development stages and may differ from the actual product.
/