Onkyo TX-NR696 AV Receiver Owners Manual - English - Page 11
Rear Panel, Remote, PURE AUDIO button/indicator European, Australian, Taiwanese and Asian
 |
View all Onkyo TX-NR696 AV Receiver manuals
Add to My Manuals
Save this manual to your list of manuals |
Page 11 highlights
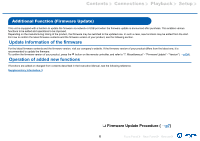
Contents ≫ Connections ≫ Playback ≫ Setup ≫ 1. ON/STANDBY button 2. MUSIC OPTIMIZER button/indicator (North American models): Turns on/off the MUSIC OPTIMIZER function that improves the quality of the compressed audio. PURE AUDIO button/indicator (European, Australian, Taiwanese and Asian models): Switches to the Pure Audio mode. ( p93) 3. HYBRID STANDBY indicator: Lights up when any of the following functions is working or enabled in standby state of this unit. When this indicator is lighting, the power consumption in standby state increases, however, the increase in power consumption is minimized by entering the HYBRID STANDBY mode where only the essential circuits operate. -- HDMI CEC ( p127) -- HDMI Standby Through ( p127) -- USB Power Out at Standby ( p131) -- Network Standby ( p131) -- Bluetooth Wakeup ( p132) 4. Remote control sensor: Receives signals from the remote controller. • The reception range of the remote controller is within a distance of approx. 16´/5 m, and an angle of 20° in vertical direction and 30° to right and left. 5. ZONE 2 button: Controls the multi-zone function. ( p79) 6. OFF button: Switches the multi-zone function off. ( p79) 7. QUICK MENU button: Pressing this button during playback can make settings such as "HDMI" and "Audio" quickly on the TV screen while playing. ( p135) 8. Display ( p12) 9. SETUP button: You can display advanced setting items on the TV and the display to have a more enjoyable experience with this unit. ( p112) 10. Cursor buttons ( / / / ) and ENTER button: Select an item with the cursors, and press ENTER to confirm your selection. When using TUNER, use them to tune in to stations. ( p73) 11. RETURN button: Returns the display to the previous state while setting. 12. MASTER VOLUME 13. Press the LISTENING MODE button (above) to select a category from "Movie/ TV", "Music" and "Game", and then turn the LISTENING MODE dial (below) to change the listening mode ( p85). 14. Adjusts the sound quality. Press the TONE button (above) to select an item to adjust from "Bass", "Vocal" and "Treble", and turn the TONE dial (below) to adjust. ( p83) 15. PHONES jack: Connect headphones with a standard plug (ø1/4″/6.3 mm). 16. Input selector buttons: Switches the input to be played. 17. SETUP MIC jack: Connect the supplied speaker setup microphone. ( p139) 18. AUX INPUT AUDIO/HDMI jack: Connect a video camera, etc. using a stereo mini plug cable (ø1/8″/3.5 mm) or HDMI cable. ( p43) 11 Front Panel≫ Rear Panel≫ Remote≫
-
 1
1 -
2
-
3
-
4
-
5
-
 6
6 -
 7
7 -
 8
8 -
 9
9 -
 10
10 -
 11
11 -
 12
12 -
 13
13 -
 14
14 -
 15
15 -
 16
16 -
17
-
18
-
19
-
20
-
21
-
22
-
23
-
24
-
25
-
26
-
27
-
28
-
29
-
30
-
31
-
32
-
33
-
34
-
35
-
36
-
37
-
38
-
39
-
40
-
41
-
42
-
43
-
44
-
45
-
46
-
47
-
48
-
49
-
50
-
51
-
52
-
53
-
54
-
55
-
56
-
57
-
58
-
59
-
60
-
61
-
62
-
63
-
64
-
65
-
66
-
67
-
68
-
69
-
70
-
71
-
72
-
73
-
74
-
75
-
76
-
77
-
78
-
79
-
80
-
81
-
82
-
83
-
84
-
85
-
86
-
87
-
88
-
89
-
90
-
91
-
92
-
93
-
94
-
95
-
96
-
97
-
98
-
99
-
100
-
101
-
102
-
103
-
104
-
105
-
106
-
107
-
108
-
109
-
110
-
111
-
112
-
113
-
114
-
115
-
116
-
117
-
118
-
119
-
120
-
121
-
122
-
123
-
124
-
125
-
126
-
127
-
128
-
129
-
130
-
131
-
132
-
133
-
134
-
135
-
136
-
137
-
138
-
139
-
140
-
141
-
142
-
143
-
144
-
145
-
146
-
147
-
148
-
149
-
150
-
151
-
152
-
153
-
154
-
155
-
156
-
157
-
158
-
159
 |
 |
