Onkyo TX-NR696 AV Receiver Owners Manual - English - Page 8
Updating via USB, If an Error Message is Displayed, Update
 |
View all Onkyo TX-NR696 AV Receiver manuals
Add to My Manuals
Save this manual to your list of manuals |
Page 8 highlights
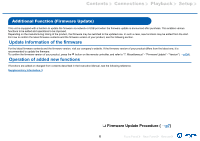
Contents ≫ Connections ≫ Playback ≫ Setup ≫ 4. Press ON/STANDBY on the main unit to turn the unit into standby mode. The process is completed, and your firmware is updated to the latest version. • Do not use on the remote controller. If an Error Message is Displayed If an error occurs Error!" is displayed on the display of the unit. ("" represents an alphanumeric character.) Refer to the following descriptions and check. Error Code • -01, -10: LAN cable not found. Connect the LAN cable properly. • -02, -03, -04, -05, -06, -11, -13, -14, -16, -17, -18, -20, -21: Internet connection error. Check the following: -- Whether the router is turned on -- Whether this unit and the router are connected via the network Unplug and plug the power cords of this unit and the router. This may solve the problem. If you are still unable to connect to the Internet, the DNS server or proxy server may be temporarily down. Check the server operation status with your Internet service provider. • Others: After removing the power plug once, insert it to the outlet, and then start the operation from the beginning. Updating via USB • While updating the firmware, do not do the following: -- Disconnecting and reconnecting cables, USB storage device, speaker setup microphone or headphones, or performing operations on the unit such as turning the power off -- Accessing this unit from a PC or smartphone using their applications • Prepare a 256 MB or larger USB storage device. The format of USB storage devices supports FAT16 or FAT32 file system format. -- Media inserted into a USB card reader may not be used for this function. -- USB storage devices equipped with the security function are not supported. -- USB hubs and USB devices equipped with the hub function are not supported. Do not connect these devices to the unit. • Delete any data stored on the USB storage device. • Turn off control devices (PC etc.) connected to the network. • Stop an Internet radio, USB storage device, or server content being played • If the multi-zone function is active, turn it off. • If "HDMI CEC" is set to "On", set it to "Off". -- Press . Next, select "5. Hardware" - "HDMI" and press ENTER, then select "HDMI CEC" and select "Off". * Depending on the USB storage device or its content, long time may be required for loading, the content may not be loaded correctly, or power may not be supplied correctly. * Our company will not be liable whatsoever for any loss or damage of data, or storage failure arising from the use of the USB storage device. Please note this in advance. * The descriptions may differ from the actual on-screen displays, however, operations and functions are the same. Update 1. Connect the USB storage device to your PC. 2. Download the firmware file from the our company's website to your PC and unzip. Firmware files are named as below. ONKAVR R.zip Unzip the file on your PC. The number of unzipped files and folders varies depending on the model. 3. Copy all unzipped files and folders to the root folder of the USB storage device. • Make sure to copy the unzipped files. 4. Connect the USB storage device to the USB port of this unit. • If an AC adapter is supplied with the USB storage device, connect the AC adapter, and use it with a household outlet. • If the USB storage device has been partitioned, each section will be treated as an independent device. 8 Front Panel≫ Rear Panel≫ Remote≫
-
 1
1 -
2
-
 3
3 -
 4
4 -
 5
5 -
 6
6 -
 7
7 -
 8
8 -
 9
9 -
 10
10 -
 11
11 -
 12
12 -
 13
13 -
14
-
15
-
16
-
17
-
18
-
19
-
20
-
21
-
22
-
23
-
24
-
25
-
26
-
27
-
28
-
29
-
30
-
31
-
32
-
33
-
34
-
35
-
36
-
37
-
38
-
39
-
40
-
41
-
42
-
43
-
44
-
45
-
46
-
47
-
48
-
49
-
50
-
51
-
52
-
53
-
54
-
55
-
56
-
57
-
58
-
59
-
60
-
61
-
62
-
63
-
64
-
65
-
66
-
67
-
68
-
69
-
70
-
71
-
72
-
73
-
74
-
75
-
76
-
77
-
78
-
79
-
80
-
81
-
82
-
83
-
84
-
85
-
86
-
87
-
88
-
89
-
90
-
91
-
92
-
93
-
94
-
95
-
96
-
97
-
98
-
99
-
100
-
101
-
102
-
103
-
104
-
105
-
106
-
107
-
108
-
109
-
110
-
111
-
112
-
113
-
114
-
115
-
116
-
117
-
118
-
119
-
120
-
121
-
122
-
123
-
124
-
125
-
126
-
127
-
128
-
129
-
130
-
131
-
132
-
133
-
134
-
135
-
136
-
137
-
138
-
139
-
140
-
141
-
142
-
143
-
144
-
145
-
146
-
147
-
148
-
149
-
150
-
151
-
152
-
153
-
154
-
155
-
156
-
157
-
158
-
159
 |
 |
