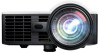
Optoma ML1050ST ML1050ST User Manual
Optoma ML1050ST Manual
 |
View all Optoma ML1050ST manuals
Add to My Manuals
Save this manual to your list of manuals |
Optoma ML1050ST manual content summary:
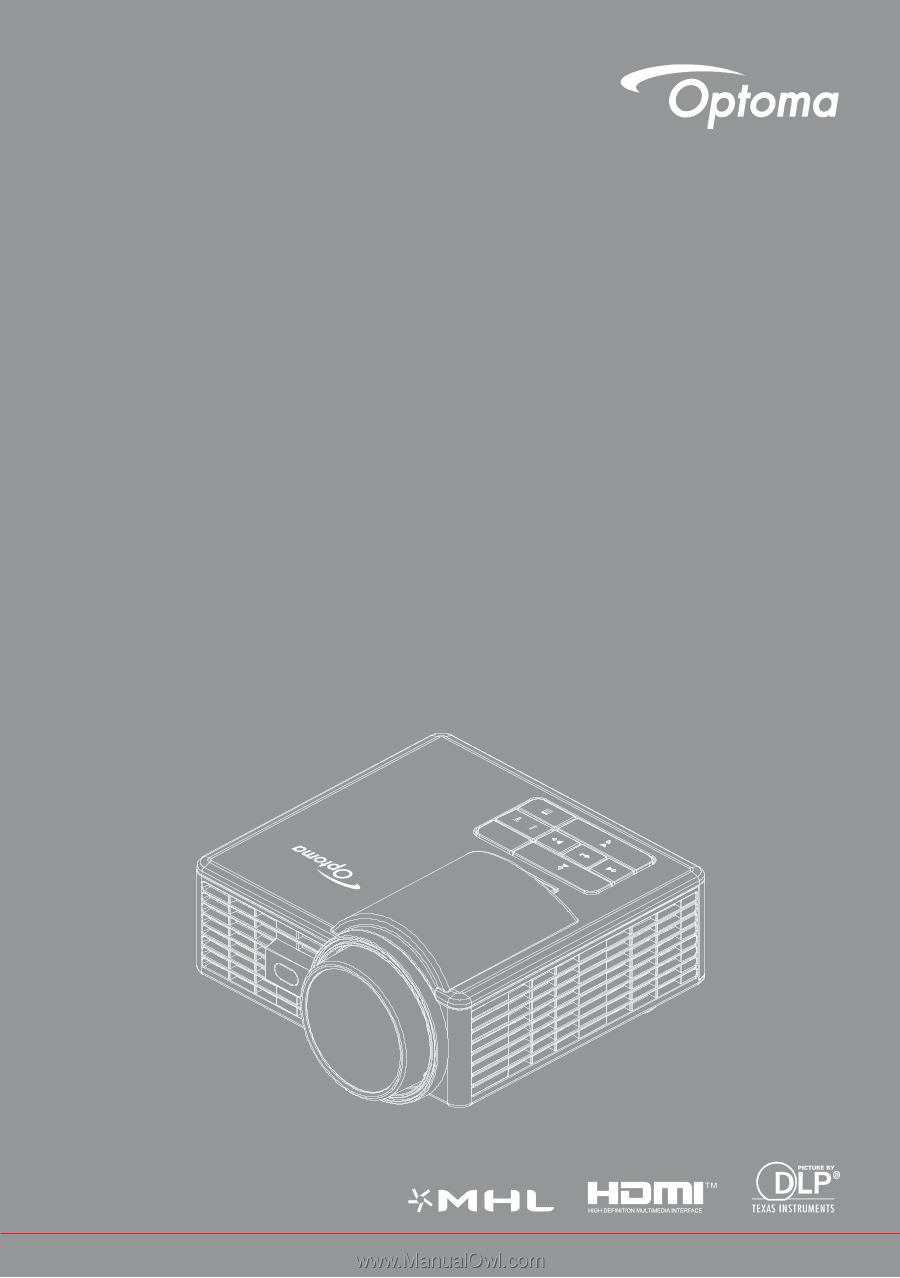
- Optoma ML1050ST | ML1050ST User Manual - Page 1
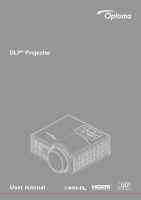
DLP® Projector User manual - Optoma ML1050ST | ML1050ST User Manual - Page 2
to Multi-Media...19 Turning On/Off the Projector 20 Turning Your Projector On 20 Turning Your Projector Off 20 Adjusting the Projected Image 21 Raising the Projector Height 21 Lowering the Projector Height 21 Adjusting Projection Image Size 22 User Controls...24 Using the On-Screen Display - Optoma ML1050ST | ML1050ST User Manual - Page 3
the Screen of the Portable Device 47 Auto Play Feature (Digital Signage Mode 50 Playback...50 Error Message...52 Power on/off...52 Appendices...53 Troubleshooting...53 Guiding Signals...55 Compatibility Modes (HDMI/VGA 56 Tripod Mount the Projector...57 Specification...58 English 3 - Optoma ML1050ST | ML1050ST User Manual - Page 4
to alert the user to the presence of important operating and maintenance (servicing) instructions in the literature projector or something is loose inside. Do not attempt to service the unit yourself. Opening or removing covers may expose you to dangerous voltages or other hazards. Please call Optoma - Optoma ML1050ST | ML1050ST User Manual - Page 5
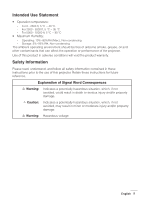
warranty. Safety Information Please read, understand, and follow all safety information contained in these instructions prior to the use of this projector. Retain these instructions for future reference. Explanation of Signal Word Consequences Warning: Indicates a potentially hazardous situation - Optoma ML1050ST | ML1050ST User Manual - Page 6
: yy Do not modify this product in any way. yy Do not attempt to service this projector. yy There are no user-serviceable parts. Service to be performed only by a Optoma authorized service provider using Optoma approved system components. yy Do not use the wall power supply in a wet environment - Optoma ML1050ST | ML1050ST User Manual - Page 7
falling: yy Position the charging cord and data cables so that they are not a tripping hazard. Important Note: Do not expose the projector to direct sunlight in a closed space such as a vehicle. SAVE THESE INSTRUCTIONS Safety Labels MnO2-LiCECLLR2302V5OL Remote Control Model No. IR28012 English 7 - Optoma ML1050ST | ML1050ST User Manual - Page 8
Trademarks Optoma and the Optoma logo are trademarks of Optoma Company. Adobe and the Adobe logo are either registered trademarks or trademarks of Adobe Systems Incorporated in the United States and/or other countries. Microsoft, - Optoma ML1050ST | ML1050ST User Manual - Page 9
with the instruction manual may cause interference to radio communications. It has been tested and found projector. Use the cables which are included with the projector or specified. Note: Changes or modifications not expressly approved by the party responsible for compliance could void the user - Optoma ML1050ST | ML1050ST User Manual - Page 10
CE Statement ElectroMagnectic Compatibility Statement: Meets 2004/108/EC Directive Low Voltage Directive: Meets 2006-95-EC Directive. WEEE Statement The following information is only for EU-members States: The mark shown to the right is in compliance with Waste Electrical and Electronic Equipment - Optoma ML1050ST | ML1050ST User Manual - Page 11
. Ensure that you have all the items, and contact your local reseller or service center if anything is missing. Projector Lens cap Power cable AC adapter Universal 24-pin to VGA cable Basic user manual and documentation Carrying case Remote control Note: The remote control is shipped with - Optoma ML1050ST | ML1050ST User Manual - Page 12
3 Input / Output connections 8 Tilt adjusting wheel 4 Lens 9 Screw hole for tripod 5 Ventilation (outlet) Note: - Do not block projector intake and exhaust vents. - When operating the projector in an enclosed space, allow at least 15cm clearance around the intake and exhaust vents. 12 English - Optoma ML1050ST | ML1050ST User Manual - Page 13
Input / Output Connections 1 2 7 6 5 # Description 1 MicroSD card slot 2 USB Type A connector 3 DC input connector 4 Head phone connector 5 HDMI / MHL connector 6 Universal I/O connector 7 Security cable slot 4 3 English 13 - Optoma ML1050ST | ML1050ST User Manual - Page 14
will automatically shut down. 3 Temp LED If the TEMP amber indicator is blinking, one of the following problems could be occurring: yy Internal temperature of the projector is too high. yy The fans has failed. 4 Menu Press to activate the OSD. Use the directional keys and the Menu button - Optoma ML1050ST | ML1050ST User Manual - Page 15
Remote Control 1 2 3 4 5 6 7 8 9 # Name Description 10 1 Power Turns the projector on or off. 11 2 Home Press to return to the home page. 12 3 Mute 13 14 4 Enter 15 5 Menu Press to mute/unmute audio and/ - Optoma ML1050ST | ML1050ST User Manual - Page 16
Installing the Remote Control Battery 1. Remove the battery holder by holding down the side release firmly and pulling out the battery holder. 2. Insert a CR2025 coin cell battery and align the polarity correctly according to the marking in the battery holder. CR2302V5OL TS Note: When you use - Optoma ML1050ST | ML1050ST User Manual - Page 17
1 Power cord 2 AC adapter 3 Audio cable (*1) 4 USB-A to USB-A cable (*2) 5 HDMI cable (*2) 6 Universal 24-pin to VGA cable Note: - (*1)The projector supports only TRS-type audio cables (without microphone function); with some headsets, due to the impedance difference, you might notice a slight - Optoma ML1050ST | ML1050ST User Manual - Page 18
Connecting to a DVD Player 1 3 2 # Description 1 Power cord 2 AC adapter 3 HDMI cable (*2) Note: (*2)The accessory is not shipped with your projector. 18 English - Optoma ML1050ST | ML1050ST User Manual - Page 19
1 Smart Phone 4 6 5 3 2 # Description 1 Power cord 2 AC adapter 3 Audio cable(*1) 4 USB flash disk (*2) 5 MicroSD card (*2) 6 MHL cable (*2) Note: - (*1)The projector supports only TRS-type audio cables (without microphone function); with some headsets, due to the impedance difference, you might - Optoma ML1050ST | ML1050ST User Manual - Page 20
disappears after 5 seconds or you can press the Menu button to clear it. 1. Press the Power button. Follow the instruction displayed on screen to properly turn off the projector. 2. Press the Power button again. The cooling fans continue to operate for 3~5 seconds. 3. Disconnect the power cord and - Optoma ML1050ST | ML1050ST User Manual - Page 21
to the desired display angle, and use the front tilt adjustment wheel to fine-tune the display angle. Lowering the Projector Height Lower the projector, and use the front tilt adjustment wheel to fine-tune the display angle. Front tilt adjustment wheel (Angle of tilt: 0 to 3 degrees) Important - Optoma ML1050ST | ML1050ST User Manual - Page 22
Adjusting Projection Image Size 100" (254.0 cm) 22 English Projector to screen distance 5.65' (1.723 m) 5.09' (1.551 m) 4.52' (1.379 m) 3.96' (1.206 m) 3.39' (1.034 m) 90" (228.6 cm) 80" (203.2 cm) 70" (177.8 cm) 60" (152.4 cm)) 50" (127.0 cm) 2.83' (0.862 m) - Optoma ML1050ST | ML1050ST User Manual - Page 23
" (203.2 cm) 67.72" (172 cm) 90" (228.6 cm) 76.38" (194 cm) 100" (254.0 cm) 84.65" (215 cm) Note: This graph is for user reference only. Height 26.38" (67 cm) 31.89" (81 cm) 37.01" (94 cm) 42.52" (108 cm) 47.64" (121 cm) 53.15 - Optoma ML1050ST | ML1050ST User Manual - Page 24
User Controls Using the On-Screen Display 1. The projector has a multi-language On-Screen Display (OSD) Menu Input Source: Select your projector's input source. The options are: VGA, HDMI / MHL, and Media. Volume: Adjust the volume. Note: Audio output is not supported in VGA mode. Display Mode - Optoma ML1050ST | ML1050ST User Manual - Page 25
be changed when you select image settings. - In 3D mode, the maximum supported input timing is 1024x768 @ 120Hz. Format: Select the format to adjust how . Options are: yy Auto: Maintain the aspect ratio of the image projector according to the input source. yy 4:3: The input source scales to fit - Optoma ML1050ST | ML1050ST User Manual - Page 26
used to adjust the image distortion vertically. Keystone: Adjust image distortion caused by tilting the projector (+/-40 degrees). Note: If you adjust the keystone degree manually then the Auto Keystone function will be automatically switched off. Projection: Select the projection mode, depending - Optoma ML1050ST | ML1050ST User Manual - Page 27
on the remote control. Sleep Timer: Set the countdown timer interval. The countdown timer will start, with or without a signal being sent to the projector. The projector will automatically power off when the countdown has finished. Options are: Auto, Off, 0:30, 1:00, 3:00, 8:00, 12:00. Note: If the - Optoma ML1050ST | ML1050ST User Manual - Page 28
this option, a confirmation message appears on the screen. Select "Yes" to confirm or "No" to cancel reset. Reset Reset ? No Yes Ver.: View the current projector's firmware version. 28 English - Optoma ML1050ST | ML1050ST User Manual - Page 29
If you want to project images from iDevice, connect the device to the projector through the Lightning HDMI adapter, set input source to HDMI, enable iDevice image. Note: Saturation can be only adjusted in HDMI mode with supported video timings 1080p/i, 720p, and 480p/i. Hue: Adjust the hue of the - Optoma ML1050ST | ML1050ST User Manual - Page 30
Multi-Media Introduction Multi-media format supported: Photo Format Image Type (Ext Name) Sub Type Encode Type Jpeg / Jpg Baseline YUV420 YUV422 YUV440 YUV444 Progressive YUV420 YUV422 YUV440 YUV444 BMP Max Size - Optoma ML1050ST | ML1050ST User Manual - Page 31
22-48 8-48 8-48 8-48 Bit Rate (Kbps) 8-320 5-320 32-384 128-1536 8-256 Office Viewer Format File Format Support Version Page/Lines Limitation Size Limitation Adobe PDF PDF 1.0, 1.1, 1.2, 1.3, 1.4 Up to 1000 pages (One File) Up to 75MB MS Word British Word 95, Word 97, 2000, 2002, 2003 Word - Optoma ML1050ST | ML1050ST User Manual - Page 32
2010(.pptx) Office XP PowerPoint PowerPoint presentation 2003 and earlier (.ppx) PowerPoint presentation 2007 and 2010 (.ppsx) Note: - Animations are not supported when viewing MS PowerPoint files. - When projecting files, some documents may not be displayed the same as shown on the screen of - Optoma ML1050ST | ML1050ST User Manual - Page 33
don't connect USB port for camera since it would be exist compatibility problem. Follow these steps to playback the Photo, Video, or Music files on your projector: 1. Connect the power cable with AC adapter and turn on the projector by pressing the Power button. 2. Plug in a USB flash disk to your - Optoma ML1050ST | ML1050ST User Manual - Page 34
3. Select the HD Media menu. The HD Media menu opens. Internal Memory SD Card USB Settings 4. Access the USB menu and select the multimedia files: Photo, Video, or Music. Or select the Settings option to change settings for Photo, Video, or Music. 5. Select the file you want to open. Office - Optoma ML1050ST | ML1050ST User Manual - Page 35
. Follow these steps to playback the Photo, Video, or Music files on your projector: 1. Connect the power cable with AC adapter and turn on the projector by pressing the Power button. 2. Plug in a MicroSD card to your projector. The Multi-Media menu opens. HD Media Note: To open the Main Menu - Optoma ML1050ST | ML1050ST User Manual - Page 36
3. Select the HD Media menu. The HD Media menu opens. Internal Memory SD Card USB Settings 4. Access the SD Card menu and select the multimedia files: Photo, Video, or Music. Or select the Settings option to change settings for Photo, Video, or Music. 5. Select the file you want to open. - Optoma ML1050ST | ML1050ST User Manual - Page 37
want to use the multimedia microSD function. Follow these steps to playback the Photo, Video, or Music files on your projector: 1. Connect the power cable with AC adapter and turn on the projector by pressing the Power button. The Multi-Media menu opens. HD Media Note: To open the Main Menu, press - Optoma ML1050ST | ML1050ST User Manual - Page 38
2. Select the HD Media menu. The HD Media menu opens. Internal Memory SD Card USB Settings 3. Access the Internal Memory menu and select the multimedia files: Photo, Video, or Music. Or select the Settings option to change settings for Photo, Video, or Music. 4. Select the file you want to open - Optoma ML1050ST | ML1050ST User Manual - Page 39
Multi-Media Main Menu HD Media Multi-Media SETTINGS for System, USB, MicroSD, and Internal Memory The multi-media settings menu allows you to change settings for System, Photo, Video, and Music. Internal Memory SD Card USB Settings System Photo Video Music Note: Multi-media setup menu and - Optoma ML1050ST | ML1050ST User Manual - Page 40
System Settings Access the system settings menu. The system settings menu provides the following options: System Version Update C03.2015-10-14 18:13:12 USB Version View the current projector's firmware. Update Update the projector firmware only from the USB stick. 40 English - Optoma ML1050ST | ML1050ST User Manual - Page 41
automatically switch to the next photo after the time out. Options are: 10 sec, 30 sec, 1 min. Note: Slideshow Duration, and Slideshow Pattern function only support Slideshow mode. English 41 - Optoma ML1050ST | ML1050ST User Manual - Page 42
Video Setup Access the video settings menu. The video setting menu provides the following option: Video Display Ratio Repeat Mode Letter box Sequence Display Ratio Select the display ratio of the Video. yy Letter box: If the video source does not fit a 16:10 screen then the video image is - Optoma ML1050ST | ML1050ST User Manual - Page 43
Music Setup Access the music settings menu. The music settings menu provides the following option: Music Repeat Mode Sequence Repeat Mode Select the music play mode. Options are: Sequence, Single, Random. English 43 - Optoma ML1050ST | ML1050ST User Manual - Page 44
multi-media menu, you can copy files directly to the projector or mirror the screen of your portable device. Project Files from files from your PC: 1. Connect the power cable with AC adapter and turn on the projector by pressing the Power button. 2. To access files from the hard disk of your PC, - Optoma ML1050ST | ML1050ST User Manual - Page 45
The Multi-Media menu opens. HD Media 3. Select the Connect to PC menu. Connect to PC English 45 - Optoma ML1050ST | ML1050ST User Manual - Page 46
memory on your PC. Then copy the files from your PC into the projector's internal memory. 5. Select the HD Media > Internal Memory menu and select the OS 10.9, you can also save files from your PC directly to the projector's internal memory or to the micro SD card that has been inserted into the - Optoma ML1050ST | ML1050ST User Manual - Page 47
Mirroring the Screen of the Portable Device Follow these steps to mirror the screen of your portable device: 1. Connect the power cable with AC adapter and turn on the projector by pressing the Power button. The Multi-Media menu opens. HD Media 2. Select the HDCast Pro menu. HDCast Pro English 47 - Optoma ML1050ST | ML1050ST User Manual - Page 48
HDCast Pro menu with your mobile device and then follow the on-screen instructions to install the HDCast Pro app. If you are using a laptop, download HDCast Pro app from www.optoma.com/hdcastpro website. 4. Plug in a Wi-Fi dongle to your projector. 5. Connect your portable device via Wi-Fi to the - Optoma ML1050ST | ML1050ST User Manual - Page 49
The following screen opens. Android Photo Camera Music Video Document Web Cloud Video Cloud Storage Split Screen Preference AirView Windows Mirror Off Quality Audio Compatible Music Video Web Cloud Video Air View Split Screen Preference Update HDMirror Setting Setting 7. - Optoma ML1050ST | ML1050ST User Manual - Page 50
Auto Play Feature (Digital Signage Mode) Playback 1. Content Full screen playback video files. No Image and ticker. 2. Video/Audio Codec The supported file formats are listed below: Ext. filename Video Codec *1 Audio Codec *1 Note *1 .AVI XVID MPEG1,2-audio layer (mpga) .MPG, .AVI MPEG2( - Optoma ML1050ST | ML1050ST User Manual - Page 51
system will autodisable "playback info window" (pause/start/next/previous/progress bar...) during signage mode. 6. Error handling If the system gets an un-supported video file in file list, the system will skip this file. 7. Remote and keypad handling During "signage mode", touchpad and "Up", "Down - Optoma ML1050ST | ML1050ST User Manual - Page 52
video file If the microSD card inserted, but no any video file in "Signage" folder, the system will show a message window to notify the end user. An example of message window: 2. MicroSD card is removed If the microSD card is removed during playback, the system will show a message window to notify - Optoma ML1050ST | ML1050ST User Manual - Page 53
If you experience problems with your projector, see the following troubleshooting tips. If the problem persists, contact your local reseller or service center. Problem Possible Solution No image appears on the screen yy Ensure that the projector is turned on. yy Ensure that you have - Optoma ML1050ST | ML1050ST User Manual - Page 54
The display automatically shuts down. Turn the display on again after the projector cools down. If the problem persists, contact Optoma. yy If the projector fan fails, the projector will automatically shut down. Clear the projector mode by pressing and holding the Power button for 10 seconds. Please - Optoma ML1050ST | ML1050ST User Manual - Page 55
Flashing (Cycling turn-off 1sec and turn-on 3sec) One of the fans has failed. The Amber flashing Amber OFF projector automatically shuts down. If and Blue ON the problem persists, contact us. Flashing (Cycling turn-off 0.5sec and turn-on 2sec) LED shutdown. OFF OFF Amber Note: If there - Optoma ML1050ST | ML1050ST User Manual - Page 56
Compatibility Modes (HDMI/VGA) Signal Mode HDMI, VGA(via Universal port) HDMI, YPbPr(via Universal port) VGA SVGA XGA SXGA WXGA WXGA WXGA WXGA+ SXGA+ WSXGA+ 480i 480p 576i 576p 720p 1080i 1080p Note: (*)3D timing for TI DLP 3D. Resolution 640 x 480 800 x 600 1024 x 768 1280 x 1024 1280 x 768 - Optoma ML1050ST | ML1050ST User Manual - Page 57
Tripod Mount the Projector Screw a standard tripod into the screw hole on the projector. Note: Please note that damage resulting from incorrect installation will void the warranty. Unit: mm 42.0 56.25 Insert Nut 1/4" - 20 UNC (Screw hole for tripod) English 57 - Optoma ML1050ST | ML1050ST User Manual - Page 58
LED life=20,000hrs) Manual focus 50" ~ 100 100 - 240V ±10%, AC 50/60Hz, Output 19V DC (to projector), Standby Mode < = 0.5W AC in 1.7A (DC in 3,42A support) - Supports Host mode for USB storage disk (USB 2.0 support up to 64GB). - Supports WiFi dongle - Supports 5V/0.5A power for 3C device - Supports - Optoma ML1050ST | ML1050ST User Manual - Page 59
www.optoma.com
-
 1
1 -
 2
2 -
 3
3 -
 4
4 -
 5
5 -
 6
6 -
 7
7 -
8
-
9
-
10
-
11
-
12
-
13
-
14
-
15
-
16
-
17
-
18
-
19
-
20
-
21
-
22
-
23
-
24
-
25
-
26
-
27
-
28
-
29
-
30
-
31
-
32
-
33
-
34
-
35
-
36
-
37
-
38
-
39
-
40
-
41
-
42
-
43
-
44
-
45
-
46
-
47
-
48
-
49
-
50
-
51
-
52
-
53
-
54
-
55
-
56
-
57
-
58
-
59
 |
 |
DLP
®
Projector
User manual