Oreck Air 6 Owners Guide - Page 21
Transformer Removal and Replacement, Motor, Removal and Replacement
 |
View all Oreck Air 6 manuals
Add to My Manuals
Save this manual to your list of manuals |
Page 21 highlights
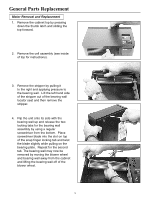
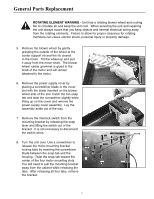
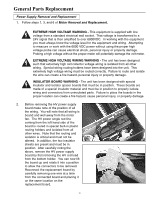
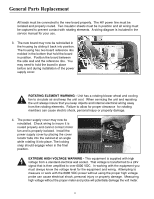
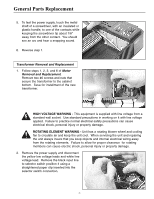
General Parts Replacement 5. To test the power supply, touch the metal shaft of a screwdriver, with an insulated or plastic handle, to one of the contacts while keeping the screwdriver tip about 1/8" away from the other contact. You should see an arc and hear a snapping sound. 6. Reverse step 1. Transformer Removal and Replacement 1. Follow steps 1, 2, 3, and 6 of Motor Removal and Replacement. Remove two #6 screws and nuts that secure the transformer to the cabinet bottom. Save for installment of the new transformer. HIGH VOLTAGE WARNING - This equipment is supplied with line voltage from a standard wall socket. Use standard precautions in working on it with line voltage applied. Failure to practice normal electrical safety precautions can cause electrical shock, personal injury or property damage. ROTATING ELEMENT WARNING - Unit has a rotating blower wheel and cooling fan to circulate air and keep the unit cool. When servicing the unit and repairing the unit always insure that you keep objects and internal electrical wiring away from the rotating elements. Failure to allow for proper clearance for rotating members can cause electric shock, personal injury or property damage. 2. Remove the power supply and disconnect the yellow low voltage leads and white line voltage lead. Remove the black input line to selector switch position 4 using a straightened paper clip inserted into the selector switch connection. 21
-
 1
1 -
2
-
3
-
4
-
5
-
6
-
7
-
8
-
9
-
10
-
11
-
12
-
13
-
14
-
15
-
 16
16 -
 17
17 -
 18
18 -
 19
19 -
 20
20 -
 21
21 -
 22
22 -
 23
23 -
 24
24 -
 25
25 -
 26
26 -
27
-
28
 |
 |
