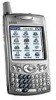
Palm Treo 650 User Guide
Palm Treo 650 - Smartphone 23 MB Manual
 |
UPC - 805931012661
View all Palm Treo 650 manuals
Add to My Manuals
Save this manual to your list of manuals |
Palm Treo 650 manual content summary:
- Palm Treo 650 | User Guide - Page 1
using your Treo™ 650 smartphone by palmOne Includes setup information and instructions for most tasks - Palm Treo 650 | User Guide - Page 2
guide. palmOne, Inc. and its suppliers assume no responsibility for any loss or claims by third parties that may arise through the use of this software. palmOne, Inc. and its suppliers assume no responsibility for any damage or loss caused by deletion of data as a result of malfunction, dead battery - Palm Treo 650 | User Guide - Page 3
you'll need 45 Using voicemail 7 Treo smartphone overview 46 Managing active calls 11 Installing the battery 49 More ways to manage calls 12 Charging the battery 53 Defining favorite buttons 14 Inserting the SIM card 56 Using a phone headset 15 Turning Treo on and off 58 Connecting to - Palm Treo 650 | User Guide - Page 4
and time settings 153 Power Preferences 154 Locking your phone and info 161 if something happens: help 162 Upgrading from another Palm Powered™ device 167 Trouble installing the desktop software? 168 Resetting your Treo 170 Replacing the battery 171 Screen 172 Network connection 175 Synchronization - Palm Treo 650 | User Guide - Page 5
Welcome Congratulations on the purchase of your Treo™ 650 smartphone by palmOne. In one compact and indispensable device, you now have all of the following: • An advanced mobile phone* • A Palm Powered™ organizer with portable expansion capability (MultiMediaCard/ Secure Digital/Secure Digital - Palm Treo 650 | User Guide - Page 6
This guide is designed to get you using your Treo™ 650 smartphone by palmOne quickly, starting with just the basics. As you become more comfortable with your Treo 650 smartphone and want to learn more, come back and read the other sections. Read this Now: Getting Started Follow the instructions to - Palm Treo 650 | User Guide - Page 7
read this now: getting started read this now: getting started :: 5 - Palm Treo 650 | User Guide - Page 8
through the instructions in this guide, you'll need all the items that came in the Treo™ 650 smartphone box (see "Treo smartphone overview" on page 7) as well as the following: • A subscriber identity module (SIM) card for which you have an activated mobile account with data services* • A location - Palm Treo 650 | User Guide - Page 9
650 smartphone box: Hardware • Treo handset • Your wireless service provider's SIM card • AC charger • USB sync cable • Headset • Electric socket adapter(s) (if required in region) Documentation and software • Using Your Treo 650 Smartphone (this guide) • Software Installation CD (includes desktop - Palm Treo 650 | User Guide - Page 10
the locations and names of the physical features of the Treo 650 smartphone. Refer to these illustrations while following the instructions in this guide. A B C F E D A. Ringer switch B. Infrared (IR) port C. Antenna D. SIM slot E. Expansion card slot F. Stylus 8 :: Treo smartphone overview - Palm Treo 650 | User Guide - Page 11
Phone/Send button K. Side button L. Volume button C D E F G H Be careful not to scratch or crush your Treo screen. Do not store it in a place where other items might damage it. Visit www.palmOne.com/intl to find carrying cases that protect the screen and other useful accessories. Treo smartphone - Palm Treo 650 | User Guide - Page 12
. A. Camera lens* B. Self-portrait mirror C. Battery door release D. Speaker * There are two models of Treo 650: One model has a built-in camera and the other model does not have a camera. The packaging for your Treo 650 identifies if a camera is included. 10 :: Treo smartphone overview - Palm Treo 650 | User Guide - Page 13
place. 4. Slide the battery door onto the back of the phone until it clicks into place. 5. When the Welcome screen appears, follow the onscreen instructions to set up your Treo 650. B A C D A. Battery Door Release button B. Battery contacts C. Notch D. Phone contacts Installing the battery :: 11 - Palm Treo 650 | User Guide - Page 14
light indicates the charging state. Before using your Treo 650 smartphone, you need to charge the battery. It may not turn on at all when charger cable to the bottom of the Treo. Make sure the arrow on the connector is facing up, toward your Treo screen. A A. Indicator light 3. To confirm your Treo - Palm Treo 650 | User Guide - Page 15
After you turn on your Treo smartphone, the onscreen battery icon displays power status: • Full battery icon : Battery is charged • Partial battery icon : Battery has some power and is not charging • Empty battery icon : Battery needs charging immediately • Red lightning bolt : Charging • Green - Palm Treo 650 | User Guide - Page 16
Your wireless service provider may already have inserted the SIM card into your Treo. In that case, skip to "Turning Treo on and off account information such as your phone number and voicemail access number. To use the phone, email, or web features of your Treo 650 smartphone, you need to insert - Palm Treo 650 | User Guide - Page 17
off You can use the Palm OS® features of your Treo 650 smartphone independently of the wireless features and applications. In other words, the screen and phone are designed to be turned off and on separately. Turning your phone on and off When you turn on your Treo, it connects to a mobile network - Palm Treo 650 | User Guide - Page 18
area and this problem persists, contact your wireless service provider for assistance. If you are inside a coverage and cannot complete a call, your SIM card may not be activated. Please contact your wireless service provider for assistance. We recommend that you charge your Treo 650 smartphone for - Palm Treo 650 | User Guide - Page 19
is in progress, press the Volume button on the side of your Treo to adjust call volume. A B A. Volume button B. Side button What's my number? 1. Make sure your phone is on (see "Turning your phone on and off" on page 15). 2. Press Phone/Send . 3. Press Menu . 4. Select Options, and then select - Palm Treo 650 | User Guide - Page 20
- Palm Treo 650 | User Guide - Page 21
first day: learning the basics first day: learning the basics :: 19 - Palm Treo 650 | User Guide - Page 22
instead. In this guide, we use arrow icons to indicate directions on the 5-way. These are different from any onscreen arrows that you tap with your stylus or select with the 5-way to display pick lists. 5-way buttons: Onscreen arrows: To move around the Treo™ 650 smartphone screen, you can use - Palm Treo 650 | User Guide - Page 23
an onscreen scroll bar. Once you've opened an application (see "Opening applications" on page 28), you can experiment with using list is highlighted, the button acquires a glow around its border. • When a phone number, email address, or web link is highlighted on a web page or in Treo screen :: 21 - Palm Treo 650 | User Guide - Page 24
buttons Command buttons such as New, OK, and Details appear at the bottom of the screen. In many cases, you can jump directly to these buttons instead of scrolling to them. • From a list screen, such You can also select an item by tapping it with the stylus. 22 :: Moving around the Treo screen - Palm Treo 650 | User Guide - Page 25
Treo, it's a good idea to familiarize yourself with the additional features available through the various application menus. 1. Press Menu to display an application's list and cancel your selection, press Left or Right . • Use your stylus to tap the pick list, and then tap the item you want from - Palm Treo 650 | User Guide - Page 26
The keyboard backlight I D may not be visible in bright sunlight. H E A. Applications B. Menu C. Backspace D. Return E. Right Shift F. Alt G. Space H. Shift/Find I. Option G F Using the keyboard backlight Treo includes a keyboard backlight for low light conditions. The keyboard backlight - Palm Treo 650 | User Guide - Page 27
list of all the alternate characters. Open the Edit menu and select Keyboard Help. Some application views automatically default to Option Lock, such as the Dial Pad View in the Phone application or the Calculator. In this case, you do not have to press and hold Option to enter numbers. The alternate - Palm Treo 650 | User Guide - Page 28
Symbols and accented characters Enter... a then press Alt to select... Enter... o then press Alt to select... Enter... 0 then press Alt to select... % ‰ ° A O 1 b or B ß c C d † ‡ D † ‡- D e é è ë ê E É È Ë Ê p or P % r or R ® s ß Šs § S ß ŠS § t or T u - Palm Treo 650 | User Guide - Page 29
Symbols and accented characters Enter... f or F i then press Alt to select... ƒ í ì ï î I Í Ì Ï Î l or L £ m or µ M n ñ N Ñ Enter... then press Alt to select... x or X x y ÿ ¥ Y Ÿ ¥ Enter... ' " then press Alt to select... ' ' < > ~ ` " " « » $ £ ¥ ¢ + & - / % \ ÷ | # - Palm Treo 650 | User Guide - Page 30
Buttons Preferences" on page 150 for details. Your wireless service provider may have customized the applications associated with each button There are three application buttons on the front of the Treo 650 smartphone. The fourth button turns your phone on and off, wakes up the screen, and controls - Palm Treo 650 | User Guide - Page 31
Primary application Phone/Send Calendar Messaging Power/End (on/off) Secondary application + Web browser + Memos + VersaMail® + Keyguard In Palm OS®, you access all available applications through the Applications View: 1. Press Applications . 2. Use the 5-way navigator to highlight the application - Palm Treo 650 | User Guide - Page 32
lets you enter information on your computer (using Palm® Desktop software or Microsoft Outlook for Windows) and then efficiently transfer that info to your Treo 650 smartphone. At the same time, changes you make on your Treo are transferred to Palm Desktop or Microsoft Outlook. Even if you manage - Palm Treo 650 | User Guide - Page 33
computer. 3. Connect the sync cable to the Multi-connector on the bottom of your Treo with the HotSync® button facing up. Do not press the HotSync button until you are instructed to do so. 4. Connect the charger cable to the Multi-connector on the sync cable. For best performance, plug your sync - Palm Treo 650 | User Guide - Page 34
in the background. 2. Insert the palmOne Software Installation CD into the CD drive on your computer. If you are installing on a Mac, double-click the CD icon on the desktop, and then double-click the palmOneSoftware.pkg icon. 3. Follow the onscreen instructions of the installation program. Please - Palm Treo 650 | User Guide - Page 35
(and backed up) in both locations. If you installed Palm Desktop software, the HotSync Manager icon should appear in the lower-right corner of your computer screen. 1. Connect your Treo 650 smartphone to your computer, as described in "Connecting your Treo to your computer" on page 31. 2. Press the - Palm Treo 650 | User Guide - Page 36
want to synchronize information with applications other than Palm Desktop or Microsoft Outlook, you need to purchase additional third-party conduit software. • If you have any problems synchronizing, see "Synchronization (HotSync®)" on page 175 for troubleshooting suggestions. 34 :: Synchronizing - Palm Treo 650 | User Guide - Page 37
the camera (if included), games, media players, eBooks, or other Palm OS applications, keep an eye on the battery icon and charge when necessary. • If you don't plan to use the wireless features on your Treo for a while, you may want to turn off your phone (see "Turning your phone on and off" on - Palm Treo 650 | User Guide - Page 38
in that dialog box. • Online support from palmOne: For up-to-date downloads, troubleshooting, and support information, check out www.palmOne.com/intl/support/treo650. If you need more information • Books: Many books on Palm Powered devices, such as "Now You Know Treo", are available in local or - Palm Treo 650 | User Guide - Page 39
first week: using phone, web, and messaging first week: using phone, web, and messaging :: 37 - Palm Treo 650 | User Guide - Page 40
The Phone application lets you make and receive calls and store favorites for contacting people and opening applications. Be sure you know how to turn on your phone before reading this section (see "Turning your phone on and off" on page 15). Accessing the Phone application • Press the Phone/Send - Palm Treo 650 | User Guide - Page 41
. If you are outside a coverage area, no bars appear. The triangle appears when your phone is on and a GPRS or EDGE network is within range. Some service providers do not show the triangle. To display the remaining battery power, tap the battery icons at the top of the screen. If ALS is active and - Palm Treo 650 | User Guide - Page 42
the icon changes from red to clear. Appears when your Treo battery is charging. The lightening bolt turns from red to green when the battery is fully charged and your phone remains connected to the AC charger. Appears when your Treo battery is fully charged. Indicates the number of unread text and - Palm Treo 650 | User Guide - Page 43
102). If you changed the wallpaper in the Main View of the Phone application (see "Selecting wallpaper for the Phone application" on page 145), you can still access the Dial Pad. From the Main View of the Phone application, press Phone/ Send, and then select Dial Pad. You can paste numbers directly - Palm Treo 650 | User Guide - Page 44
. 4. Press Center to dial the selected button. Dialing from a web page or message Treo recognizes most phone numbers that appear in web pages or in text, email, or multimedia messages. 1. Use the 5-way to highlight the phone number you want to dial in the web page or text message. 2. Press Center to - Palm Treo 650 | User Guide - Page 45
also access the Call Log by pressing Phone/Send twice, and then selecting Call Log from the recent call list. If you can't highlight and dial a phone number on a web page or in a text message using the 5-way or stylus, it means that Treo does not recognize it as a phone number. Dialing calls :: 43 - Palm Treo 650 | User Guide - Page 46
. To silence the ringer while your phone is ringing: • Press the Volume button or any key on your Treo except Phone/Send, Power/End, or the 5- through to voicemail. If music is playing, and a call arrives, the phone rings softly. The audio continues playing, but you won't hear it during your call - Palm Treo 650 | User Guide - Page 47
top of your screen (this feature is not supported by all mobile networks). Retrieving voicemail messages 1. Press Phone/Send . 2. From the Phone application Main View, Dial Pad, or Favorites, press and hold 1 on the keyboard. Treo dials your wireless service provider's voicemail system. 3. Enter - Palm Treo 650 | User Guide - Page 48
the Active call screen and the Main View of the Phone application. To avoid accidentally pressing onscreen buttons while you're holding the phone up to your ear to speak, you can disable the screen's touch-sensitive feature during active calls (see "Using Auto-Keyguard and touchscreen lockout - Palm Treo 650 | User Guide - Page 49
button when a call is on hold. Opens the Dial Pad so you can manually dial additional numbers. Dials any extra digits (such as a password or extension) on page 53 for information on creating a Speed Dial favorite button. Mutes the Treo microphone so that you cannot be heard. Ending a call Do one of - Palm Treo 650 | User Guide - Page 50
active call from another application You can use many other applications on your Treo while holding a phone conversation, including the organizer and SMS features. You cannot browse the web or send and receive email while on an active call. • From any application, press Phone/Send to return to the - Palm Treo 650 | User Guide - Page 51
Power/End . You can use most of the other application on your Treo while holding a phone conversation, including text messaging and organizer features such as Calendar and Memos. To return to an active call from another application, press Phone/ Send. You cannot make a data connection or use the - Palm Treo 650 | User Guide - Page 52
After you set your call forwarding options, call your Treo to confirm that call forwarding is active. Making a conference call You can join a total of five other calls in a conference session, provided that your network and service plan include 6-way conferencing. Please contact your wireless - Palm Treo 650 | User Guide - Page 53
a forwarding number, including the area code or country code if it is different from your mobile phone number. Select OK. 5. Select OK. Forwarding calls under certain conditions You can forward calls to another number when the line is busy, a call is unanswered, your phone is off, or you are outside - Palm Treo 650 | User Guide - Page 54
calls on your Treo. This feature may not be available on all mobile networks. You must enter your Call Barring password every time you change your Call Barring preferences. Contact your wireless service reset the counters to zero, select Reset Counters. 5. Select Done. - Palm Treo 650 | User Guide - Page 55
onscreen Dial Pad. • Opening an application • Accessing a web page • Addressing a text, MMS, or email message • Accessing voicemail (preset on Treo) Your wireless service provider may include special favorite buttons on your Treo that are customized for their services To see the next Favorites page - Palm Treo 650 | User Guide - Page 56
Number. 6. (Optional) Enter a Quick Key. When you are in the Phone application, you can press and hold the Quick Key to instantly open the favorite. 7. (Optional) Select the Ringtone pick list and select a special ringtone for incoming calls from that contact. 8. (Optional) Select More, and select - Palm Treo 650 | User Guide - Page 57
changes. For example, you can add a Quick Key shortcut to any favorite. When you press and hold the assigned key from within the Phone application, the favorite opens. 7. To delete the entry, select Delete. 8. Select OK. You can also organize your buttons on different Favorites pages. Open the - Palm Treo 650 | User Guide - Page 58
technology and you want to return to the handset or a wired headset during a call, select Cancel Bluetooth on the Active Call screen. You can connect a phone headset for hands-free operation. If you need to use your phone while driving and this is permitted in your area, we recommend using - Palm Treo 650 | User Guide - Page 59
through the jack (such as music), you should use a stereo adapter or other accessory. Visit www.palmOne.com/ intl for more information on audio accessories and for the latest compatibility info. The headset designed for Treo 180/270/300 is not compatible with Treo 650. Using a phone headset :: 57 - Palm Treo 650 | User Guide - Page 60
is within range (30 feet), Treo automatically routes all calls to the hands-free device instead of to the handset. When a call comes in, your Treo rings and the headset beeps. Even if you pick up the call on your Treo, the call goes to the headset. Your phone must be on and the Bluetooth - Palm Treo 650 | User Guide - Page 61
device for specific setup instructions. 8. After you finish setting up the device, select Done to return to the Applications View. You are now ready to use your Treo with your hands-free device with Bluetooth wireless technology. Your Treo does not support Bluetooth wireless connections to stereo - Palm Treo 650 | User Guide - Page 62
other accessory devices with Bluetooth wireless technology, you may want to set up other trusted devices, such as a friend's handheld. When your Treo recognizes a trusted device, it automatically accepts communication, bypassing the discovery and authentication process. 1. Go to Applications and - Palm Treo 650 | User Guide - Page 63
, or press Down to refuse it. You can set your Treo to receive Bluetooth wireless connections when your phone is off. However, keep in mind that the Bluetooth radio consumes battery power even though your phone is off. 1. Go to Applications and select Bluetooth. 2. Select Bluetooth On. 3. Open the - Palm Treo 650 | User Guide - Page 64
more information, and see the VersaMail User Guide on the CD (English only) or visit www.palmOne.com/intl (other languages) for setup instructions. Transferring settings from an existing account (Windows only) 1. Select the option to set up your email software when prompted on the final screen of - Palm Treo 650 | User Guide - Page 65
When you are finished setting up all accounts, click Finish. 7. Synchronize to transfer all account information to your phone. Setting up an account on your computer: Common providers (Windows only) The settings for many common providers are already included in VersaMail. If you have an account with - Palm Treo 650 | User Guide - Page 66
Service list, see "Setting up an account on your computer: Other providers (Windows only)" on page 64 for account setup instructions. 1. Select the option to set up your email software when prompted on the final screen of software CD installation. Or select Start > Programs > palmOne > VersaMail - Palm Treo 650 | User Guide - Page 67
. 8. When finished setting up all accounts, click Finish. 9. Synchronize to transfer all account information to your phone. Setting up an account on your phone 1. Go to Applications and select VersaMail . 2. Open the menus . 3. Select Accounts, and then select Account Setup. 4. Select New. 5. In - Palm Treo 650 | User Guide - Page 68
. 8. Select the Password box, enter your email account password, and then select OK. 9. Select Next. 10.If you chose an email provider from the Mail Services pick list on the Account Setup screen, the mail server screen is already filled in. If you chose Other, enter your email address and the - Palm Treo 650 | User Guide - Page 69
message. To remove an attachment, select the file in the Attachments box, and then select Delete. Ringtones that are copy protected appear in the Sounds application with a lock icon. These ringtones can be used on your phone only and cannot be sent as attachments. Sending and receiving email :: 67 - Palm Treo 650 | User Guide - Page 70
pick list. 4. Select the file you want from the list in the Type box. 5. Select Done. Receiving and viewing messages 1. Make sure your phone is turned on (see "Turning Treo on and off" on page 15). 2. From any mailbox, select Get or Get & Send. 3. From the Inbox, select the message you want - Palm Treo 650 | User Guide - Page 71
types you can open with the built-in software on your Treo (for example, Microsoft Word, Excel, and PowerPoint files; ringtones; and photos). 1. From any folder, open the message with the attachment you want to view. Messages with downloaded attachments are indicated by a paper clip icon to - Palm Treo 650 | User Guide - Page 72
messages, the oldest messages are automatically removed from the phone. 1. Select the bullet next to the icon of each message that you delete. To select adjacent messages, drag the stylus so it hits the bullet to the left of each message. Lift the stylus and drag again to select more adjacent - Palm Treo 650 | User Guide - Page 73
You can customize the VersaMail settings for each individual email account on your Treo. The preferences you set apply only to the email account you are customize, see the VersaMail User Guide on the CD (English only) or visit www.palmOne.com/intl (other languages). Sending and receiving email :: 71 - Palm Treo 650 | User Guide - Page 74
manual to automatically download new email messages to your phone with the Auto Sync feature. 1. Open a more frequent interval, you may need to recharge your phone's battery more often. 6. Select the Start and End Time boxes . Your Treo plays a brief demo of the sound. 7. Select OK. 72 :: - Palm Treo 650 | User Guide - Page 75
Unread messages (IMAP accounts only): Downloads only unread mail to your phone. If you don't check this is HTML. 5. Select OK. The VersaMail application sends all messages as plain text only, support retrieval of unread mail only from the server. If you have a POP email account, VersaMail downloads - Palm Treo 650 | User Guide - Page 76
computer, such as Microsoft Outlook or Palm Desktop software. Other information, such as contacts, tasks, and memos, continues to synchronize with your desktop software. For complete information on using a Microsoft Exchange ActiveSync account, see the VersaMail User Guide on the CD (English only - Palm Treo 650 | User Guide - Page 77
brief text and multimedia messages with other mobile phones that support these forms of messaging (also known as SMS and MMS) and with email addresses. Before you use your Treo to send or receive messages, consult your wireless service provider for pricing and availability of text and multimedia - Palm Treo 650 | User Guide - Page 78
all symbols available on your phone may be used in text messages. The Messaging application automatically replaces invalid characters before if your phone does not include a camera, you can still send, receive, and view photos and videos. You can include any of the following items: • Ringtones • MIDI - Palm Treo 650 | User Guide - Page 79
few letters of the recipient's first or last name. Highlight the recipient's phone number or email address, and then select Add. • If the recipient's as a voice caption for a photo, or insert an existing sound, such as a ringtone. You can add only one sound per page. If you capture a photo with the - Palm Treo 650 | User Guide - Page 80
. For multimedia messages, you can configure your Treo to automatically download new messages or to notify you that a message is ready to download. You can also configure your Treo to notify you when a new text or multimedia message arrives, using a ringtone and vibration or an onscreen alert. The - Palm Treo 650 | User Guide - Page 81
. Your Treo automatically opens the appropriate application from the link. 1. Select a message from the list. 2. Select the phone number, to Applications and selecting Sounds . • To save a photo, tap it with your stylus or finger. You can access saved photos later by going to Applications and - Palm Treo 650 | User Guide - Page 82
Unread messages appear in bold. Messages you've read appear in plain text. Managing your messages The status icons that appear next to each message in the Inbox and Outbox folders indicate the following: • A text message. Urgent messages appear with a red exclamation point (!). • A chat - Palm Treo 650 | User Guide - Page 83
Chatting with Messaging When you exchange more than one message with a single contact, your messages are grouped into a chat session. The upper part of the Chat View displays all messages you've exchanged with this contact, and the lower part provides a text entry area. You can carry on multiple - Palm Treo 650 | User Guide - Page 84
application to stop functioning. • Validity period: Set how long you want your wireless service next to each message. • Display my name in chat window as: Enter the name you want displayed as the label or Manual message retrieval. If you select Manual, select Edit and enter your wireless service - Palm Treo 650 | User Guide - Page 85
4. Select the first Vibrate pick list and indicate if you want your phone to vibrate during an incoming alert, when Sound Mode is on. 5. Select the second Vibrate pick list and indicate if you want your phone to vibrate during an incoming alert, when Sound Mode is off. 6. Select - Palm Treo 650 | User Guide - Page 86
Large. The Web browser on your Treo provides quick and easy access to web pages features, such as JavaScript and frames. To browse the web, you must activate data services from your wireless service phone is turned on (see "Turning your phone on and off" on page 15). 2. Go to Applications and - Palm Treo 650 | User Guide - Page 87
to highlight the link, and then press Center to go to the selected page. You can also tap the link on the screen with your stylus. Creating a bookmark Bookmarks let you instantly access a web page without needing to enter the address every time. The Web browser can store up to 100 - Palm Treo 650 | User Guide - Page 88
? Email addresses appear as links on web pages. After you configure an email application on your Treo, you can select an email address link to create a message to the selected address. 1. Go to the page you want to save. 2. Open the menus . 3. - Palm Treo 650 | User Guide - Page 89
page. 4. Use the stylus to drag and drop Treo, such as new applications, MIDI ringtones, or pictures that are specifically tagged for download. When you download a file, it is automatically sent to the application that can use the file. For example, if you download download them to your phone - Palm Treo 650 | User Guide - Page 90
text) and paste it into the Phone Dial Pad. You can also save an image from a web page by tapping and holding it with the stylus. Copying text from a web page You can copy text from a web page and paste it in other applications. 1. Use the stylus to highlight the text you want to - Palm Treo 650 | User Guide - Page 91
Home Page: Sets the page that appears when you select . Your wireless service provider may have locked this setting. • Restore Default: Selects the original Web browser. The Web browser supports JavaScript, Secure Socket Layer (SSL), and cookies, but does not support plugins (Flash, Shockwave, etc - Palm Treo 650 | User Guide - Page 92
Treo. Some sites do not work properly if you select this option. • Tap and Drag: Determines whether dragging the stylus Indicates how much memory is being used by cookies. To free up this memory, select Clear Cookies. • Cache: Indicates your Internet service provider or IT administrator for this information. 6. Select - Palm Treo 650 | User Guide - Page 93
Treo 650 does not have a built-in camera, then the section in this chapter about taking photos and videos does not apply to you. Even if your phone synchronizing your phone with your computer. Taking a photo You can store photos on your phone or on an expansion card. 1. Go to Applications and - Palm Treo 650 | User Guide - Page 94
store videos on your phone or on an expansion card. 1. Go to Applications and select Camcorder . 4. Point the lens on the back of your Treo at the subject you want to record. 5. Press recording, press Center again to stop. 7. Select Play to review the video. 8. Select Save to keep the video, - Palm Treo 650 | User Guide - Page 95
Viewing a photo 1. Select Gallery . 2. Select the photo you want to view. 3. Press Up and Down to zoom in and out. 4. If the photo has a voice caption, select Audio 5. Select Done. to hear it. Viewing a video 1. Select Gallery . 2. Select the video you want to view. 3. Press Up and Down to adjust - Palm Treo 650 | User Guide - Page 96
video you want to send. 2. Select Send . 3. When the Messaging application opens, address and send the message. (See "Creating and sending a for details.) Copying photos and videos You can copy photos or videos from your phone to an expansion card, and vice versa. 1. From the Gallery , select the - Palm Treo 650 | User Guide - Page 97
your own personal touch. When you save the photo, you can replace the original or save a copy. You can also open the Gallery from the Applications View. Go to Applications and select Media. Taking photos and videos :: 95 - Palm Treo 650 | User Guide - Page 98
Customizing your Camera settings If your Treo has a built-in camera, you can customize the camera's Determines if the date the photo is taken appears on your photos. • Review photos/videos: Determines if you can review photos or videos before saving them and how quickly they are automatically saved. - Palm Treo 650 | User Guide - Page 99
When you synchronize, your Treo your photos and videos are copied to your desktop computer. You can view photos in JPEG format and videos in .3GP format, and you can email them to friends using your desktop email application. • Windows: Refer to the Palm Desktop Online Help for information about - Palm Treo 650 | User Guide - Page 100
- Palm Treo 650 | User Guide - Page 101
first two weeks: using organizer features first two weeks: using organizer features :: 99 - Palm Treo 650 | User Guide - Page 102
to use Palm® Desktop software or Microsoft Outlook on your computer and then synchronize info on your Treo™ 650 smartphone the info previous Palm Powered™ devices, you may recognize the Contacts application as similar to the Address Book on previous devices. Adding a contact 1. Press Phone/Send - Palm Treo 650 | User Guide - Page 103
in Contact Edit View, open the menus . 3. Select Business Card on the Record menu. 4. Now you can beam your business card to other Palm Powered devices. In any Phone view, open the menus . Select Beam Business Card on the Record menu. In the Contacts list, press Up and Down to move to - Palm Treo 650 | User Guide - Page 104
Record menu, and then select Export to SIM. Viewing your SIM Phonebook By default, you can view your SIM Phonebook right in the Contacts application. 1. In the Contacts list, open the menus . 2. Select Options, and then select Preferences. 3. Make sure the Show SIM Phonebook Category box is checked - Palm Treo 650 | User Guide - Page 105
entering numbers). If you have several appointments to enter, it's more efficient to use Palm Desktop software or Microsoft Outlook on your computer and then synchronize the info on your Treo with the info on your computer. For more information, see "Synchronizing contacts and other information - Palm Treo 650 | User Guide - Page 106
use Palm Desktop software, do not add time zones to your events. Palm Desktop does not support time zones. If you use Microsoft Outlook, you can use the time zone feature, but you must install the conduit that came with your Treo 650 (or a subsequent update) on all the computers you sync your phone - Palm Treo 650 | User Guide - Page 107
nothing is highlighted. 4. Enter a description for the event. A diamond appears next to the description of an untimed event. Color-coding your schedule Use color-coding to quickly spot different types of events. For example, make your appointments with family green, work blue, and friends yellow - Palm Treo 650 | User Guide - Page 108
: When the event takes place. Change these settings to reschedule the event. • Location: A description of where the event takes place. • Category: The color-coded category for this event. • Note : Space for you to enter additional text. • Delete: The event is erased from your calendar. 4. Select OK - Palm Treo 650 | User Guide - Page 109
the fade setting so that the text is easy to read against the photo. You can customize your phone to display the most current Calendar event on the Main View in the Phone application. Press Phone/ Send, open the Options menu, and then select General Preferences. Check the Show Calendar event box - Palm Treo 650 | User Guide - Page 110
, tasks, and memos sync with Palm Desktop software or Microsoft Outlook, depending on which desktop application you use. 5. Select the Day screen disappear to minimize scrolling. • Show Category Column: The color-coded category marker appears between the time and description to indicate which - Palm Treo 650 | User Guide - Page 111
, or days before the event for which the alarm goes off 7. Select Done. You can also record, preview, delete, and send sounds on your phone. Go to Applications and select Sounds. Select Tones, and then select Manage. To record a sound, select New. To play a sound, select it and press Center. To - Palm Treo 650 | User Guide - Page 112
107 details. Open the menus to access other features such as importing phone numbers into the Tasks list. You can use Tasks as a reminder of tasks you need to complete and to keep a record of complete tasks. Adding a task 1. Go to Applications - Palm Treo 650 | User Guide - Page 113
Setting task priority, due date, and other details The Details dialog box enables you to assign a priority level, due date, category, privacy flag, and note for each task. 1. Select the task to which you want to assign details. 2. Select Details. 3. Set any of the following: • Priority: Select the - Palm Treo 650 | User Guide - Page 114
To uncheck the selected task, press Center. Overdue tasks have an exclamation point (!) next to the due date. To save memory, you can purge all completed tasks. Open the Record menu and select Purge. Select OK. Checking off a task 1. Select the task you want to check off. 2. Press Center to check - Palm Treo 650 | User Guide - Page 115
Customizing Tasks The Tasks Preferences screen enables you to control the appearance of the Tasks list screen. 1. In the Tasks list screen, select Show. 2. Set any of the following preferences: • Sort by: Indicates the order in which your tasks appear in the list. • Show Completed Items: Displays - Palm Treo 650 | User Guide - Page 116
notes on your Treo 650 smartphone. Each memo can include 4,096 characters of text. You can assign categories to your memos. Open the item you want to change, select the category pick list at the top of the screen, and select a category. Creating a memo 1. Go to Applications and select Memos - Palm Treo 650 | User Guide - Page 117
Windows computer to convert the files and transfer them to an expansion card. See the RealPlayer desktop online Help for details. You can install the RealPlayer desktop software from the Software Essentials section on the Software Installation CD that came with your Treo. If you want to download - Palm Treo 650 | User Guide - Page 118
. 6. Synchronize your Treo with your computer. Be patient; transferring music to an expansion card can take several minutes. Transferring music from a CD to your phone To transfer music from a CD to your phone, you must first install the RealPlayer desktop application onto your Windows computer. You - Palm Treo 650 | User Guide - Page 119
to do anything. B A. CD/DVD B. Save Tracks 5. Go to Applications and select Music . 6. Connect your phone and your computer to the USB sync cable. 7. In RealPlayer on your computer, click Burn/Transfer. 8. If necessary, select palmOne Handheld from the Current Burn/Transfer Device drop-down - Palm Treo 650 | User Guide - Page 120
9. Drag the song files you want from the My Library window on the left into the palmOne device window on the right. You can customize your Treo so that pressing and holding the Side button on the side of your Treo opens RealPlayer. See "Button settings" on page 150 for details. To view details for - Palm Treo 650 | User Guide - Page 121
continues playing until it reaches the end of your list or until you select Stop. Music continues to play even if you switch to another application or turn off your screen. If you want to stop playing music when you exit RealPlayer, open the Options menu and select Preferences. Uncheck the - Palm Treo 650 | User Guide - Page 122
Editing a playlist 1. Select Playlists. 2. Select the playlist you want to edit. 3. Select Edit. 4. Do any of the following: • To delete a song from the playlist, select the song, and then select Remove. • To add a song, select Add, check a song's box, and then select Done. • To move a song up or - Palm Treo 650 | User Guide - Page 123
. If the Enable Local Network Time box is checked in your Date & Time Preferences, your wireless service provider's network automatically sets the time and updates it when you travel. 1. Go to Applications and select World Clock . 2. Select the City pick list at the top of the screen and select - Palm Treo 650 | User Guide - Page 124
To customize the alarm sound and volume, open the Options menu and select Alarm Preferences. Selecting remote cities In addition to your home city, you can display the day and time for two other cities anywhere around the globe. These other cities are called remote cities. • Select a pick list in - Palm Treo 650 | User Guide - Page 125
calculator, plus an advanced calculator with scientific, financial, and conversion functions. Switching between Basic and Advanced Calculator Modes 1. Go to Applications and select Calculator . 2. Open the menus . 3. Select Options, and then select Advanced Mode or Basic Mode. You can tap the - Palm Treo 650 | User Guide - Page 126
Select Sto to store a number in one of ten memory slots. Select Rcl to recall a stored number. Select Con to access a list of mathematical constants such as Avogadro's number or the speed of light. • Logic: Hexadecimal characters in keypad, plus logic functions such as and, not, or and xor. In - Palm Treo 650 | User Guide - Page 127
up contacts and other information With the built-in search features on your Treo, you can find information quickly: • Lookup: Enables you to dial your contacts by name. It locates people's phone numbers when you're in the Phone or Messaging applications. • Find: Searches through the text in all the - Palm Treo 650 | User Guide - Page 128
view the contents of the record. • Highlight any phone number, and then press Phone/Send to dial. Using Find The Find feature locates any text in the built-in applications and databases and in some third-party applications. The Find feature performs an exact search on a character string, including - Palm Treo 650 | User Guide - Page 129
you beam information to another Palm Powered device with an IR port. The IR port is located on the top of your Treo, between the antenna and the the transfer is complete before you continue using your Treo. You can store a beamed application on your phone, or send it to an expansion card inserted - Palm Treo 650 | User Guide - Page 130
information, try a soft reset (see "Resetting your Treo" on page 168). Beaming an application Not all applications can be beamed. A Lock icon appears on the Beam screen next to applications that cannot be beamed. 1. Go to Applications . 2. Open the menus . 3. Select Beam on the App menu. 4. Select - Palm Treo 650 | User Guide - Page 131
Wait for the Beam Status dialog box to indicate that the transfer is complete before you continue using your Treo. Receiving beamed information 1. Turn on your screen. 2. Point the IR port on your Treo directly at the IR port of the transmitting device to open the Beam Status dialog box. 3. When the - Palm Treo 650 | User Guide - Page 132
- Palm Treo 650 | User Guide - Page 133
first month: managing applications first month: managing applications :: 131 - Palm Treo 650 | User Guide - Page 134
Installing applications On a Windows computer, you can also access palmOne™ Quick Install by selecting the Quick Install icon in Palm® Desktop software or on the Start menu in the Programs folder. Your Treo™ 650 smartphone comes with several built-in and ready to use applications. You can also - Palm Treo 650 | User Guide - Page 135
your Treo, you need to install Palm Desktop software on your computer (see "Installing the desktop synchronization software on your computer" on page 32). To control whether files are installed on your phone or on an expansion card, double-click the palmOne Quick Install icon on a Windows computer - Palm Treo 650 | User Guide - Page 136
the Backup folder on your computer. If the application re-appears on your phone, you may need to manually delete it from your computer. Locate your Backup folder on your computer (Windows: C:\Program Files\palmOne\username; Mac: Mac HD\Applications\palmOne\Users\username). If you find a .prc or .pdb - Palm Treo 650 | User Guide - Page 137
display basic statistics about the applications on your Treo. 1. Go to Applications . 2. Open the menus . 3. Select Info on the App menu. 4. At the bottom of the screen, select the type of information you want to view: • Version: The version numbers of applications on your Treo. • Size: The size (in - Palm Treo 650 | User Guide - Page 138
SD Memory Card Specifications may damage Treo 650. SD cards that do meet SD Memory Card Specifications Games • eBooks • Applications • Databases • ... and more Your Treo is also compatible with Secure Digital input/output (SDIO) cards, which let you add accessories, such as a presentation module, to your phone - Palm Treo 650 | User Guide - Page 139
on the expansion card and your phone, select the category pick list at the top of the screen and select another category. In order to run an application on an expansion card, you must have enough free space in the internal memory of your Treo to accommodate the program. Using expansion cards - Palm Treo 650 | User Guide - Page 140
to an expansion card You can copy applications between your Treo and your expansion card. 1. Go to Applications . 2. Open the menus . 3. Select Copy on the App menu. 4. Select the Copy To pick list and select the destination: card name or Phone. 5. Select the From pick list and select the - Palm Treo 650 | User Guide - Page 141
expansion card that is currently in the expansion card slot. • Go to Applications and select Card Info . Renaming an expansion card If you change the contents card, make sure the card is not writeprotected. See the instructions that came with your card for details. Using expansion cards :: 139 - Palm Treo 650 | User Guide - Page 142
- Palm Treo 650 | User Guide - Page 143
when you're ready: customizing your Treo when you're ready: customizing your Treo :: 141 - Palm Treo 650 | User Guide - Page 144
phone. Go to Applications and select Sounds. Select Tones, and then select Manage. To record a sound, select New. To play a sound, select it and press Center. To delete a sound, select it and press Backspace, and to send a sound, select it and then select Send. Want more ringtones? You can download - Palm Treo 650 | User Guide - Page 145
pick list and indicate if you want your phone to vibrate when you receive a call or alert and Sound Mode is off. 7. Select Done. Adjusting call or music volume While a call is in progress, press the Volume button on the side of your Treo™ 650 smartphone to adjust the call volume. While music is - Palm Treo 650 | User Guide - Page 146
call or music is not in progress. Assigning a caller ID photo 1. Press Phone/Send . 2. Select the Contacts favorites button. 3. Open the contact you and add it to this contact entry when you save the photo (if your Treo includes a camera), or select Photos to add an existing photo to this contact - Palm Treo 650 | User Guide - Page 147
3. Open the menus . 4. Select Edit Favorites on the Record menu. 5. Select the Ringtone pick list and select a tone for this contact entry. 6. Select OK. Selecting wallpaper for the Phone application If you have images stored on your Treo, you can select different wallpaper for the Main View in the - Palm Treo 650 | User Guide - Page 148
switch is set to Sound Mode Off. You can immediately silence all sounds on your Treo, including phone ringtones, Calendar alerts, and system sounds. This does not mute the speaker on your Treo during a phone call. Setting the ringer switch 1. Slide the ringer switch to Sound Mode Off. 2. To hear - Palm Treo 650 | User Guide - Page 149
Depending on the lighting conditions in which you're using your Treo, you may need to adjust the brightness of the screen. Contacts, Memos, Messaging, and Tasks. The font styles may vary between applications. 1. Open the application in which you want to change the font. 2. Open the menus . - Palm Treo 650 | User Guide - Page 150
your Treo screen may need to be readjusted. If this occurs, you may see the wrong feature being activated when you tap the screen. To fix the problem, you can align the screen any time. 1. Go to Applications and select Prefs . 2. Select Touchscreen. 3. Follow the onscreen instructions. 4. Select - Palm Treo 650 | User Guide - Page 151
and then display a specific category of applications in the Applications View. 1. Go to Applications . 2. Open the menus . 3. Select Category on the App menu. 4. Select the pick list next to each application and select a category. 5. Select Done. Displaying applications by category Do one of the - Palm Treo 650 | User Guide - Page 152
combinations to their factory settings, select Default. Setting Buttons Preferences Buttons Preferences lets you select which applications are associated with the buttons on your Treo. 1. Go to Applications and select Prefs . 2. Select Buttons. 3. Select the pick list next to the button or key - Palm Treo 650 | User Guide - Page 153
time zone, and Daylight Savings Time setting for your Treo. 1. Go to Applications and select Prefs . 2. Select Date & Time. service provider supports this feature, you can check the Enable Local Network box to synchronize the date and time on your phone with the network. Then whenever your phone - Palm Treo 650 | User Guide - Page 154
aspects of your phone that display a applications on your Treo use the Format Preferences settings. 1. Go to Applications and select Prefs . 2. Select Select Formats. 3. Set any of the following preferences: • Preset to: The standard number conventions for your country. When you select a country - Palm Treo 650 | User Guide - Page 155
Power Preferences 1. Go to Applications 2. Select Power. and select Prefs . 3. Set any of the following preferences: • Auto-off After: The time that elapses before your screen turns off automatically. • Beam Receive: The setting for whether you want your Treo to receive beamed information. 4. - Palm Treo 650 | User Guide - Page 156
" on page 155). Your Treo includes several features that help you protect your phone from inadvertent use and keep your information private. The built-in security software enables you to use your Treo for emergency calls even if the handset is locked. • Keyguard: Manually disables all buttons and - Palm Treo 650 | User Guide - Page 157
the keyboard after a period of inactivity. 1. Go to Applications and select Prefs . 2. Select Keyguard. 3. Set either your phone off to activate the phone lock feature. 8. To turn your phone on again, press and hold the Power/End button , enter your PIN, and then select OK to unlock your phone. - Palm Treo 650 | User Guide - Page 158
hard reset deletes all the entries in your phone. However, you can restore all previously synchronized info the next time you sync (see "Synchronizing contacts and other information" on page 33). To lock your system manually, select Lock & Turn Off, and then select Off & Lock. To permanently unlock - Palm Treo 650 | User Guide - Page 159
your Treo, such as your name, company name, and phone number. If you lock your keyboard, the Owner Preferences information appears on the screen that requests your password to unlock it, and you must also enter your password to change the Owner Preferences information. 1. Go to Applications and - Palm Treo 650 | User Guide - Page 160
mask are marked private. 1. Go to Applications and select Security . 2. Select the mask are marked private. 1. Go to Applications and select Security . 2. Select the Current Viewing private entries in a specific application Open the application that contains the private entries you want - Palm Treo 650 | User Guide - Page 161
Security and Palm® Desktop software (Windows) The Windows version of Palm Desktop software observes the security password for your Treo. If you forget your Treo password, you cannot view your information in Palm Desktop. You can change your password, but all entries marked as private will be - Palm Treo 650 | User Guide - Page 162
need a VPN, you must purchase and install a third-party VPN client to use this feature. 1. Install your third-party VPN client. See "Installing applications" on page 132 for details. 2. Go to Applications and select Prefs . 3. Select VPN. 4. Enter the settings provided by your corporate system - Palm Treo 650 | User Guide - Page 163
if something happens: help if something happens: help :: 161 - Palm Treo 650 | User Guide - Page 164
Upgrading from another Palm Powered™ device Always use the same language for your Treo, your operating system, and your desktop software. Otherwise, you may lose information or have difficulty with synchronization. Support is not provided for mix-andmatch language setups. Some third-party utilities - Palm Treo 650 | User Guide - Page 165
new desktop software as instructed. When prompted to select a username for your new Treo, be sure to select the existing username for your old device. 6. (Mac users only) If you have pictures on your old device, copy them from your old device to an expansion card or beam them to your new Treo 650 - Palm Treo 650 | User Guide - Page 166
Phone/Send to dial. • Power/End button: The fourth button on the right is used to turn the wireless features on and off and to wake up and turn off the screen; it is not an application button. • Internet connection: This Treo was designed to work on high-speed wireless data network, such as a GPRS - Palm Treo 650 | User Guide - Page 167
Files\palmOne\Treo Pictures\(username) • C:\Program Files\Handspring\Treo Pictures\(username) • C:\Program Files\Palm\Treo Pictures\(username) Trouble upgrading? If you experience problems with your Treo 650 after performing the upgrade steps in this section, you may have incompatible applications - Palm Treo 650 | User Guide - Page 168
the Backup subfolder. 4. Delete all files from the original Backup subfolder. 5. Perform a hard reset on your Treo 650. See "Resetting your Treo" on page 168 for instructions. 6. Sync your Treo 650 with your new desktop software and be sure to select your existing username. 7. Reinstall third-party - Palm Treo 650 | User Guide - Page 169
Trouble installing the desktop software? The palmOne Software Installation CD installs the software and drivers that let you synchronize with Palm Desktop software or Microsoft Outlook for Windows. If you want to synchronize with a different personal information manager (PIM), you must install a - Palm Treo 650 | User Guide - Page 170
a soft reset A soft reset is similar to restarting a computer. If your Treo is not responding or you have trouble synchronizing with your computer, a soft reset may help. 1. Press the Battery Door Release button and slide the battery door downward to remove it from your Treo. 2. Use the stylus tip - Palm Treo 650 | User Guide - Page 171
use the tip of the stylus to gently press the reset button on the back of your Treo. 3. When the Palm Powered logo appears, release Up . 4. Delete the third-party application that you suspect is causing the problem. 5. Perform a soft reset. The wireless features of your phone are not available until - Palm Treo 650 | User Guide - Page 172
that is compatible with Treo 650. 1. Press Power/End to turn off the screen. 2. Press the Battery Door Release button and slide the battery door downward to remove it from your Treo. 3. Place a finger in the notch between the stylus and the battery and lift the battery up at a 45 degree angle - Palm Treo 650 | User Guide - Page 173
connect the Treo to the AC charger (see "Charging the battery" on page 12) and perform a soft reset again. 5. If that doesn't work, perform a hard reset (see "Performing a hard reset" on page 169). The screen doesn't respond accurately to taps or activates wrong features 1. Go to Applications and - Palm Treo 650 | User Guide - Page 174
a window. Treo won't connect to the mobile network 1. Try the suggestions above for weak signals. 2. Turn off your phone and turn it on again (see "Turning your phone on and off" on page 15). 3. Remove the SIM card and re-insert it (see "Inserting the SIM card" on page 14). 4. Perform a soft reset - Palm Treo 650 | User Guide - Page 175
, you cannot receive calls. Treo won't connect to the Internet Treo supports GPRS and EDGE wireless data networks. To connect to the Internet, you must subscribe to and activate GPRS or EDGE data services with your wireless service provider. • Contact your wireless service provider to verify that - Palm Treo 650 | User Guide - Page 176
on again. • Perform a soft reset (see "Performing a soft reset" on page 168). • Confirm that high-speed data services are correctly configured on your Treo: 1. Go to Applications and select Prefs . 2. Select Network. 3. If the Service field says Untitled, select the Service pick list and select - Palm Treo 650 | User Guide - Page 177
a hard reset or otherwise erase all your information on your Treo, you can synchronize your phone with your computer to restore the info. To make sure you always have an up-to-date backup of your info; synchronize frequently. Before you attempt to synchronize, make sure you've installed the desktop - Palm Treo 650 | User Guide - Page 178
. 8. Reinstall the palmOne Software Installation CD that came with your Treo 650. Synchronization starts but stops without finishing If you upgraded from a previous Palm Powered device or received a system error, such as Sys0505, there may be conflicts with software on your phone. As you complete - Palm Treo 650 | User Guide - Page 179
the toolbar of Palm Desktop. 3. Open HotSync Manager on your computer, and make sure the necessary conduits are set to Synchronize the files. 4. Uninstall palmOne software. 5. Reboot your computer. 6. Reinstall the palmOne Software Installation CD that came with your Treo 650. 7. (Outlook only) With - Palm Treo 650 | User Guide - Page 180
your Treo 650. If you're not sure whether this software is installed, reinstall it. 2. Open Microsoft Outlook and correct the wrong entries. 3. Manually enter any information you've added to your phone since the last time you synchronized. 4. Go to the Calendar conduit dialog box, and select Desktop - Palm Treo 650 | User Guide - Page 181
, and select Desktop overwrites handheld. 8. Synchronize your phone and your computer. 9. Go to the conduit dialog box, and select Synchronize the files. To avoid this problem in the future, do not assign time zones to your events. Palm Desktop software does not support time zones. Synchronization - Palm Treo 650 | User Guide - Page 182
experiencing problems using the case, be sure to use your provider's network as the connection type for the account. • Some wireless service providers have other requirements specific to their service. For example, Yahoo! requires you to set up POP mail forwarding for your Yahoo! account to download - Palm Treo 650 | User Guide - Page 183
their network to send email through their servers. In this case, you can almost always receive email from these accounts, but if you want to send email, you must send it through another server. I have problems synchronizing messages on my phone with messages on my computer Make sure you have chosen - Palm Treo 650 | User Guide - Page 184
My vCard or vCal email attachment isn't forwarding correctly Palm Desktop software provides several features that work with email client software on a Windows computer. For these features to work correctly, the email client software must be properly set up. Follow these steps to check the settings: - Palm Treo 650 | User Guide - Page 185
I am using Microsoft Exchange ActiveSync, but the last seven days of email messages and Calendar events are not downloading to my phone Check with your system administrator to obtain the name of the mail server that offers you wireless access to the corporate mail system. If you - Palm Treo 650 | User Guide - Page 186
trouble, the page may contain elements that are not supported palmOne.com/intl/support). If the Web browser can't follow the redirect, try using a desktop browser to see the landing page of the redirector, and enter that address in the Web browser. An image or map displays too small on the Treo - Palm Treo 650 | User Guide - Page 187
your Camera images are stored in the My Pictures/palmOne Photos folder on your hard drive (see "Viewing photos and videos on your computer" on page 97). The Camera preview image looks strange Some third-party applications overwrite the Treo's color settings with their own 8-bit color settings. This - Palm Treo 650 | User Guide - Page 188
on your Treo. Third-party applications that modify wireless features may require extra troubleshooting. If you recently installed an application and your Treo seems to be stuck, try the following: 1. Perform a soft reset (see "Performing a soft reset" on page 168). 2. If the problem persists - Palm Treo 650 | User Guide - Page 189
Send . 2. Press Center, and then select Dial Pad. 3. Enter # * 377, and then press Phone/Send . 4. Review the screen with details about the conditions that lead up to the most recent automatic reset. 5. Select OK. Please note that third-party developers create their own error messages. If you do not - Palm Treo 650 | User Guide - Page 190
to an expansion card" on page 138). Also, remember that your Treo includes an expansion card slot, and that you can store applications and information on expansion cards. However, you still need free memory on the Treo itself to run applications from an expansion card. 188 :: Making room on your - Palm Treo 650 | User Guide - Page 191
? Ask the other person to turn down their volume or to hold the phone closer to their ear. Is your voice too quiet on the other end? Be sure to hold the bottom of the Treo, or the hands-free microphone, close to your mouth. Check the signal strength indicator. If the signal - Palm Treo 650 | User Guide - Page 192
- Palm Treo 650 | User Guide - Page 193
on one phone/SIM. The Treo™ 650 smartphone supports ALS, but be sure to contact your wireless service provider for regional availability of this service. Alt (alternative) : A keyboard key. Enter a letter on the are up to three times faster than standard GPRS connections. GPRS (General Packet - Palm Treo 650 | User Guide - Page 194
synchronized with your Treo. Palm OS®: The operating system of your Treo phone. A trademark of PalmSource, Palm OS is known for its simplicity of use and for the large number of applications that can be added to your Treo. palmOne™ Quick Install: The component on your Windows computer that enables - Palm Treo 650 | User Guide - Page 195
the instructions, certify this unit for sale in the US, Treo Model 650 palmOne declares that the above model of Treo smartphone is compliant with the regulations below. The declaration applies to the smartphone and its associated accessories (power supply, headset, and USB cable) where applicable - Palm Treo 650 | User Guide - Page 196
hard of hearing, or who have speech or language disabilities, to communicate by telephone. Your Treo 650 is compatible with select TTY devices. You can connect a TTY/TDD machine to your phone Turn your smartphone OFF in health care facilities when any regulations posted in these areas instruct you to - Palm Treo 650 | User Guide - Page 197
your attention off the road. 2. When available, use a hands-free device. A number of hands-free smartphone accessories are readily available today. Whether you choose an installed mounted device for your smartphone or a speaker phone accessory, take advantage of these devices if available to you - Palm Treo 650 | User Guide - Page 198
9-1-1. But you can still use your smartphone to lend a hand. If you see phones with built-in antennas, often called cell, mobile, or PCS phones. These phones Free Capability All CTIA Certified portable products provide the consumer with a toll- free number for the purchase of a compatible hands-free - Palm Treo 650 | User Guide - Page 199
, adding photos as 107 backlight 15, 24 battery charging 12 consumption factors for 12 installing 11 replacing 170 viewing status of 13, 40 beaming 127-129 Bluetooth® application, opening 60 icon on Phone application 39 problems with, solving 174 setting connection information 58 switching - Palm Treo 650 | User Guide - Page 200
118 color, system 148 color-coding appointments 105 command buttons, accessing 22 components of Treo 650 3, 7 computers synchronizing with 33 details from phone 42 Cookies preference 90 current event, displaying in Main View of Phone 40 customizing alarms 113 appearance 147-148 applications settings - Palm Treo 650 | User Guide - Page 201
-54 dialing calls with 42 features monitoring on Phone screen 39-40 of Treo 650 8-10 finding information 125 5-way navigator, using 20 font, screen 147 formats, audio files 115 forwarding calls 50-51 messages with VersaMail 69 freeing memory 90 freezing during soft reset 168 G Glossary 191 H handset - Palm Treo 650 | User Guide - Page 202
during call 44 playing on Treo 650 118 playlists 119-120 selecting 118 stopping 119 storing 115 transferring from CD 116 transferring from computer 115 volume, adjusting 143 N naming devices 58 navigating screen 20 network connection, problems with 172-174 No Service message 16 notification of - Palm Treo 650 | User Guide - Page 203
handset 40 recording time (actual) 92 redialing phone 16, 43 removing applications 134 songs from playlists 120 repeating events, displaying 108 replacing battery 170 replying to messages with VersaMail 69 required items to set up Treo 650 6 resetting 168 resolution of photos and videos 91, 185 - Palm Treo 650 | User Guide - Page 204
133 problems with, solving 186 thumbnails (photos) 107 time displaying recording 92 preferences 151 setting 121 timed events 108 touchscreen lockout 155 transferring audio files 115 data from another device 162 information 33 Treo 650 features 8-10 turning on and off 15 troubleshooting 161 trusted - Palm Treo 650 | User Guide - Page 205
secure websites 89 using 84-90 viewing web pages 84 web pages in 85, 86-87, 88 web browsing problems, solving 184 web pages dialing calls from 42 in Web browser 84, 85, 86-87, 88 setting initial view for 89 wireless features independent of Palm OS features 15 World Clock 121 Index :: 203 - Palm Treo 650 | User Guide - Page 206
204 :: Index - Palm Treo 650 | User Guide - Page 207
Phone features Processor technology Expansion Battery Palm OS® version Camera (not included on all models) Size Weight IR Display Keyboard • GSM 850/900/1800/1900 quad band world phone • GPRS class 10, class B; also supports CSD • EDGE up to 170kbps • Personal speakerphone • Hands-free stylus) - Palm Treo 650 | User Guide - Page 208
) • VersaMail® • Calendar • Memos • Tasks • Calculator Basic and Advanced • Palm® Desktop software and HotSync® Manager • World Clock • Windows 2000 or XP with USB port • Mac OS 10.2 -10.3 with USB port • Later versions may also be supported • 32°F to 104°F (0°C to 40°C) • 5% to 90% RH 206
-
 1
1 -
 2
2 -
 3
3 -
 4
4 -
 5
5 -
 6
6 -
 7
7 -
8
-
9
-
10
-
11
-
12
-
13
-
14
-
15
-
16
-
17
-
18
-
19
-
20
-
21
-
22
-
23
-
24
-
25
-
26
-
27
-
28
-
29
-
30
-
31
-
32
-
33
-
34
-
35
-
36
-
37
-
38
-
39
-
40
-
41
-
42
-
43
-
44
-
45
-
46
-
47
-
48
-
49
-
50
-
51
-
52
-
53
-
54
-
55
-
56
-
57
-
58
-
59
-
60
-
61
-
62
-
63
-
64
-
65
-
66
-
67
-
68
-
69
-
70
-
71
-
72
-
73
-
74
-
75
-
76
-
77
-
78
-
79
-
80
-
81
-
82
-
83
-
84
-
85
-
86
-
87
-
88
-
89
-
90
-
91
-
92
-
93
-
94
-
95
-
96
-
97
-
98
-
99
-
100
-
101
-
102
-
103
-
104
-
105
-
106
-
107
-
108
-
109
-
110
-
111
-
112
-
113
-
114
-
115
-
116
-
117
-
118
-
119
-
120
-
121
-
122
-
123
-
124
-
125
-
126
-
127
-
128
-
129
-
130
-
131
-
132
-
133
-
134
-
135
-
136
-
137
-
138
-
139
-
140
-
141
-
142
-
143
-
144
-
145
-
146
-
147
-
148
-
149
-
150
-
151
-
152
-
153
-
154
-
155
-
156
-
157
-
158
-
159
-
160
-
161
-
162
-
163
-
164
-
165
-
166
-
167
-
168
-
169
-
170
-
171
-
172
-
173
-
174
-
175
-
176
-
177
-
178
-
179
-
180
-
181
-
182
-
183
-
184
-
185
-
186
-
187
-
188
-
189
-
190
-
191
-
192
-
193
-
194
-
195
-
196
-
197
-
198
-
199
-
200
-
201
-
202
-
203
-
204
-
205
-
206
-
207
-
208
 |
 |

using your
Treo™ 650
smartphone
by palmOne
Includes setup information and instructions for most tasks