Panasonic BL C131A Operating Instructions - Page 22
Registering and Changing Presets, Viewing a preset, Registering or changing a preset
 |
UPC - 037988845156
View all Panasonic BL C131A manuals
Add to My Manuals
Save this manual to your list of manuals |
Page 22 highlights
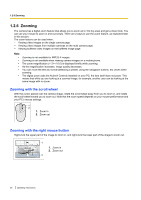
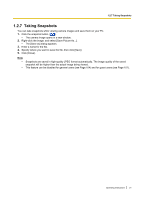
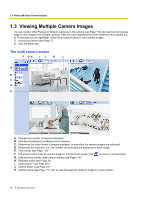
1.2.8 Registering and Changing Presets 1.2.8 Registering and Changing Presets Presets allow you to easily aim the camera lens in the desired direction. The following presets can be registered: • Home position (the direction that the lens moves to when you turn the camera on or click the center navigator button) • Sensor position • Presets 1-8 Additionally, the first 4 presets are set by default. • 1: Upper Left • 2: Upper Right • 3: Lower Left • 4: Lower Right Viewing a preset You can move the lens to a preset position in the following ways: • Click the center navigator button (to move the lens to the home position) • Click [Preset] and select a preset from the pull-down menu • Click a blue preset button (1-8) (Unregistered preset buttons are displayed in white.) Registering or changing a preset Note • This feature is available to the camera administrator only. 1. Confirm that you are logged in to the camera as the administrator. 2. Click [Program]. 3. Aim the camera in the desired direction. 4. Adjust the brightness and white balance settings if desired. The brightness and white balance settings will be registered to the preset. 5. Under [Preset Number], select the desired preset from the pull-down menu. 6. Enter a name for the preset (max. 15 characters). • You cannot rename the home position or sensor position. • See Page 147 for a list of valid characters. Note that [Space and [>] cannot be used. 7. Click [Save] to register the preset, or click [Back] to cancel. • When [Success!] is displayed, click [Back] to continue. Deleting a preset Note • This feature is available to the camera administrator only. 1. Confirm that you are logged in to the camera as the administrator. 2. Click [Program]. 3. Under [Preset Number], select the desired preset from the pull-down menu. • You cannot delete the home position or sensor position. 4. Click [Delete] to delete the preset, or click [Back] to cancel. • When [Success!] is displayed, click [Back] to continue. 22 Operating Instructions
-
 1
1 -
2
-
3
-
4
-
5
-
6
-
7
-
8
-
9
-
10
-
11
-
12
-
13
-
14
-
15
-
16
-
 17
17 -
 18
18 -
 19
19 -
 20
20 -
 21
21 -
 22
22 -
 23
23 -
 24
24 -
 25
25 -
 26
26 -
 27
27 -
28
-
29
-
30
-
31
-
32
-
33
-
34
-
35
-
36
-
37
-
38
-
39
-
40
-
41
-
42
-
43
-
44
-
45
-
46
-
47
-
48
-
49
-
50
-
51
-
52
-
53
-
54
-
55
-
56
-
57
-
58
-
59
-
60
-
61
-
62
-
63
-
64
-
65
-
66
-
67
-
68
-
69
-
70
-
71
-
72
-
73
-
74
-
75
-
76
-
77
-
78
-
79
-
80
-
81
-
82
-
83
-
84
-
85
-
86
-
87
-
88
-
89
-
90
-
91
-
92
-
93
-
94
-
95
-
96
-
97
-
98
-
99
-
100
-
101
-
102
-
103
-
104
-
105
-
106
-
107
-
108
-
109
-
110
-
111
-
112
-
113
-
114
-
115
-
116
-
117
-
118
-
119
-
120
-
121
-
122
-
123
-
124
-
125
-
126
-
127
-
128
-
129
-
130
-
131
-
132
-
133
-
134
-
135
-
136
-
137
-
138
-
139
-
140
-
141
-
142
-
143
-
144
-
145
-
146
-
147
-
148
-
149
-
150
-
151
-
152
-
153
-
154
 |
 |