Panasonic HDC-SDX1H HDCSDX1 User Guide - Page 12
Quick Guide
 |
View all Panasonic HDC-SDX1H manuals
Add to My Manuals
Save this manual to your list of manuals |
Page 12 highlights
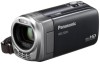
Quick Guide ∫ Inserting the battery Install the battery by inserting it in the direction shown in the figure. A Insert the battery until it clicks and locks. ∫ Charging the battery Access lamp [ACCESS] A ≥ When this unit is accessing the SD card, the access lamp lights up. 1) Open the LCD monitor. 2) Open the SD card cover and insert (remove) the SD card into (from) the card slot B. ≥ Face the label side C in the direction shown in the illustration and press it straight in as far as it will go. ≥ Press the center of the SD card and then pull it straight out. 3) Securely close the SD card cover. ≥ Securely close it until it clicks. ∫ Turning the unit on/off Turning the unit on and off with the power button Press the power button to turn on the unit. A DC input terminal 1 Connect the AC adaptor to the DC input terminal. 2 Connect the AC cable to the AC adaptor, then the AC outlet. ≥ The status indicator will flash red at an interval of 2 seconds, indicating that charging has begun. It will turn off when the charging is completed. ∫ Inserting/removing an SD card A The status indicator lights on. ≥ To turn off the unit, hold down the power button until the status indicator goes off. Turning the unit on and off with the LCD monitor Unit is turned on when the LCD monitor is opened, and unit is turned off when it is closed. ∫ To turn on the unit 12 VQT2W55 A The status indicator lights on.
-
 1
1 -
2
-
3
-
4
-
5
-
6
-
 7
7 -
 8
8 -
 9
9 -
 10
10 -
 11
11 -
 12
12 -
 13
13 -
 14
14 -
 15
15 -
 16
16 -
 17
17 -
18
-
19
-
20
-
21
-
22
-
23
-
24
-
25
-
26
-
27
-
28
-
29
-
30
-
31
-
32
-
33
-
34
-
35
-
36
-
37
-
38
-
39
-
40
-
41
-
42
-
43
-
44
-
45
-
46
-
47
-
48
-
49
-
50
-
51
-
52
-
53
-
54
-
55
-
56
-
57
-
58
-
59
-
60
-
61
-
62
-
63
-
64
-
65
-
66
-
67
-
68
-
69
-
70
-
71
-
72
-
73
-
74
-
75
-
76
-
77
-
78
-
79
-
80
-
81
-
82
-
83
-
84
-
85
-
86
-
87
-
88
-
89
-
90
-
91
-
92
-
93
-
94
-
95
-
96
-
97
-
98
-
99
-
100
-
101
-
102
-
103
-
104
-
105
-
106
-
107
-
108
-
109
-
110
-
111
-
112
-
113
-
114
-
115
-
116
-
117
-
118
-
119
-
120
-
121
-
122
-
123
-
124
-
125
-
126
-
127
-
128
-
129
-
130
-
131
-
132
-
133
-
134
-
135
-
136
-
137
-
138
-
139
-
140
-
141
-
142
-
143
-
144
-
145
-
146
-
147
-
148
-
149
-
150
-
151
-
152
 |
 |
