Panasonic HomeHawk 1080p HomeHawk Users Guide - Page 74
Detection test, Temperature sensor, Sound sensitivity, Temperature Alert Range]
 |
View all Panasonic HomeHawk 1080p manuals
Add to My Manuals
Save this manual to your list of manuals |
Page 74 highlights
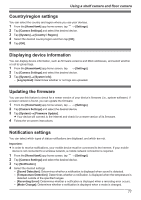
Using a shelf camera and floor camera - [Very Low]: The image sensor is only slightly sensitive to changes, i.e., a large change is required to trigger the sensor. 5 When finished, tap [OK]. Detection test You can test which areas of the camera image can be detected while viewing live images from the camera. This is useful when determining where to install cameras, and also which areas you should enable or disable detection for. 1 From the [HomeHawk] app home screen, tap ® [Settings]. 2 Tap [Camera Settings] and select the desired camera. 3 Tap [Detection] ® [Detection Test]. Video motion A live image of the selected camera is displayed with detection areas colored to show their detection status. - Pink outlined areas: Areas where motion was detected. - Blue outlined areas: Areas where motion was not detected. - Grey areas with a red diagonal line: Areas where detection is disabled. (See "Detection area", Page 73 for more information.) Temperature sensor You can configure the camera to send notifications if the camera's ambient temperature is too cold or too hot. 1 From the [HomeHawk] app home screen, tap ® [Settings]. 2 Tap [Camera Settings] and select the desired camera. 3 Tap [Detection] ® [Temperature Alert Range]. 4 Select the desired temperature for the lower threshold of the acceptable temperature range. 5 Select the desired temperature for the upper threshold of the acceptable temperature range, and then tap [OK]. Temperature units You can change the units displayed for the temperature. 1 From the [HomeHawk] app home screen, tap ® [Settings]. 2 Tap [Camera Settings] and select the desired camera. 3 Tap [System] ® [Temperature Units]. 4 Select whether the temperature is displayed and specified in Fahrenheit or Celsius, and then tap [OK]. Sound sensitivity You can configure the sound sensitivity used for sound detection. 1 From the [HomeHawk] app home screen, tap ® [Settings]. 74
-
 1
1 -
2
-
3
-
4
-
5
-
6
-
7
-
8
-
9
-
10
-
11
-
12
-
13
-
14
-
15
-
16
-
17
-
18
-
19
-
20
-
21
-
22
-
23
-
24
-
25
-
26
-
27
-
28
-
29
-
30
-
31
-
32
-
33
-
34
-
35
-
36
-
37
-
38
-
39
-
40
-
41
-
42
-
43
-
44
-
45
-
46
-
47
-
48
-
49
-
50
-
51
-
52
-
53
-
54
-
55
-
56
-
57
-
58
-
59
-
60
-
61
-
62
-
63
-
64
-
65
-
66
-
67
-
68
-
 69
69 -
 70
70 -
 71
71 -
 72
72 -
 73
73 -
 74
74 -
 75
75 -
 76
76 -
 77
77 -
 78
78 -
 79
79 -
80
-
81
-
82
-
83
-
84
-
85
-
86
-
87
-
88
-
89
-
90
-
91
-
92
-
93
-
94
-
95
-
96
-
97
-
98
-
99
-
100
-
101
-
102
-
103
-
104
-
105
-
106
-
107
-
108
-
109
-
110
-
111
-
112
-
113
-
114
-
115
-
116
-
117
-
118
-
119
-
120
-
121
-
122
-
123
-
124
-
125
-
126
-
127
-
128
-
129
-
130
-
131
-
132
-
133
-
134
-
135
-
136
-
137
-
138
-
139
-
140
-
141
-
142
-
143
-
144
-
145
-
146
-
147
-
148
-
149
-
150
-
151
-
152
-
153
-
154
-
155
-
156
 |
 |
