| Section |
Page |
| Expanding Your Phone |
3 |
| Contents |
4 |
| Connections 11 |
4 |
| Installing the Battery in the Handset 12 |
4 |
| Battery Charge 12 |
4 |
| Programming Guidelines 14 |
4 |
| Function Menu Table 15 |
4 |
| Display Language 16 |
4 |
| Dialing Mode 16 |
4 |
| Line Mode 17 |
4 |
| Auto Talk 17 |
4 |
| Ringer Volume 18 |
4 |
| Ringer Tone 19 |
4 |
| LCD Contrast 21 |
4 |
| Message Alert 21 |
4 |
| Using the Handset 22 |
4 |
| Using the Base Unit 25 |
4 |
| Talking Caller ID 28 |
4 |
| Viewing the Caller List 30 |
4 |
| Calling Back from the Caller List 30 |
4 |
| Editing the Caller’s Phone Number 31 |
4 |
| Caller ID Number Auto Edit 32 |
4 |
| Storing Caller Information in the Phone Book 33 |
4 |
| Erasing Caller Information 33 |
4 |
| Storing Names and Numbers 34 |
4 |
| Dialing from the Phone Book 36 |
4 |
| Chain Dial 37 |
4 |
| Editing an Item in the Phone Book 38 |
4 |
| Erasing an Item in the Phone Book 38 |
4 |
| Copying Items in the Phone Book 39 |
4 |
| Storing Phone Numbers 41 |
4 |
| Dialing a Stored Phone Number 41 |
4 |
| Making Intercom Calls 42 |
4 |
| Answering Intercom Calls 43 |
4 |
| Voice Paging 44 |
4 |
| Call Share 48 |
4 |
| Storing a Voice Mail Access Number 51 |
4 |
| Setting Voice Mail (VM) Tone Detection 52 |
4 |
| Listening to Voice Mail Messages 53 |
4 |
| Muting Your Conversation 54 |
4 |
| Call Privacy 54 |
4 |
| Using the PAUSE Button (For PBX Line/Long Distance Calls) 55 |
4 |
| For Call Waiting Service Users 55 |
5 |
| Temporary Tone Dialing (For Rotary or Pulse Service Users) 56 |
5 |
| FLASH Button 56 |
5 |
| Incoming Call Tone 57 |
5 |
| Key Tone 58 |
5 |
| Canceling the Handset Registration 65 |
5 |
| Re-registering the Handset 65 |
5 |
| If the Following Appear on Your Display... 67 |
5 |
| For Best Performance |
6 |
| Battery charge |
6 |
| Base unit location/Noise |
6 |
| Location of Controls |
7 |
| Base unit |
7 |
| Handset |
8 |
| How to use the soft keys/navigator keys |
9 |
| Display |
10 |
| Installation |
11 |
| Connections |
11 |
| Installing the Battery in the Handset |
12 |
| Battery Charge |
12 |
| Battery strength |
12 |
| Recharge |
13 |
| Battery information |
13 |
| Programmable Settings |
14 |
| Programming Guidelines |
14 |
| How to select a function item from the menu |
14 |
| 1 Press [MENU]. |
14 |
| 2 Scroll to the desired item by pressing [d] or [B]. |
14 |
| 3 Press the soft key () to select the desired item. |
14 |
| 4 If the item has a sub-menu, select the menu item (p. 15). Repeat steps 2 and 3 until the desired item is displayed. If the item has no sub-menu, go to step 5. |
14 |
| 5 Select the desired setting by pressing [d] or [B], then press the soft key (). |
14 |
| 6 Press [OFF] to exit programming mode. |
14 |
| Function Menu Table |
15 |
| Display Language |
16 |
| 1 Press [MENU]. |
16 |
| 2 Scroll to “Initial setting” by pressing [d] or [B], then press the soft key (). |
16 |
| 3 Scroll to “Change language” by pressing [d] or [B], then press the soft key (). |
16 |
| 4 To change from English to Spanish, press the soft key (). To change from Spanish to English, press the soft key (). |
16 |
| 5 When Spanish is selected, press the soft key (), then press [OFF]. When English is selected, press the soft key (), then press [OFF]. |
16 |
| Dialing Mode |
16 |
| 1 Press [MENU]. |
16 |
| 2 Scroll to “Initial setting” by pressing [d] or [B], then press the soft key (). |
16 |
| 3 Scroll to “Set tel line” by pressing [d] or [B], then press the soft key (). |
16 |
| 4 Press the soft key () at “Set dial mode”. |
16 |
| 5 Select “Pulse” or “Tone” by pressing [d] or [B]. |
16 |
| 6 Press the soft key (), then press [OFF]. |
16 |
| Line Mode |
17 |
| 1 Press [MENU]. |
17 |
| 2 Scroll to “Initial setting” by pressing [d] or [B], then press the soft key (). |
17 |
| 3 Scroll to “Set tel line” by pressing [d] or [B], then press the soft key (). |
17 |
| 4 Scroll to “Set line mode” by pressing [d] or [B], then press the soft key (). |
17 |
| 5 Select “A” or “B” by pressing [d] or [B]. |
17 |
| 6 Press the soft key (), then press [OFF]. |
17 |
| Auto Talk |
17 |
| 1 Press [MENU]. |
17 |
| 2 Scroll to “Initial setting” by pressing [d] or [B], then press the soft key (). |
17 |
| 3 Scroll to “Auto talk” by pressing [d] or [B], then press the soft key (). |
17 |
| 4 Select “On” or “Off” by pressing [d] or [B]. |
17 |
| 5 Press the soft key (), then press [OFF]. |
17 |
| Ringer Volume |
18 |
| 1 Press [MENU]. |
18 |
| 2 Press the soft key () at “Ringer setting”. |
18 |
| 3 Press the soft key () at “Ringer volume”. |
18 |
| 4 Select the desired volume by pressing [d] or [B]. |
18 |
| 5 Press the soft key (). |
18 |
| Ringer Tone |
19 |
| 1 Press [MENU]. |
19 |
| 2 Press the soft key () at “Ringer setting”. |
19 |
| 3 Scroll to “Ringer tone” by pressing [d] or [B], then press the soft key (). |
19 |
| 4 Select the desired ringer tone by pressing [d] or [B]. |
19 |
| 5 Press the soft key (), then press [OFF]. |
19 |
| 1 Press [f] or [g]. |
20 |
| 2 Press [f] or [g] repeatedly to select the desired tone. |
20 |
| 1 Press [MENU]. |
20 |
| 2 Scroll to “Initial setting” by pressing [d] or [B], then press the soft key (). |
20 |
| 3 Scroll to “Set base unit” by pressing [d] or [B], then press the soft key (). |
20 |
| 4 Press the soft key () at “Ringer tone”. |
20 |
| 5 Select the desired ringer tone by pressing [d] or [B]. |
20 |
| 6 Press the soft key (), then press [OFF]. |
20 |
| LCD Contrast |
21 |
| 1 Press [MENU]. |
21 |
| 2 Scroll to “Initial setting” by pressing [d] or [B], then press the soft key (). |
21 |
| 3 Scroll to “LCD contrast” by pressing [d] or [B], then press the soft key (). |
21 |
| 4 Select the desired contrast by pressing [d] or [B]. |
21 |
| 5 Press the soft key (), then press [OFF]. |
21 |
| Message Alert |
21 |
| 1 Press [MENU]. |
21 |
| 2 Scroll to “Initial setting” by pressing [d] or [B], then press the soft key (). |
21 |
| 3 Scroll to “Message alert” by pressing [d] or [B], then press the soft key (). |
21 |
| 4 Select “On” or “Off” by pressing [d] or [B]. |
21 |
| 5 Press the soft key (), then press [OFF]. |
21 |
| Making Calls |
22 |
| System capabilities (Operating more than one handset, p. 3) |
22 |
| Using the Handset |
22 |
| 1 Press [C]. |
22 |
| 2 Dial a phone number. |
22 |
| 3 To hang up, press [OFF] or place the handset on the base unit. |
22 |
| To have a hands-free phone conversation |
22 |
| 1 Press [s]. |
22 |
| 2 Dial a phone number. |
22 |
| 3 When the other party answers, talk into the microphone. |
22 |
| 4 To hang up, press [OFF] or place the handset on the base unit. |
22 |
| To dial after confirming the entered number |
23 |
| 1. Enter a phone number. |
23 |
| 2. Press [C] or [s]. |
23 |
| 3. To hang up, press [OFF] or place the handset on the base unit. |
23 |
| To adjust the receiver/ speaker volume during a conversation |
23 |
| To redial the last number dialed |
23 |
| To redial using the redial list (Memory Redial) |
23 |
| 1. Press [REDIAL]. |
23 |
| 2. Scroll to the desired number by pressing [d] or [B]. |
23 |
| 3. Press [C] or [s]. |
23 |
| To put a call on hold |
23 |
| 1. Press [HOLD/INTERCOM] during a conversation. |
23 |
| 2. Press [HOLD/INTERCOM] again. |
23 |
| Voice Enhancer Technology |
24 |
| 1. Press [MENU]. |
24 |
| 2. Scroll to “Voice enhancer” by pressing [d] or [B], then press the soft key (). |
24 |
| 3. Select “On” or “Off” by pressing [d] or [B]. |
24 |
| 4. Press the soft key (), then press [OFF]. |
24 |
| Clarity Booster |
24 |
| 1. Press [MENU] during an outside call. |
24 |
| 2. Press [2] to select “2=Booster on” or “2=Booster off”. |
24 |
| Backlit LCD display/Lighted handset keypad |
24 |
| Using the Base Unit |
25 |
| 1 Press [SP-PHONE]. |
25 |
| 2 Dial a phone number. |
25 |
| 3 When the other party answers, talk into the MIC (microphone). |
25 |
| 4 To hang up, press [SP-PHONE]. |
25 |
| To adjust the speaker volume |
25 |
| To redial the last number dialed |
25 |
| To put a call on hold |
25 |
| Answering Calls |
26 |
| 1 Press [C] or [s]. |
26 |
| 2 To hang up, press [OFF] or place the handset on the base unit. |
26 |
| 1 Press [SP-PHONE]. |
26 |
| 2 Talk into the MIC. |
26 |
| 3 To hang up, press [SP-PHONE]. |
26 |
| Caller ID Service |
27 |
| How Caller ID information is displayed and announced |
27 |
| Talking Caller ID |
28 |
| To turn on or off Talking Caller ID feature |
28 |
| 1 Press [MENU]. |
28 |
| 2 Scroll to “Talk Caller ID” by pressing [d] or [B], then press the soft key (). |
28 |
| 3 Select “On” or “Off” by pressing [d] or [B]. |
28 |
| 4 Press the soft key (), then press [OFF]. |
28 |
| Caller ID Service |
29 |
| 1 Press [MENU]. |
29 |
| 2 Scroll to “Initial setting” by pressing [d] or [B], then press the soft key (). |
29 |
| 3 Scroll to “Set base unit” by pressing [d] or [B], then press the soft key (). |
29 |
| 4 Scroll to “Talk Caller ID” by pressing [d] or [B], then press the soft key (). |
29 |
| 5 Select “Off” or “On” by pressing [d] or [B]. |
29 |
| 6 Press the soft key (), then press [OFF]. |
29 |
| Using the Caller List |
29 |
| Viewing the Caller List |
30 |
| 1 Press the soft key (), [d], or [B] to enter the Caller List. |
30 |
| 2 To search from the most recent call, press [d]. To search from the oldest call, press [B]. |
30 |
| 3 Press [OFF] to exit the list. |
30 |
| Calling Back from the Caller List |
30 |
| 1 Press the soft key (), [d], or [B] to enter the Caller List. |
30 |
| 2 Scroll to the desired caller by pressing [d] or [B]. |
30 |
| 3 Press [C] or [s]. |
30 |
| Editing the Caller’s Phone Number |
31 |
| 1 Press the soft key (), [d], or [B] to enter the Caller List. |
31 |
| 2 Scroll to the desired caller by pressing [d] or [B]. |
31 |
| 3 Press the soft key ( ) repeatedly until the number is shown in the desired format. |
31 |
| 4 To call the edited number, press [C] or [s]. |
31 |
| Caller ID Number Auto Edit |
32 |
| To turn on or off Caller ID Number Auto Edit feature |
32 |
| 1 Press [MENU]. |
32 |
| 2 Scroll to “Initial setting” by pressing [d] or [B], then press the soft key (). |
32 |
| 3 Scroll to “Caller ID edit” by pressing [d] or [B], then press the soft key (). |
32 |
| 4 Select “Off” or “On” by pressing [d] or [B]. |
32 |
| 5 Press the soft key (), then press [OFF]. |
32 |
| Storing Caller Information in the Phone Book |
33 |
| 1 Press the soft key (), [d], or [B] to enter the Caller List. |
33 |
| 2 Scroll to the desired caller by pressing [d] or [B]. |
33 |
| 3 Press the soft key (). |
33 |
| Erasing Caller Information |
33 |
| To erase a specific caller |
33 |
| 1 Press the soft key (), [d], or [B] to enter the Caller List. |
33 |
| 2 Scroll to the desired caller by pressing [d] or [B]. |
33 |
| 3 Press the soft key (). |
33 |
| To erase all entries |
33 |
| 1 Press the soft key (), [d], or [B] to enter the Caller List. |
33 |
| 2 Press the soft key (). |
33 |
| 3 Press the soft key (). |
33 |
| Phone Book |
34 |
| Storing Names and Numbers |
34 |
| 1 Press the soft key (C). |
34 |
| 2 Press the soft key (). |
34 |
| 3 Enter a name of up to 16 characters with the dialing buttons ([0] to [9]) (p. 35), then press [d]. |
34 |
| 4 Enter a phone number of up to 32 digits. |
34 |
| 5 Press [d]. |
34 |
| 6 Press the soft key (). |
34 |
| 7 Press [OFF]. |
34 |
| Selecting characters to enter names |
35 |
| 1. Press [8] four times. |
35 |
| 2. Press [6] three times, then press the soft key () to move the cursor. |
35 |
| 3. Press [6] once. |
35 |
| If you make a mistake while entering a name or number |
35 |
| 1. Press the soft key () or () to move the cursor to the incorrect character. |
35 |
| 2. Press the soft key () to delete the character. |
35 |
| 3. Enter the correct character. |
35 |
| Dialing from the Phone Book |
36 |
| 1 Press the soft key (C). |
36 |
| 2 Scroll to the desired item. To scroll down, press [d]. To scroll up, press [B]. |
36 |
| 3 Press [C], [s], or the soft key (). |
36 |
| 1. Press the soft key (C). |
36 |
| 2. Press the dialing button for the first letter of the desired name until any name with the same initial is displayed (see the Index table below). |
36 |
| Ex. To find “Frank”, press [3] repeatedly until the first item under “F” is displayed. |
36 |
| 3. Press [d] repeatedly until the desired name is displayed. |
36 |
| Chain Dial |
37 |
| 1. Search and dial from the phone book: 1-800-012-3456 (Calling card access number) |
37 |
| 2. Search and dial from the phone book: 1234 (Calling card PIN) |
37 |
| 3. Search and dial from the phone book: 1-555-012-3456 (Destination Number) |
37 |
| 1 While you are on a call; Press [MENU]. |
37 |
| 2 Press the soft key () at “1=Phone book”, or press [1]. |
37 |
| 3 Search for the desired item by pressing [d] or [B]. |
37 |
| 4 Press the soft key (). |
37 |
| Editing an Item in the Phone Book |
38 |
| 1 Press the soft key (C). |
38 |
| 2 Scroll to the desired item by pressing [d] or [B]. |
38 |
| 3 Press the soft key (). |
38 |
| 4 Edit the name (p. 35), then press [d]. |
38 |
| 5 Edit the phone number, then press [d]. |
38 |
| 6 Press the soft key (). |
38 |
| 7 Press [OFF]. |
38 |
| Erasing an Item in the Phone Book |
38 |
| 1 Press the soft key (C). |
38 |
| 2 Scroll to the desired item by pressing [d] or [B]. |
38 |
| 3 Press the soft key (). |
38 |
| 4 Press the soft key (). |
38 |
| 5 Press [OFF]. |
38 |
| Copying Items in the Phone Book |
39 |
| (When the System Has Two or More Handsets) |
39 |
| To copy one phone book item to another handset |
39 |
| 1 Press [MENU]. |
39 |
| 2 Scroll to “Copy phone book” by pressing [d] or [B], then press the soft key (). |
39 |
| 3 Press the soft key () at “Copy 1 item”. |
39 |
| 4 Select the destination extension number (1 to 4) by pressing [d] or [B]. |
39 |
| 5 Press the soft key (). |
39 |
| 6 Scroll to the desired phone book item by pressing [d] or [B]. |
39 |
| 7 Press the soft key (). |
39 |
| 8 Press [OFF]. |
39 |
| To copy all of the items in your phone book to another handset |
40 |
| 1 Press [MENU]. |
40 |
| 2 Scroll to “Copy phone book” by pressing [d] or [B], then press the soft key (). |
40 |
| 3 Scroll to “Copy all items” by pressing [d] or [B], then press the soft key (). |
40 |
| 4 Select the destination extension number (1 to 4) by pressing [d] or [B]. |
40 |
| 5 Press the soft key (). |
40 |
| 6 Press [OFF]. |
40 |
| Speed Dialer |
41 |
| Storing Phone Numbers |
41 |
| 1 Press [PROGRAM]. |
41 |
| 2 Enter a phone number of up to 32 digits. |
41 |
| 3 Press [AUTO]. |
41 |
| 4 Press a memory station number ([0] to [9]). |
41 |
| To erase a stored number |
41 |
| 1. Press [PROGRAM], then press [AUTO]. |
41 |
| 2. Press the memory station number ([0] to [9]) for the phone number to be erased. |
41 |
| Dialing a Stored Phone Number |
41 |
| 1 Press [SP-PHONE]. |
41 |
| 2 Press [AUTO]. |
41 |
| 3 Press a memory station number ([0] to [9]). |
41 |
| Intercom |
42 |
| Making Intercom Calls |
42 |
| From |
42 |
| 1 Press [HOLD/INTERCOM]. |
42 |
| 2 To page the base unit, press [0]. To page another handset, press its extension number ([1] to [4]). |
42 |
| 3 When the paged party answers, start talking. |
42 |
| 4 To disconnect the intercom, press [OFF]. |
42 |
| From |
42 |
| 1 Press [LOCATOR/INTERCOM/TRANSFER]. |
42 |
| 2 To page all handsets, press [0]. To page a specified handset, press its extension number [1] () to [4] (). |
42 |
| 3 When the paged party answers, talk into the MIC. |
42 |
| 4 To disconnect the intercom, press [SP-PHONE] or [LOCATOR/ INTERCOM/TRANSFER]. |
42 |
| Answering Intercom Calls |
43 |
| 1 Press [C], [s] or [HOLD/INTERCOM]. |
43 |
| 2 To disconnect the intercom, press [OFF]. |
43 |
| 1 Press [SP-PHONE] or [LOCATOR/INTERCOM/TRANSFER]. |
43 |
| 2 To disconnect the intercom, press [SP-PHONE] or [LOCATOR/INTERCOM/TRANSFER]. |
43 |
| Voice Paging |
44 |
| 1 Press [LOCATOR/INTERCOM/TRANSFER]. |
44 |
| 2 To make a voice announcement to all handsets, press [5] (). |
44 |
| 3 When the SP-PHONE indicator stops flashing, speak into the MIC. |
44 |
| 4 When finished, press [SP-PHONE] or [LOCATOR/INTERCOM/ TRANSFER]. OR After one of the handsets answers, talk into the MIC. To disconnect the intercom, press [SP-PHONE] or [LOCATOR/INTERCOM/TRANSFER]. |
44 |
| Transferring a Call |
45 |
| From the to the |
45 |
| 1 Handset: |
45 |
| (1) During a call, press [HOLD/INTERCOM]. |
45 |
| (2) To page the base unit, press [0]. |
45 |
| (3) Wait for the paged party to answer, then you can announce the transfer. |
45 |
| 2 Base unit: Press [SP-PHONE] or [LOCATOR/INTERCOM/ TRANSFER] to answer the page. |
45 |
| 3 Handset: To complete the transfer, press [OFF]. |
45 |
| From the to the |
45 |
| 1 Base unit: |
45 |
| (1) During a call, press [LOCATOR/INTERCOM/TRANSFER]. |
45 |
| (2) To page a specified handset, press its extension number [1] () to [4] (). To page all handsets, press [0]. Wait for the hand... |
45 |
| 2 Handset: Press [C], [s], or [HOLD/INTERCOM] to answer the page. |
45 |
| 3 Base unit: To complete the transfer, press [SP-PHONE]. |
45 |
| From a to another (when the system has two or more handsets) |
46 |
| 1 During a call, press [HOLD/INTERCOM], then page another handset by pressing its extension number ([1] to [4]). |
46 |
| 2 Wait for the paged party to answer, then you can announce the transfer. |
46 |
| 3 To complete the transfer, press [OFF]. |
46 |
| Quick call transfer |
47 |
| 1. During a call, press [HOLD/INTERCOM]. |
47 |
| 2. Press the extension number ([0] for the base unit, [1] to [4] for the handset). |
47 |
| 3. Press [OFF] to hang up. |
47 |
| 1. During a call, press [LOCATOR/INTERCOM/TRANSFER]. |
47 |
| 2. Press the extension number [1] () to [4] (), or press [0] to page all handsets. |
47 |
| 3. Press [SP-PHONE] to hang up. |
47 |
| Conference Calls |
48 |
| 1 During a call, press [HOLD/ INTERCOM]. |
48 |
| 2 To page the base unit, press [0]. To page another handset, press the extension number ([1] to [4]). |
48 |
| 3 When the paged party answers, press the soft key () on your unit to make a conference call. |
48 |
| 1 During a call, press [LOCATOR/INTERCOM/ TRANSFER]. |
48 |
| 2 To page a handset, press the extension number [1] () to [4] (). |
48 |
| 3 When the paged party answers, press [CONF] on your unit to make a conference call. |
48 |
| Call Share |
48 |
| To join a conversation (Call Share) |
48 |
| Room Monitor |
49 |
| To turn Room Monitor on for the handset |
49 |
| 1 Press [MENU]. |
49 |
| 2 Scroll to “Initial setting” by pressing [d] or [B], then press the soft key (). |
49 |
| 3 Scroll to “Room monitor” by pressing [d] or [B], then press the soft key (). |
49 |
| 4 Select “On” by pressing [d] or [B]. |
49 |
| 5 Press the soft key (), then press [OFF]. |
49 |
| To turn Room Monitor on for the base unit |
49 |
| 1 Follow steps 1 and 2 of “To turn Room Monitor on for the handset” above. |
49 |
| 2 Scroll to “Set base unit” by pressing [d] or [B], then press the soft key (). |
49 |
| 3 Scroll to “Room monitor” by pressing [d] or [B], then press the soft key (). |
49 |
| 4 Select “On” by pressing [d] or [B]. |
49 |
| 5 Press the soft key (), then press [OFF]. |
49 |
| To monitor with |
50 |
| 1 Press [HOLD/INTERCOM], then press the soft key (). |
50 |
| 2 To call the base unit, press [0]. To call another handset, press its extension number ([1] to [4]). |
50 |
| 3 To end monitoring, press [OFF]. |
50 |
| To monitor with |
50 |
| 1 Press [LOCATOR/INTERCOM/TRANSFER], then press [MUTE]. |
50 |
| 2 To call the handset, press its extension number [1] () to [4] (). |
50 |
| 3 To end monitoring, press [LOCATOR/INTERCOM/TRANSFER] or [SP-PHONE]. |
50 |
| Voice Mail Service |
51 |
| Storing a Voice Mail Access Number |
51 |
| 1 Press [MENU]. |
51 |
| 2 Scroll to “Initial setting” by pressing [d] or [B], then press the soft key (). |
51 |
| 3 Press the soft key () at “Voice Mail”. |
51 |
| 4 Press the soft key () at “Store VM access#”. |
51 |
| 5 Enter your access number, up to 32 digits. |
51 |
| 6 Press the soft key (), then press [OFF]. |
51 |
| To erase a stored voice mail access number |
52 |
| Setting Voice Mail (VM) Tone Detection |
52 |
| 1 Press [MENU]. |
52 |
| 2 Scroll to “Initial setting” by pressing [d] or [B], then press the soft key (). |
52 |
| 3 Press the soft key () at “Voice Mail”. |
52 |
| 4 Scroll to “VM tone detect” by pressing [d] or [B], then press the soft key (). |
52 |
| 5 Select “Off” or “On” by pressing [d] or [B]. |
52 |
| 6 Press the soft key (), then press [OFF]. |
52 |
| Listening to Voice Mail Messages |
53 |
| To listen to your voice mail message(s) |
53 |
| 1 Press the soft key (), then press [C] or [s]. |
53 |
| 2 Follow the pre-recorded instructions. |
53 |
| 3 When finished, press [OFF]. |
53 |
| 1 Press [VM]. |
53 |
| 2 Follow the pre-recorded instructions. |
53 |
| 3 When finished, press [SP-PHONE]. |
53 |
| Voice Mail Service |
54 |
| Special Features |
54 |
| Muting Your Conversation |
54 |
| Call Privacy |
54 |
| Using the PAUSE Button (For PBX Line/Long Distance Calls) |
55 |
| For Call Waiting Service Users |
55 |
| Call Waiting Caller ID display |
55 |
| Temporary Tone Dialing (For Rotary or Pulse Service Users) |
56 |
| FLASH Button |
56 |
| Selecting the flash time |
56 |
| 1 Press [MENU]. |
56 |
| 2 Scroll to “Initial setting” by pressing [d] or [B], then press the soft key (). |
56 |
| 3 Scroll to “Set tel line” by pressing [d] or [B], then press the soft key (). |
56 |
| 4 Scroll to “Set flash time” by pressing [d] or [B], then press the soft key (). |
56 |
| 5 Select the flash time by pressing [d] or [B]. |
56 |
| 6 Press the soft key (), then press [OFF]. |
56 |
| Incoming Call Tone |
57 |
| Handset incoming call tone |
57 |
| 1 Press [MENU]. |
57 |
| 2 Press the soft key () at “Ringer setting”. |
57 |
| 3 Scroll to “Incoming call.” by pressing [d] or [B], then press the soft key (). |
57 |
| 4 Select “On”, “Off” or “2” by pressing [d] or [B]. |
57 |
| 5 Press the soft key (), then press [OFF]. |
57 |
| 1 Press [MENU]. |
57 |
| 2 Scroll to “Initial setting” by pressing [d] or [B], then press the soft key (). |
57 |
| 3 Scroll to “Set base unit” by pressing [d] or [B], then press the soft key (). |
57 |
| 4 Scroll to “Incoming call.” by pressing [d] or [B], then press the soft key (). |
57 |
| 5 Select “On”, “Off” or “2” by pressing [d] or [B]. |
57 |
| 6 Press the soft key (), then press [OFF]. |
57 |
| Key Tone |
58 |
| 1 Press [MENU]. |
58 |
| 2 Scroll to “Initial setting” by pressing [d] or [B], then press the soft key (). |
58 |
| 3 Scroll to “Key tone” by pressing [d] or [B], then press the soft key (). |
58 |
| 4 Select “Off” or “On” by pressing [d] or [B]. |
58 |
| 5 Press the soft key (), then press [OFF]. |
58 |
| Belt Clip |
59 |
| To attach the belt clip To remove the belt clip |
59 |
| Optional Headset |
59 |
| Connecting an optional headset |
59 |
| Wall Mounting |
60 |
| 1 Connect the AC adaptor. |
60 |
| 2 Tuck the telephone line cord inside the wall mounting adaptor (A). Connect the telephone line cord (B). |
60 |
| 3 Insert the hooks on the wall mounting adaptor into the holes (A) and (B) on the base unit. |
60 |
| 4 Adjust the adaptor to hold the base unit, then push it in the direction of the arrow until it clicks into place. |
61 |
| 5 Connect the telephone line cord. Mount the unit, then slide it down. |
61 |
| 6 To charge the handset battery: Place the handset on the base unit. |
61 |
| To remove the wall mounting adaptor |
62 |
| Direct Commands |
63 |
| Canceling Registration/Re-registration |
65 |
| Canceling the Handset Registration |
65 |
| 1 Press [MENU]. |
65 |
| 2 Scroll to “Initial setting” by pressing [d] or [B], then press the soft key (). |
65 |
| 3 Scroll to “Registration” by pressing [d] or [B], then press the soft key (). |
65 |
| 4 Scroll to “Deregistration” by pressing [d] or [B], then press the soft key (). |
65 |
| 5 Press [3][3][5] to delete the registration memory. |
65 |
| 6 Press the soft key (). |
65 |
| Re-registering the Handset |
65 |
| 1 Handset: Press [MENU]. |
66 |
| 2 Handset: Scroll to “Initial setting” by pressing [d] or [B], then press the soft key (). |
66 |
| 3 Handset: Scroll to “Registration” by pressing [d] or [B], then press the soft key (). |
66 |
| 4 Handset: Press the soft key () at “HS registration”. |
66 |
| 5 Base unit: Press and hold [LOCATOR/INTERCOM/TRANSFER] for 3 seconds. |
66 |
| 6 Handset: |
66 |
| (1) Press the soft key (). |
66 |
| (2) Wait until a long beep sounds and the display shows the new extension number (ex. extension number 2). |
66 |
| If the Following Appear on Your Display... |
67 |
| If the Following Appear on Your Display... |
69 |
| Troubleshooting |
69 |
| Important Safety Instructions |
73 |
| CAUTION: |
74 |
| WARNING: |
74 |
| FCC and Other Information |
75 |
| Index |
78 |
| Specifications |
80 |

 1
1 76
76 77
77 78
78 79
79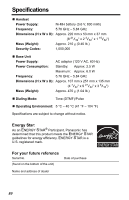 80
80 81
81 82
82 83
83 84
84