Panasonic SVP20U SVP20U User Guide
Panasonic SVP20U - SD PRINTER Manual
 |
View all Panasonic SVP20U manuals
Add to My Manuals
Save this manual to your list of manuals |
Panasonic SVP20U manual content summary:
- Panasonic SVP20U | SVP20U User Guide - Page 1
Mobile Printer Operating Instructions Model No. SV-P20U Before use, please read these instructions completely. For USA assistance, please call:1-800-272-7033 or send e-mail to:[email protected] For Canadian assistance, please call:1-800-561-5505 or visit us at www.panasonic.ca VQT0A81-1 - Panasonic SVP20U | SVP20U User Guide - Page 2
Article 1 License Licensee is granted the right to use the Software, including the information recorded or described on the CD-ROM, instruction manuals, and any other media provided to Licensee (collectively "Software"), but all applicable rights to patents, copyrights, trademarks and trade secrets - Panasonic SVP20U | SVP20U User Guide - Page 3
on Handling the SD Mobile Printer 49 Maintenance Notes 50 Messages on the LCD Monitor 51 Before Requesting Service 52 Specifications 54 Limited Warranty (For U.S.A. Only)...... 56 Customer Services Directory (For U.S.A. Only 58 Spanish Quick Use Guide/Guía española para el uso rápido 59 3 - Panasonic SVP20U | SVP20U User Guide - Page 4
to thank you for purchasing this Panasonic SD Mobile Printer. Please read these Operating Instructions carefully and keep them handy for THE COVER (OR BACK); THERE ARE NOT USER SERVICEABLE PARTS INSIDE. REFER SERVICING TO QUALIFIED SERVICE PERSONNEL. Notice: This product has parts that contain - Panasonic SVP20U | SVP20U User Guide - Page 5
To assure continued compliance, follow the attached installation instructions and use only shielded interface cables with ferrite core party: Support Contact: Panasonic SV-P20U Matsushita Electric Corporation of America One Panasonic Way, Secaucus, NJ 07094 Panasonic Consumer Electronics - Panasonic SVP20U | SVP20U User Guide - Page 6
Supplied Accessories AC Adaptor (VSK0624) Power Cable (K2CA2EA00002) USB Connection Cable (K2KZ4CB00002) Head Cleaner (VFQ0106) Ink Cassette/Paper set (For trial/20 sheets) CD-ROM (Printer Driver, SD Viewer for Printer)(VFF0167) Carrying Case (RFC0069-H) Battery Pack (CGR-S603) Optional Accessories - Panasonic SVP20U | SVP20U User Guide - Page 7
Í MENU DISPLAY 1 23 4 PAPER IN 8 9 5 ON 6 PRINT 7 ERROR 18 19 20 21 10 11 12 13 14 15 16 17 Preparation Controls and Components 1 Power Button [ ] Hold down (for about 2 seconds) to turn on/off the SD Mobile Printer. 2 Menu Button [MENU] Use this button to display the Menu screen. 3 Display - Panasonic SVP20U | SVP20U User Guide - Page 8
DC IN 4.9V 1 Power Supply ª Using an AC Adaptor 1 Connect the DC Input Lead to the [DC IN 4.9V] socket on the SD Mobile Printer. 2 Connect the AC main Lead to the AC Adaptor and the AC Outlet. ≥Hold down the Power Button [ ] for about 2 seconds, and the printer is on. The SOCKET OUTLET SHALL BE - Panasonic SVP20U | SVP20U User Guide - Page 9
incorrectly replaced. Replace only with the same or equivalent type recommended by the manufacturer. Dispose of used batteries according to the manufacturer's instructions. ≥When recharging, turn off the power of the printer. ≥Remove the battery if the printer is left unused for a long time. ≥When - Panasonic SVP20U | SVP20U User Guide - Page 10
Paper/Ink Cassette The following Ink Cassette/Paper Sets may be used for this printer in addition to the paper/ink cassette supplied. ª Paper That Can Be Used For Printing The SD Mobile Printer can use the following types of paper. (optional) ≥Credit Card Size 2-1/8"t3-3/8"(54t86 mm) Printing - Panasonic SVP20U | SVP20U User Guide - Page 11
1 1 2 Inserting the Ink Cassette 1 After removing the stopper 1, turn the hole in the direction of the arrow to clear any slack in the Ink Film. 2 Open Ink Cassette Compartment Door 2. 3 Push it into the direction shown by the arrow until it clicks into place. 4 Close 2. Ejecting the Ink Cassette - Panasonic SVP20U | SVP20U User Guide - Page 12
11 1 2 2,3 1 Í Inserting an SD Memory Card/ MultiMediaCard 1 Slide the Memory Card Door 1, and flip it to open. 2 Hold the Memory Card placing the cut off corner 2 at the front with the label facing up, and then insert it fully into the Memory Card Slot horizontally. ≥When inserted correctly, a - Panasonic SVP20U | SVP20U User Guide - Page 13
2 MENU DISPLAY 3 MENU 1/2 Print style Standard Number of copies 1 Date print OFF DPOF PRINT OK SELECT SET MENU DISPLAY 4 MENU 1/2 Print style Standard Number of copies 2 Date print OFF DPOF PRINT OK SELECT SET MENU DISPLAY 5 MENU DISPLAY MENU 1/2 Print style Number of - Panasonic SVP20U | SVP20U User Guide - Page 14
2 Basic Functions Printing Images 1 Insert a Memory Card, and Turn on the Standard Date DISPLAY:Print this picture. Printer. (l 12) ≥The Index picture screen is displayed. 2 Press the [2 1] button to select a MENU DISPLAY desired image. ≥Each time the button is pressed, the next image is - Panasonic SVP20U | SVP20U User Guide - Page 15
6 MENU 1/2 Print style Standard Number of copies 1 Date print DPOF OFF PRINT OK SELECT SET MENU DISPLAY 7 Standard Date Insert paper to print. MENU DISPLAY 8 6 Press the [DISPLAY] button to select [Number of copies] and press the [2 1] button to set the number of the print. 7 Press - Panasonic SVP20U | SVP20U User Guide - Page 16
2 MENU DISPLAY 3 MENU 1/2 Print style Select 8 Number of copies 1 Date print OFF DPOF PRINT OK SELECT SET MENU DISPLAY ≥After the image is finished printing, a message will be displayed to feed in the next sheet of paper. ≥Do not touch the paper during printing. ≥Do not open the Ink - Panasonic SVP20U | SVP20U User Guide - Page 17
4 MENU DISPLAY 4 Press the [MENU] button. 5 Press the [2 1] button to select a image and press the [DISPLAY] button. 5 ≥The selected image is marked with [¥] 1 on the bottom-right corner of it. 6 Repeat step 5 and select 8 images. ≥After selecting 8 images, the preview image is displayed. - Panasonic SVP20U | SVP20U User Guide - Page 18
2 MENU DISPLAY 3 MENU 1/2 Print style Copy 8 Number of copies 1 Date print OFF DPOF PRINT OK SELECT SET MENU DISPLAY 4 MENU DISPLAY 5 Printing Multiple Screen Shots of the Same Images This printer can divide the screen into 8, and print multiple screen shots of the same images. 1 - Panasonic SVP20U | SVP20U User Guide - Page 19
2 MENU 2/2 Frame Trimming Picture LCD ON ADJUST ADJUST OK SELECT SET MENU DISPLAY Standard Date Insert paper to print. Inserting a Frame Illustration and Printing You can insert illustrations stored in this printer into the image and print it. 1 Proceed to steps 1 through to 4 on page 14. ≥ - Panasonic SVP20U | SVP20U User Guide - Page 20
2 MENU 1/2 Print style Standard Number of copies 1 Date print ON DPOF PRINT OK SELECT SET MENU DISPLAY Standard Date Insert paper to print. Date Printing You can print images with the date of recording superimposed. 1 Proceed to steps 1 through to 4 on page 14. ≥The Menu screen is - Panasonic SVP20U | SVP20U User Guide - Page 21
2,3 MENU 2/2 Frame Trimming Picture LCD No frame ON ADJUST ADJUST OK SELECT SET MENU DISPLAY Trimming This printer can trim the horizontal or vertical edges of an image and stretch it so that the image fills up the entire print space. 1 Proceed to steps 1 through to 4 on page 14. ≥The Menu - Panasonic SVP20U | SVP20U User Guide - Page 22
2 MENU 1/2 Print style Standard Number of copies 1 Date print ON DPOF PRINT OK SELECT PRINT MENU DISPLAY Printing DPOF-set Images Images marked with the DPOF option of a digital camera or SD video devices will be printed automatically. ("DPOF": Digital Print Order Format; a feature that - Panasonic SVP20U | SVP20U User Guide - Page 23
1 MENU DISPLAY 2 MENU 2/2 Frame Trimming Picture LCD No frame ON ADJUST ADJUST OK SELECT ADJUST MENU DISPLAY 3,4 Adjusting Picture Quality 1 Select the image you wish to adjust and press the [MENU] button. ≥The Menu screen is displayed. 2 Press the [DISPLAY] button to select [ - Panasonic SVP20U | SVP20U User Guide - Page 24
1 MENU DISPLAY 2 MENU 2/2 Frame Trimming Picture LCD No frame ON ADJUST ADJUST OK SELECT ADJUST MENU DISPLAY 3,4 BRIGHTNESS OK SELECT SET Setting LCD Monitor 1 Select an image and press the [MENU] button. ≥The Menu screen is displayed. 2 Press the [DISPLAY] button to select [LCD] and - Panasonic SVP20U | SVP20U User Guide - Page 25
1 Í 2 1 After Use 1 Hold down the Power Button [ ] for about 2 seconds. ≥Turn off the SD Mobile Printer. 2 Open the Memory Card Door 1 and push the edge of the Memory Card 2. ≥Pull out the Memory Card. 3 Put the Printer into the Carrying Case. 25 - Panasonic SVP20U | SVP20U User Guide - Page 26
1 Cutting the Left and Right Sides of the Paper After Printing 1 Fold in both directions along the perforation lines. 2 Tear along the perforation lines. ≥There are perforation lines on both ends of the paper. Be sure to tear off both sides. 2 26 - Panasonic SVP20U | SVP20U User Guide - Page 27
and unique hardware in the PC may occasionally cause an operating problem. ≥Use the supplied AC adapter when using this printer connecting ≥Although the screens in these Operating Instructions are shown in English for the sake of example, other languages are supported as well. ≥When the Printer - Panasonic SVP20U | SVP20U User Guide - Page 28
3 Installing the Printer Driver Installing this printer driver allows the Printer to be used as a full-color printer. USB For Windows XP 1 Turn on the PC and insert the supplied CD-ROM into the CD-ROM drive. 2 Turn on the Printer. (l 12) 3 Connect the Printer to the PC using auxiliary USB - Panasonic SVP20U | SVP20U User Guide - Page 29
3 4,6 5 7 8 For Windows Me USB 1 Turn on the PC and insert the supplied CD-ROM into the CD-ROM drive. 2 Turn on the Printer. (l 12) 3 Connect the Printer to the PC using auxiliary USB cable. ≥The [Add New Hardware Wizard] screen appears. ≥Depending on your PC, step 4 and 5 may be skipped. If this - Panasonic SVP20U | SVP20U User Guide - Page 30
3 Installing the Printer Driver (Cont.) USB For Windows 98SE/2000 1 Turn on the PC and insert the supplied CD-ROM into the CD-ROM drive. 2 Turn on the Printer. (l 12) 3 Connect the Printer to the PC using auxiliary USB cable. ≥The [Add (Found) New Hardware Wizard] 4 screen appears. ≥If - Panasonic SVP20U | SVP20U User Guide - Page 31
7 8 9 11 12,13 7 Click the [Next] Button. ≥Re-click the [Next] Button when the search confirmation screen appears. ≥The message [File *****.DLL is not found] can be displayed depending on the environment of PC. Many PCs may install this file on the Hard Disk. Click [Refer] and select [C:\windows\ - Panasonic SVP20U | SVP20U User Guide - Page 32
5 6,7 8,9 10 32 Installing the Printer Driver (Cont.) If the [Found New Hardware Wizard] screen does not appear, install with the following steps. Installing from the [Add Printer Wizard] screen (Windows XP) 1 Before installation, check that all applications have exited. 2 Connect the printer to - Panasonic SVP20U | SVP20U User Guide - Page 33
where the Printer Driver is located. ≥If the CD-ROM drive is assigned to the D drive, select [D:\Win2K-XP] folder. 12Click [OK]. 13Check that [Panasonic SV-P20] is displayed and click [Next]. 14Click [Next]. ≥If a screen to select the default printer is displayed, select [Yes] if it is to be the - Panasonic SVP20U | SVP20U User Guide - Page 34
3 4 5 6 7 8,9 34 Installing the Printer Driver (Cont.) If the [Add New Hardware Wizard] screen does not appear, install with the following steps. Installing from the [Add Printer Wizard] screen (Windows 98SE/Me) 1 Before installation, check that all applications have exited. 2 Connect the printer - Panasonic SVP20U | SVP20U User Guide - Page 35
10 11 12 10Check that [Panasonic SV-P20] is displayed and click [Next]. 11Select the USB port through which the Printer is connected and click [Next]. ≥Select only the [USB00X] port. (e.g. USB001). 12Click [ - Panasonic SVP20U | SVP20U User Guide - Page 36
3 4 5 6,7 8,9 10 36 Installing the Printer Driver (Cont.) If the [Found New Hardware Wizard] screen does not appear, install with the following steps. Installing from the [Add Printer Wizard] screen (Windows 2000) 1 Before installation, check that all applications have exited. 2 Connect the printer - Panasonic SVP20U | SVP20U User Guide - Page 37
where the Printer Driver is located. ≥If the CD-ROM drive is assigned to the D drive, select [D:\Win2K-XP] folder. 12Click [OK]. 13Check that [Panasonic SV-P20] is displayed and click [Next]. 14Click [Next]. ≥If a screen to select the default printer is displayed, select [Yes] if it is to be the - Panasonic SVP20U | SVP20U User Guide - Page 38
≥To view the installed operating instructions, Adobe 4 Acrobat Reader 4.0 or higher is required. Please install Adobe Acrobat Reader 5.0 from the supplied CD-ROM. ≥Before using for the first time, select [Readme] from [Start] >> [(All) Programs] >> [Panasonic] >> [SD Viewer for Printer], and - Panasonic SVP20U | SVP20U User Guide - Page 39
to the PDF-based instructions for how to use the SD Viewer for Printer. 1 Click [Start] >> [Program (All Programs)] >> [Panasonic] >> [SD Viewer Print]. 9 Click [Yes]. 10Insert a sheet of paper. (l 15) ≥When [Panasonic SV-P20-USB00X] 1 is displayed, insert a sheet of paper. ≥If a Memory Card - Panasonic SVP20U | SVP20U User Guide - Page 40
1 2 3 1,2 Printing a file from the computer (Cont.) If you click [Properties] in Step 6 on the previous page, the Advanced setting screen will open to allow you to set the paper, number of multiples, etc. Click [OK] after setting, and the display will revert back to the [Properties] screen. (Click - Panasonic SVP20U | SVP20U User Guide - Page 41
the application is displayed on the full screen or when you operate the application during printing, the status monitor may not be displayed. Click [Panasonic SV-P20 USB0...] in the task bar to display it. ≥The printer may not be connected or the other printer may be selected. Confirm the connection - Panasonic SVP20U | SVP20U User Guide - Page 42
≥Open the properties of this Printer and select USB port in the [Ports] tab. 42 ≥Open the properties of this Printer and select [Enable bidirectional support] in the [Ports] tab. [For Windows 2000] ≥Open the properties of this Printer and select USB port in the [Ports] tab. ≥Open the properties of - Panasonic SVP20U | SVP20U User Guide - Page 43
are not distinctly visible. It is recommended to set the [Date print] option to [OFF] when printing 8 screen shots of the same image. ª Messages for Printer Driver ≥Please wait. l Please wait for a while. ≥Please insert paper to print. l There is no paper. Set the paper. ≥The temperature is too high - Panasonic SVP20U | SVP20U User Guide - Page 44
≥If the Ink Cassette/Paper Set is defective due to a manufacturing error on the part of Panasonic, we will replace the Ink Cassette/Paper Set with an equivalent Ink Cassette/Paper Set. Panasonic does not bear any responsibility beyond replacing the product. ≥Do not subject the Ink Cassette or paper - Panasonic SVP20U | SVP20U User Guide - Page 45
-If the card containing print images is inserted: Turns off about 10 minutes later. -If the card contains no print images: Turns off about 5 minutes later. ≥Refer to page 48 when paper jam occurs. ≥During printing, the paper moves forward and backward several times. You can be cut if you touch the - Panasonic SVP20U | SVP20U User Guide - Page 46
high or too low. Wait until the proper temperature is reached and charge the Battery again. ≥The AC Adaptor is probably defective. Contact your nearest Panasonic dealer. If the battery runs out quickly: ≥If a fully charged battery runs out quickly, the printer may be defective. Contact your nearest - Panasonic SVP20U | SVP20U User Guide - Page 47
≥This printer complies with the Design rule for Camera File system (DCF) specified by the Japan Electronics and Information Technology Industries Association (JEITA). ≥If you select an image compliant with the DCF specification when thumbnails are displayed, the folder name and the file name for - Panasonic SVP20U | SVP20U User Guide - Page 48
]: Turn the printer OFF without removing the paper and turn it ON again. If [Paper jam has occurred] is still displayed, contact your nearest Panasonic dealer. ª Condensation ≥When a bottle is taken out from a refrigerator in summer and left standing for a while, droplets of water will form on it - Panasonic SVP20U | SVP20U User Guide - Page 49
≥You can use a Head Cleaner about 150 times. ≥Put the Head Cleaner into its bag after using it. ª Notes on Handling the SD Mobile Printer ≥When spraying or using insecticides or other volatile solvents in the vicinity of the printer, be careful not to allow any to come into contact with the printer. - Panasonic SVP20U | SVP20U User Guide - Page 50
. Then, wipe off the dust with the cloth and wipe again with a dry cloth. When using a synthetic cloth, follow the precautions in the cloth's usage instructions. ≥When you use this printer on a beach or similar place, do not let sand, fine dust, or seawater get into the printer. 50 - Panasonic SVP20U | SVP20U User Guide - Page 51
Messages on the LCD Monitor Message Remedy This picture is unreadable. • Either the image format is incompatible or the data has been destroyed. There is no SD/MMC card inserted. • Insert the SD Memory Card or MultiMediaCard. Card can't be used. • Insert a card which can be used. There is no - Panasonic SVP20U | SVP20U User Guide - Page 52
Before Requesting Service If the trouble persists even when the action suggested below has been taken, press the Power Button to turn off the power and disconnect and re-connect the - Panasonic SVP20U | SVP20U User Guide - Page 53
11: The date when the image was recorded and the one when it was printed are different. 11: If an image is processed or saved on a PC, the date it was processed or saved will be printed. 12: You wish to stop printing. 12: You are not allowed to stop printing while printing is in process. After a - Panasonic SVP20U | SVP20U User Guide - Page 54
Specifications SD Mobile Printer (Panasonic SV-P20U) Information for Your Safety Power Source: DC 4.9 V (AC Adaptor (After cut) 8 Pre-Cut Adhesive Paper:11/16"t7/8" (17.3t22 mm) (After cut) Manual insertion 290t290 dpi Full-picture print, 8-picture print Film thermal head, 11.4 dots/mm (290 dpi) - Panasonic SVP20U | SVP20U User Guide - Page 55
/60Hz 0.3 A DC 4.9 V, 1.8 A Dimensions Weight Approx. 2-5/16" t1-7/32" t3-25/32" (59 (W)t31 (H)t96 (D) mm) Approx. 4.6 oz (130 g ) Battery Pack (Panasonic CGR-S603) Information for Your Safety Nominal Voltage: Nominal Capacity: 3.7 V 1,350 mAh Dimensions Weight Approx. 25/32" t53/64" t2-5/32 - Panasonic SVP20U | SVP20U User Guide - Page 56
A purchase receipt or other proof of the original purchase date is required for warranty service. Carry-In or Mail-In Service For Carry-In or Mail-In Service in the United States call 1-800-272-7033. For assistance in Puerto Rico call Panasonic Sales Company (787)-750-4300 or fax (787)-768-2910. 56 - Panasonic SVP20U | SVP20U User Guide - Page 57
period, you may contact your dealer or Servicenter. If the problem is not handled to your satisfaction, then write to the warrantor's Consumer Affairs Department at the addresses listed for the warrantor. PARTS AND SERVICE WHICH ARE NOT COVERED BY THIS LIMITED WARRANTY ARE YOUR RESPONSIBILITY - Panasonic SVP20U | SVP20U User Guide - Page 58
can purchase parts, accessories or locate your nearest servicenter by visiting our Web Site. Accessory Purchases: 1-800-332-5368 (Customer Orders Only) Panasonic Services Company 20421 84th Avenue South, Kent, WA 98032 (6 am to 5 pm Monday - Friday; 6 am to 10:30 am Saturday; PST) (Visa, MasterCard - Panasonic SVP20U | SVP20U User Guide - Page 59
DC IN 4.9V 1 2 3 1 4 2 Spanish Quick Use Guide/Guía española para el uso rápido ª Preparación 1 Conecte el cable de entrada DC a la toma de corriente [DC IN 4.9V] en la Impresora Portá - Panasonic SVP20U | SVP20U User Guide - Page 60
1 Í 2 Standard Date DISPLAY:Print this picture. MENU DISPLAY 3 ª Impresión de imágenes 1 Instale la batería o enchufe en el adaptador CA y presione el botón [ ] durante unos 2 segundos aproximadamente. 2 Presione el botón [2 1] para seleccionar una imagen deseada. 3 Presione el botón [DISPLAY - Panasonic SVP20U | SVP20U User Guide - Page 61
1 MENU DISPLAY 2 MENU 1/2 Print style Standard Number of copies 1 Date print OFF DPOF PRINT OK SELECT SET MENU DISPLAY 3 MENU 1/2 Print style Standard Number of copies 2 Date print OFF DPOF PRINT OK SELECT SET MENU DISPLAY 4 MENU DISPLAY MENU 1/2 Print style Number of - Panasonic SVP20U | SVP20U User Guide - Page 62
Consumer Electronics Company, Division of Matsushita Electric Corporation of America One Panasonic Way, Secaucus, NJ 07094 Panasonic Sales Company ("PSC") Division of Matsushita Electric of Puerto Rico, Inc. Ave. 65 de Infantería, Km. 9.5, San Gabriel Industrial Park, Carolina, Puerto Rico 00985
-
 1
1 -
 2
2 -
 3
3 -
 4
4 -
 5
5 -
 6
6 -
 7
7 -
8
-
9
-
10
-
11
-
12
-
13
-
14
-
15
-
16
-
17
-
18
-
19
-
20
-
21
-
22
-
23
-
24
-
25
-
26
-
27
-
28
-
29
-
30
-
31
-
32
-
33
-
34
-
35
-
36
-
37
-
38
-
39
-
40
-
41
-
42
-
43
-
44
-
45
-
46
-
47
-
48
-
49
-
50
-
51
-
52
-
53
-
54
-
55
-
56
-
57
-
58
-
59
-
60
-
61
-
62
 |
 |
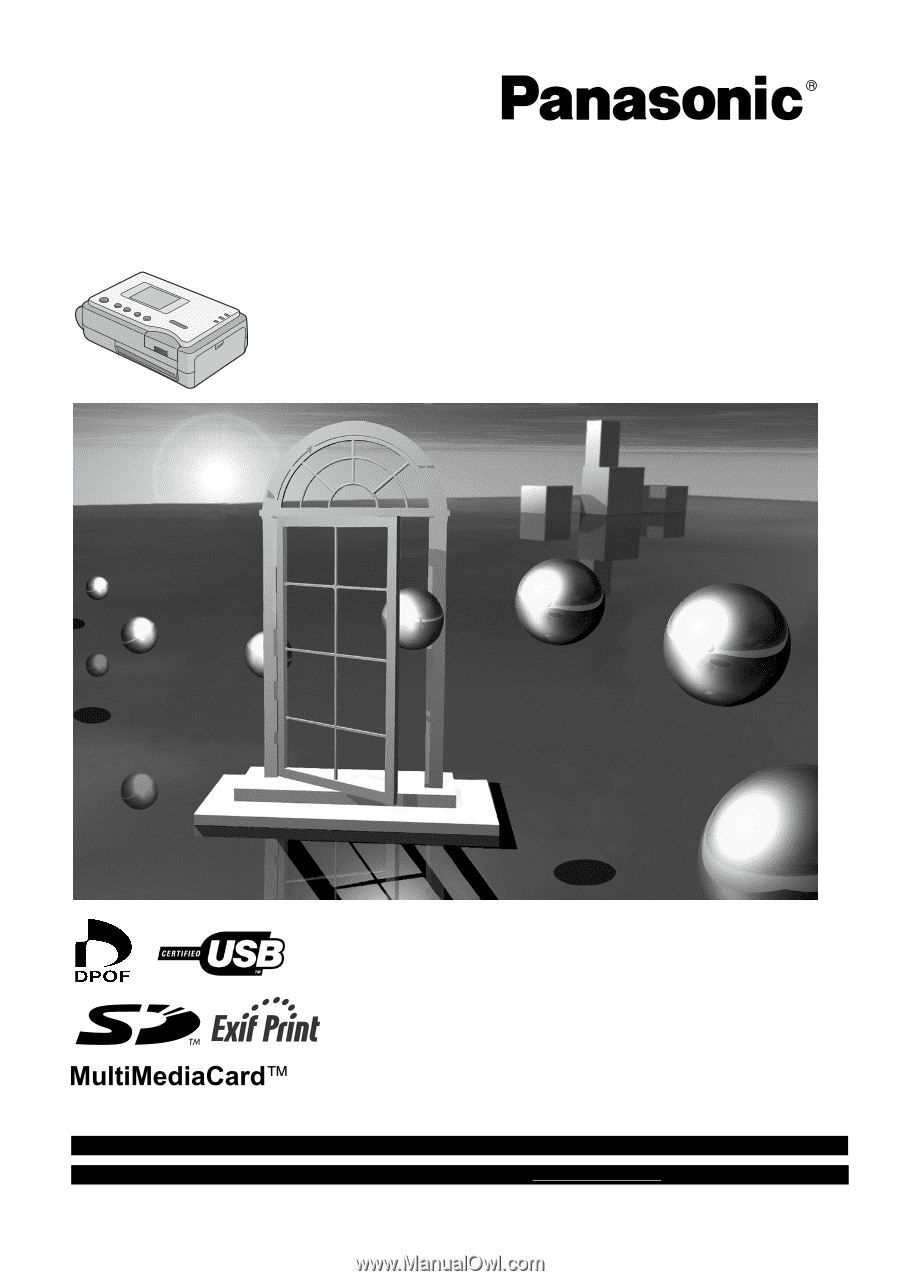
Before use, please read these instructions completely.
SD Mobile Printer
Operating Instructions
Model No.
SV-P20U
For USA assistance, please call:1-800-272-7033 or send e-mail to:[email protected]
For Canadian assistance, please call:1-800-561-5505 or visit us at www.panasonic.ca
VQT0A81-1