Panasonic VDRM75PP Dvd Video Camera-oem - Page 81
Adjusting Color White Balance, Setting white balance manually, Setting contents, On-screen, display
 |
View all Panasonic VDRM75PP manuals
Add to My Manuals
Save this manual to your list of manuals |
Page 81 highlights
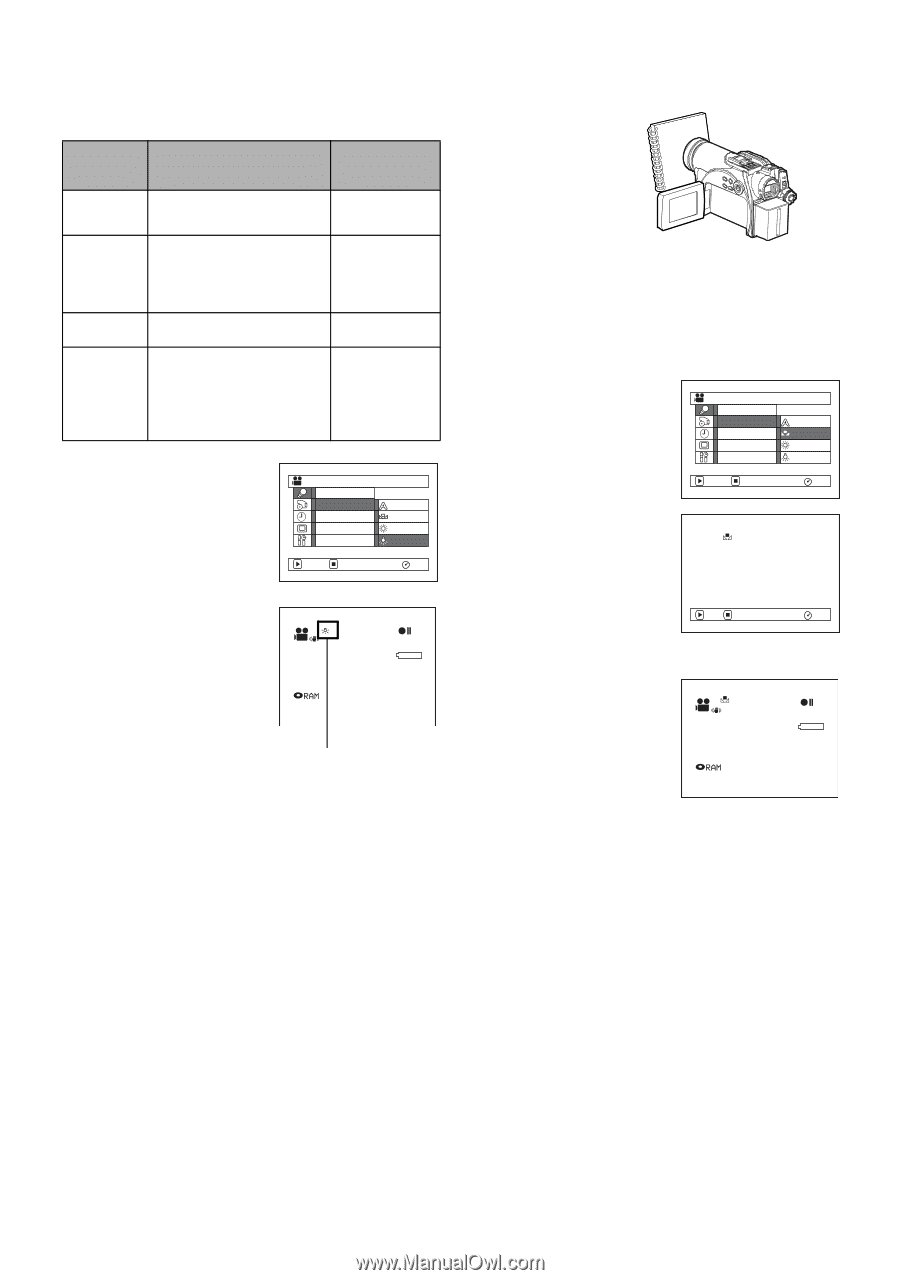
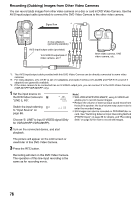
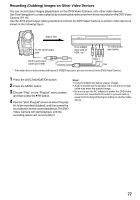
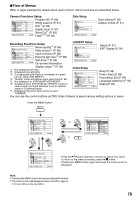
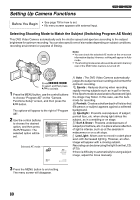
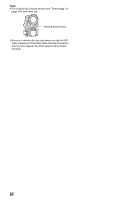
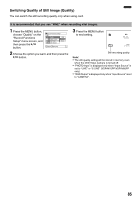
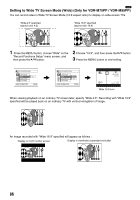
Adjusting Color (White Balance) This DVD Video Camera automatically adjusts the color of subject. Change the white balance setting depending on the recording conditions. Mode Setting contents On-screen display Auto Set Outdoor White balance always automatically adjusted You can manually adjust white balance to match the light source or situation To record in fine weather None h i Indoor To record under incandescent light, halogen light or bulb- j color type fluorescent light 1 Press the MENU button, choose "White Bal." on the "Camera Functions Setup" menu screen, and then press the A button. Camera Functions Setup Program AE White Bal. Auto EIS Set Dig.Zoom Outdoor Wind Cut Indoor ENTER RETURN RAM 2 Choose the desired option, and then press the A button. 0:00:00 REM 3 0 MIN 8 : 0 0 AM FINE SEP 3 0 2 0 0 5 lSetting white balance manually 1 Point the DVD Video Camera at a white object so that it fills the screen. Use an object that is not transparent. If the object that fills the screen is not focused, correct the focus using "Manual Focus", P. 64. White thick paper 2 Press the MENU button, choose "White Bal.", "Set", and then press the A button. 3 Hold A pressed until the "h" indicator changes from blinking to a steady light. When the "h" indicator lights, the white balance setting will be complete. Camera Functions Setup Program AE White Bal. Auto EIS Set Dig.Zoom Outdoor Wind Cut Indoor ENTER RETURN RAM Set EXIT RAM 4 Press the g button to end the setting. 0:00:00 REM 3 0 MIN White balance mode 3 Press the MENU button to end the setting. 8 : 0 0 AM FINE SEP 3 0 2 0 0 5 Note: • The white balance mode can be confirmed using the on- screen information. • In Set mode, resetting will be necessary when the DVD Video Camera is turned off. (All other modes of white balance will be stored in memory.) • If "Input Source: LINE" or "S LINE" has been specified, you cannot use the "Set" mode of white balance (P. 88). Note: • It is recommended that you specify "Dig. Zoom: Off" (See page 57) before setting white balance. • Do not use a colored object when setting white balance: The appropriate tint cannot be set. • Setting the white balance might take a while in some cases, depending on the shooting environment. In this case, set white balance in a bright environment using an object as white as possible. • The white balance cannot be set when the digital zoom is engaged or under low light: The "h" indicator will blink at this time. • If the white balance that was manually set before is kept, the "h" indicator will blink. 81
-
 1
1 -
2
-
3
-
4
-
5
-
6
-
7
-
8
-
9
-
10
-
11
-
12
-
13
-
14
-
15
-
16
-
17
-
18
-
19
-
20
-
21
-
22
-
23
-
24
-
25
-
26
-
27
-
28
-
29
-
30
-
31
-
32
-
33
-
34
-
35
-
36
-
37
-
38
-
39
-
40
-
41
-
42
-
43
-
44
-
45
-
46
-
47
-
48
-
49
-
50
-
51
-
52
-
53
-
54
-
55
-
56
-
57
-
58
-
59
-
60
-
61
-
62
-
63
-
64
-
65
-
66
-
67
-
68
-
69
-
70
-
71
-
72
-
73
-
74
-
75
-
 76
76 -
 77
77 -
 78
78 -
 79
79 -
 80
80 -
 81
81 -
 82
82 -
 83
83 -
 84
84 -
 85
85 -
 86
86 -
87
-
88
-
89
-
90
-
91
-
92
-
93
-
94
-
95
-
96
-
97
-
98
-
99
-
100
-
101
-
102
-
103
-
104
-
105
-
106
-
107
-
108
-
109
-
110
-
111
-
112
-
113
-
114
-
115
-
116
-
117
-
118
-
119
-
120
-
121
-
122
-
123
-
124
-
125
-
126
-
127
-
128
-
129
-
130
-
131
-
132
-
133
-
134
-
135
-
136
-
137
-
138
-
139
-
140
-
141
-
142
-
143
-
144
-
145
-
146
-
147
-
148
-
149
-
150
-
151
-
152
-
153
-
154
-
155
-
156
-
157
-
158
-
159
-
160
-
161
-
162
-
163
-
164
-
165
-
166
-
167
-
168
-
169
-
170
 |
 |