Panasonic WVCS564 WVCS564 User Guide - Page 19
Light Control Setting ALC/MANUAL, To Set a Display Position for a Preset ID
 |
View all Panasonic WVCS564 manuals
Add to My Manuals
Save this manual to your list of manuals |
Page 19 highlights
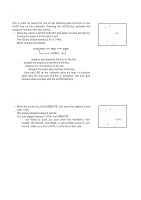
To Set a Display Position for a Preset ID (1) Move the cursor to POSI and press the CAM (SET) key. The display position set menu appears. (2) Using the joystick, move the ID to the desired position on the monitor screen, and press the MON (ESC) key. The display position is set and the monitor screen returns to the preset ID setting menu. PRESET NO. 1* 0123456789 ABCDEFGHIJKLM NOPQRSTUVWXYZ SPACE COPY POSI RET RESET DOOR............ Display position set menu To Enter the Next ID without Returning to the Preset Setting Menu (1) In the preset ID setting menu, move the cursor to the top line and select the desired position number by moving the joystick to the right or left. (2) Enter, copy, change or delete the ID as described above. To Return to the Preset Setting Menu Move the cursor to RET and press the CAM (SET) key. FLOOR 1 DOOR PRESET NO. 1* 0123456789 ABCDEFGHIJKLM NOPQRSTUVWXYZ SPACE COPY POSI RET RESET DOOR............ q Light Control Setting (ALC/MANUAL) 1. Move the cursor to ALC/MANUAL and select ALC or MANUAL by moving the joystick to the right or left. The factory default setting is ALC. ALC: The lens iris is automatically adjusted to suit the brightness of the object. MANUAL: The lens iris is fixed at the set value regardless of the brightness of the object. 2. In case of ALC Press the CAM (SET) key. The backlight compensation menu appears on the monitor screen. See page 30 for the setting. 3. In case of MANUAL Press the CAM (SET) key. The setting menu appears on the monitor screen. Set the lens iris level as desired by moving the joystick to the right or left. Preset setting menu PRESET NO. 1* POSITION SET PRESET ID ALC/MANUAL DWELL TIME SCENE FILE PRESET SPEED ON ALC 10S OFF L H RET DEL Manual setting menu ** MANUAL CONT ** IRIS CLOSE OPEN RET 20
-
 1
1 -
2
-
3
-
4
-
5
-
6
-
7
-
8
-
9
-
10
-
11
-
12
-
13
-
 14
14 -
 15
15 -
 16
16 -
 17
17 -
 18
18 -
 19
19 -
 20
20 -
 21
21 -
 22
22 -
 23
23 -
 24
24 -
25
-
26
-
27
-
28
-
29
-
30
-
31
-
32
-
33
-
34
-
35
-
36
-
37
-
38
-
39
-
40
-
41
-
42
-
43
-
44
-
45
-
46
-
47
-
48
-
49
-
50
-
51
-
52
 |
 |
