Panasonic WVCW474F WVCW474F User Guide - Page 9
Electronic Zoom EL-ZOOM, 8 BURST BW
 |
View all Panasonic WVCW474F manuals
Add to My Manuals
Save this manual to your list of manuals |
Page 9 highlights
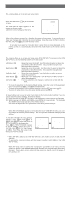
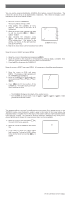
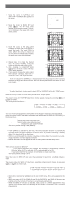
9-6 Electronic Zoom (EL-ZOOM) 1. Move the cursor to EL-ZOOM. 2. Select ON or OFF using I(L) or I(R). The factory default setting is OFF. ON: x2 electronic zoom is available with the ZOOM switch on the controller. OFF: The electronic zoom function is disabled. 3. While the cursor is on EL-ZOOM, press I(S). The EL-ZOOM setting menu ** EL-ZOOM ** appears. 4. Move the cursor to PUSH SET for ZOOM PAN/TILT →PUSH SET ZOOM →PUSH SET and press I(S) to display the ZOOM set- U TILT D/L PAN R ting menu. 5. Press I(U) or I(D) to zoom in or out the image. 6. Move the cursor to PUSH SET for PAN/TILT RET END and press I(S). The PAN/TILT setting menu appears. 7. Press I(U) or I(D) I(L) or I(R) to ** EL-ZOOM ** change the angular field of view. 8. To return to the EL-ZOOM setting menu, PAN/TILT →PUSH SET ZOOM →PUSH SET press I(S). U ZOOM D RET END 9-7 BW This function lets you switch from color to black-and-white picture automatically in low light conditions such as at night. 1. Move the cursor to BW. 2. Select AUTO1, AUTO2, ON or OFF using I(L) or I(R). The factory default setting is OFF. AUTO1: The camera selects black and white mode if the picture is dark, or color mode if the picture is bright enough. AUTO2: Applying AUTO1 may cause malfunction when using a source of near-infrared light at night because the illuminance changes significantly when switching between the color picture and a black-and-white picture. This can be prevented by using the AUTO2 setting to detect the type of light source. Notes: • Because the type of light source is detected based on information received from the CCD image pickup element, an object that is constantly moving or has the same color as its background may not always be properly recognized. When choosing the AUTO2 mode, make sure to use a light source having a wavelength of 800 nm or more. • The object may be out of focus when using a source of near-infrared light than using the visible light. ON: Black-and-white mode enabled. OFF: Color mode enabled. ** BW AUTO1 ** 3. Select AUTO1 or AUTO2 using I(L) or I(R). 4. Press I(S). LEVEL HIGH DURATION TIME .I.. S L The AUTO1 or AUTO2 menu appears on the monitor screen. 5. Move the "I" cursor to LEVEL to select the illuminance level using I(L) or I(R). RET END The factory default setting is HIGH. LOW: Color picture switches to black-and- white picture at approx.2 lx. HIGH: Color picture switches to black-and-white picture at approx.5 lx. 6. Move the "I" cursor for DURATION TIME to set the switching time using I(L) or I(R). The following switching times are available: 10s--30s--60s--300s (S) (L) 9-8 BURST (BW) 1. Move the cursor to BURST (BW). 2. Select ON or OFF using I(L) or I(R). ON: The burst signal is supplied along with the black-and-white composite video signal. OFF: The burst signal is not output. The factory default setting is ON. Notes: • We recommend that you usually select ON. • When the camera is used to synchronize the system for external sync, select ON to prevent a malfunction. To reset to the factory settings (CAMERA RESET) 1. Move the cursor to CAMERA RESET. The PUSH SW is highlighted. 2. While holding down I(L) and I(R), press I(S) for 2 seconds or more. The camera is reset to the factory settings.
-
 1
1 -
2
-
3
-
 4
4 -
 5
5 -
 6
6 -
 7
7 -
 8
8 -
 9
9 -
 10
10
 |
 |
