Pfaff 130-6 Owner's Manual - Page 13
Pfaff 130-6 Manual
 |
View all Pfaff 130-6 manuals
Add to My Manuals
Save this manual to your list of manuals |
Page 13 highlights
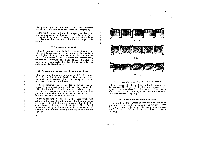
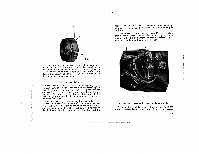
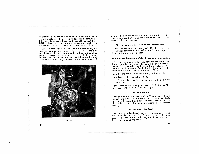
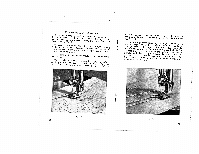
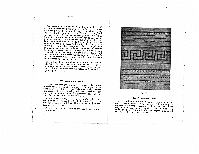
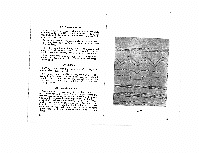
bptbisifnlttbsRsnoeohoelataeyaiaawecrreTtritimvwcsknafhsdhteiheteieulaveeaas,etsrkedcroeftnttnpdhehkotgdiihuteoenterezchpeestgmfibhheidtgnenttheeewfaeliaezeisefeaofdtdneaeooabsneiddgdtr.refitnro,sloltieicgeerhiRcnopssan.letettsnougaoiihmsnwwacsdtOnawbtechdkidhiuntahntjphbiscurelcitotlepnahehsshmersufritteavbniattfsat.hiaeyaetgcthiskthaerorbokehIieecnnunrhltrkfi0ehgeietcals,vohnetlaesbhdneeeevdsbttbirrohcszewesieatnsceeti.rhiGc.goeetnswehkizdmsaegTlneaiaaadtronteyrsgoiitlstngyhtlewt,ouhemth,etrolfehhstaeetitahtt.aeanvfiksaleittnietdeTtnecrhssrdsfshdht.ewaettpotectcfhuTwniomooieoedsr,rhtfnfdhnshheeaidtsbibgddertklthraeelhueigegsegn.rznecevrr,riesgdeoocNegcooeobforooozomdototianvvrhanhvl0uwdrdeeeegegee,r. htrdiooagwTlmhehteaeonkgrnicinniutfghgtete.itnthhTbgeehroiossabfcdurmtethtwubeosln.atbhduboetelteoinnptthehororfeltoeharedmissh.emodIlnadwdseereirtthawneidctihathrfeeathrsetteothnbeuaivttntoobainydr 19. Ornamental seams tmwapenrriaeFtdekhsosestrzieirnprguaglnzlaefaiyrnoag,sonatsNnu.dtmdiortFe.cbssohetsr4erra1sdpi3ogeoa5fch0rfao.tavlroltaaBetrtrrlyniyaoaicsnnmstesgkiaev.ilmnewl(ftFusaiidpllgltay.uhsts2teeea1aar)lnm.nttdehssre-nlueasneetesgidnptgthgehe,ceiysasnotltrliuoaytrcimcghiaheannrtl tsneeorwAt,innpglueasfdsthedoailtfmeivocsenerantoltHevrthd,aeorpiweurntisgyh.htolefavneedrffHelecftutspo;isftocpersonetdweurc.rei(dgFhigtb.yo2f2a)cl.teeTnro- Colored thread of the work. is often used to enhance the appearance 22 Fig. 21 20. Overedged hems csearteadniqrtOgdceuehfviucrelhewllrediyeilntddhgawrgtenheizndtdhisgobhzfadeaarmg1sept/sa1sessi6ertatiishrtf,ocehfniunveencssechcd,re.iyesssrssCmwpoauorraetsylpa.l.utrh,ltTeaoheretpmcfnr.ooercFdjeoiotcurvlitdmeminr-tmgshtmiehneeagdelldgf,logaealdedtoieeafdassf 23
-
 1
1 -
2
-
3
-
4
-
5
-
6
-
7
-
 8
8 -
 9
9 -
 10
10 -
 11
11 -
 12
12 -
 13
13 -
 14
14 -
 15
15 -
 16
16 -
 17
17 -
 18
18 -
19
-
20
-
21
-
22
 |
 |
