Pfaff 76 Owner's Manual - Page 16
straight-stitch
 |
View all Pfaff 76 manuals
Add to My Manuals
Save this manual to your list of manuals |
Page 16 highlights
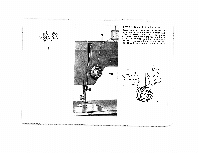
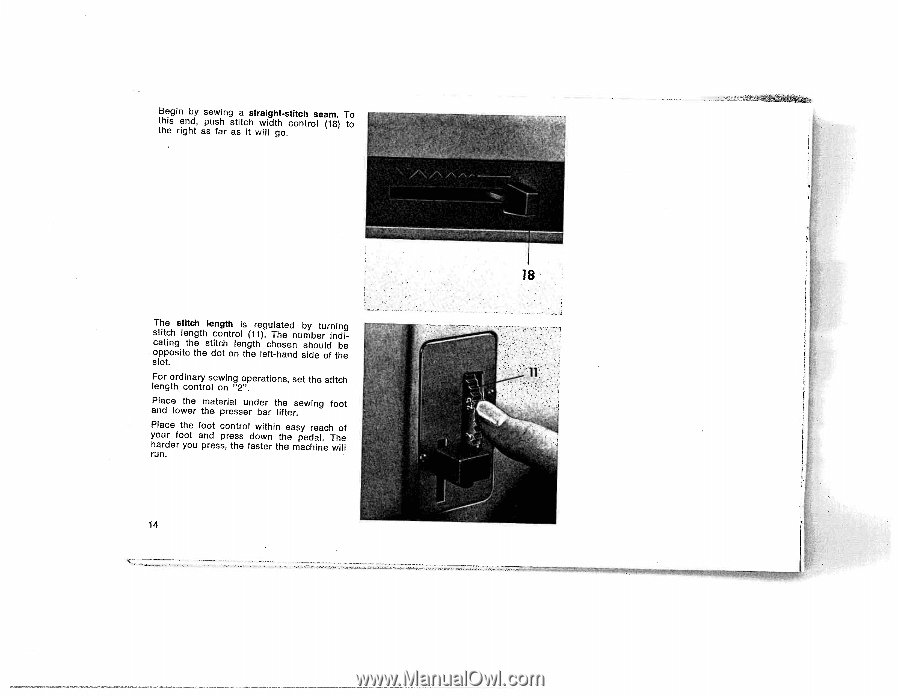
Begin by this end, the right sewing a straight-stitch seam. push stitch width control (18) as far as it will go. To to L The stitch stitch length is length control regulated by turning (11). The number indi cating the stitch length chosen should be I opposite the dot on the left-hand side of the slot. For ordinary sewing operations, set the stitch length control on "2". Place the and lower material under the sewing the presser bar lifter. foot .1 Place the foot control within easy reach of your foot and press down the pedal. The harder you press, the faster the machine will run. 14
-
 1
1 -
2
-
3
-
4
-
5
-
6
-
7
-
8
-
9
-
10
-
 11
11 -
 12
12 -
 13
13 -
 14
14 -
 15
15 -
 16
16 -
 17
17 -
 18
18 -
 19
19 -
 20
20 -
 21
21 -
22
-
23
-
24
-
25
-
26
-
27
-
28
-
29
-
30
-
31
-
32
-
33
-
34
-
35
-
36
-
37
-
38
-
39
-
40
-
41
-
42
-
43
 |
 |
Begin
by
sewing
a
straight-stitch
seam.
To
this
end,
push
stitch
width
control
(18)
to
the
right
as
far
as
it
will
go.
The
stitch
length
is
regulated
by
turning
stitch
length
control
(11).
The
number
indi
cating
the
stitch
length
chosen
should
be
opposite
the
dot
on
the
left-hand
side
of
the
slot.
For
ordinary
sewing
operations,
set
the
stitch
length
control
on
“2”.
Place
the
material
under
the
sewing
foot
and
lower
the
presser
bar
lifter.
Place
the
foot
control
within
easy
reach
of
your
foot
and
press
down
the
pedal.
The
harder
you
press,
the
faster
the
machine
will
run.
L
I
.1
14