Pfaff Tipmatic 1069 Owner's Manual - Page 22
Changing, sewing
 |
View all Pfaff Tipmatic 1069 manuals
Add to My Manuals
Save this manual to your list of manuals |
Page 22 highlights
CTbmsaoeunhawtdaktrnoieenhnglegosianluNdfsgr.oeeoiWttttshhithneeuuendpnssdlee0aewawcrteietitnanhngwcgteheiftirsofhnseoogwyostlotiaopnutugsrsePlhwf.eofPitotnhltaghechaefnoroedltoddh.teer LstsgshacoeuamrrwietvdeweeesrsttuaipQmtndordeae0ssrtseerheefceipurutsosrbdeesaiadintrrtinhofslioeilnnfortgtestaehrPtfweto.1a1oiHcsn4teh.gowailSnenfigcodnRrogeaatwantfhnotodeoShldtedgeseor on the presser bar. 18
-
 1
1 -
2
-
3
-
4
-
5
-
6
-
7
-
8
-
9
-
10
-
11
-
12
-
13
-
14
-
15
-
16
-
 17
17 -
 18
18 -
 19
19 -
 20
20 -
 21
21 -
 22
22 -
 23
23 -
 24
24 -
 25
25 -
 26
26 -
 27
27 -
28
-
29
-
30
-
31
-
32
-
33
-
34
 |
 |
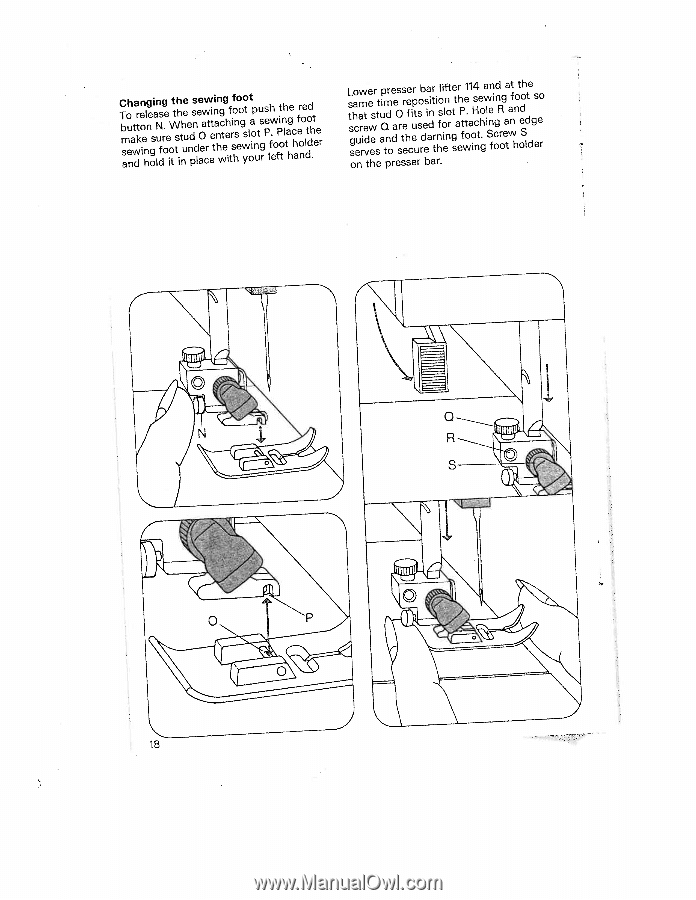
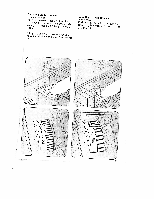
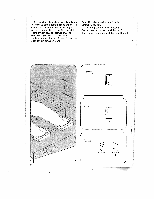
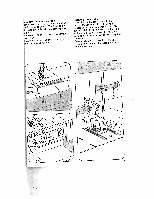
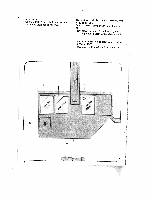
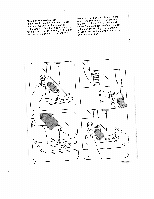
Changing
the
sewing
foot
To
release
the
sewing
foot
push
the
red
button
N.
When
attaching
a
sewing
foot
make
sure
stud
0
enters
slot
P.
Place
the
sewing
foot
under
the
sewing
foot
holder
and
hold
it
in
place
with
your
left
hand.
Lower
presser
bar
lifter
114
and
at
the
same
time
reposition
the
sewing
foot
so
that
stud
0
fits
in
slot
P.
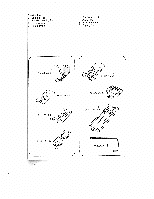
Hole
R
and
screw
Q
are
used
for
attaching
an
edge
guide
and
the
darning
foot.
Screw
S
serves
to secure
the
sewing
foot
holder
on
the
presser
bar.
18