Pfaff expression 2034 Owner's Manual - Page 92
cessories, needles
 |
View all Pfaff expression 2034 manuals
Add to My Manuals
Save this manual to your list of manuals |
Page 92 highlights
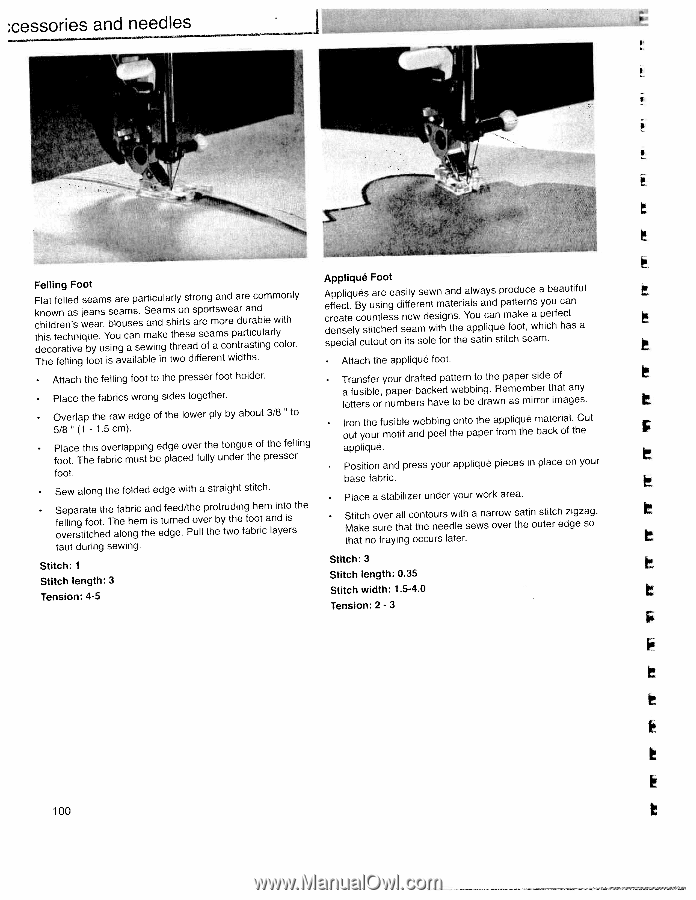
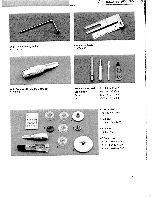
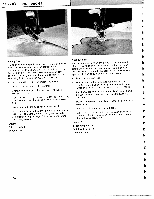
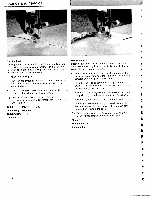
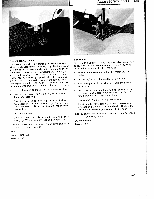
cessories and needles I I I Felling Foot Flat felled seams are particularly strong and are commonly kctdhhneioicslwodtrernaecthnaivnsseijqwebueayean.rus,Yssbionelugoaumcasasens.semwSaenianadkgmestshthhiroreetnssaedsaprsoeoeframtamsowcsroeenpadtarrruatarisncatudibnllagerlwcyoitlhor. The felling foot is available in two different widths. • Attach the felling foot to the presser foot holder. Place the fabrics wrong sides together • Overlap the raw edge of the lower ply by about 3/8 "to 5/8(1 - 1.5 cm). • Place this overlapping edge over the tongue of the felling foot. The fabric must be placed fully under the presser foot. • Sew along the folded edge with a straight stitch. • Sfoevellepirnasgrtaifttoceohtet,hdTe ahfleaobnhrgiecmthaneisdetdufegrenede.d/tPhouelvleptrrhoebtyrtuwtdhoienfgafobhoreitcmalnaidynteiosrsthe taut during sewing. Stitch: 1 Stitch length: 3 Tension: 4-5 Appliqué Foot Aecdfrepfenepacsltteie.qlyuBcéoyssutuiantscrtiehlneegsedsadssinifelefyaewmrseednwwet snimtihgaantnthsed.eriYaaallopswupaalcyinqasdnupepmraoftoadtokeuter,cnewas hapyioecbruhefaechucaattnisfual special cutout on its sole for the satin stitch seam. Attach the appliqué foot. Transfer your drafted pattern to the paper side of a fusible, letters or paper-backed numbers have webbing. Remember that any to be drawn as mirror images. Iron the fusible webbing onto the appliqué material. Cut out your motif and peel the paper from the back of the appliqué. Position and press your appliqué pieces in place on your base fabric. Place a stabilizer under your work area. Stitch over all contours with a narrow satin stitch zigzag. Make sure that the needle sews over the outer edge so that no fraying occurs later. Stitch: 3 Stitch length: 0.35 Stitch width: 1.5-4.0 Tension: 2 - 3 100
-
 1
1 -
2
-
3
-
4
-
5
-
6
-
7
-
8
-
9
-
10
-
11
-
12
-
13
-
14
-
15
-
16
-
17
-
18
-
19
-
20
-
21
-
22
-
23
-
24
-
25
-
26
-
27
-
28
-
29
-
30
-
31
-
32
-
33
-
34
-
35
-
36
-
37
-
38
-
39
-
40
-
41
-
42
-
43
-
44
-
45
-
46
-
47
-
48
-
49
-
50
-
51
-
52
-
53
-
54
-
55
-
56
-
57
-
58
-
59
-
60
-
61
-
62
-
63
-
64
-
65
-
66
-
67
-
68
-
69
-
70
-
71
-
72
-
73
-
74
-
75
-
76
-
77
-
78
-
79
-
80
-
81
-
82
-
83
-
84
-
85
-
86
-
 87
87 -
 88
88 -
 89
89 -
 90
90 -
 91
91 -
 92
92 -
 93
93 -
 94
94 -
 95
95 -
 96
96 -
 97
97 -
98
-
99
-
100
-
101
-
102
-
103
-
104
-
105
-
106
-
107
-
108
-
109
-
110
 |
 |