Pfaff expression 3.0 Owner's Manual - Page 33
Mirroring, Tie-off options
 |
View all Pfaff expression 3.0 manuals
Add to My Manuals
Save this manual to your list of manuals |
Page 33 highlights
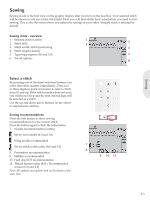
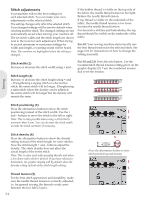
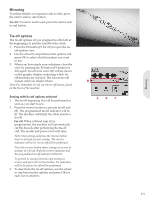
Sewing Mirroring To mirror stitches or sequences side to side, press the mirror side to side button. For 4.0: To mirror end to end, press the mirror end to end button. Tie-off options The tie-off options let you program tie-offs both at the beginning (A) and the end (B) of the stitch. 1. Press the F2 button (F1 for 2.0) to open the tie- off options view. 2. Use the wheel to step between the options and press OK to select which functions you want to use. 3. When you have made your selections, close the view by pressing the F2 button (F1 button for 2.0) again. Tie-off mini icons (D) will be shown on the graphic display, indicating which tieoff functions are selected. The selections will remain until you deselect them. Note: For immediate tie-off, use the tie-off button, found on the front of the machine. Sewing with tie-off options selected 1. The tie-off beginning (A) will be performed as soon as you start to sew. 2. Press the reverse button to activate tie-off end (B). The programmed tie-off indicator will be lit. The machine will Ànish the stitch and do a tie-off. For 4.0: When a thread snip (C) is programmed, the machine will automatically cut the threads after performing the tie-off end. The needle and presser foot will raise. Note: Stop sewing and press the reverse button twice to activate reverse sewing. The reverse indicator will be lit. No tie-off will be performed. Press the reverse button when sewing in reverse to activate tie-off end. Both the reverse indicator and the programmed tie-off indicator will be lit. To go back to sewing forward, stop sewing in reverse and press the reverse button. No indicators will be lit and no tie-off will be performed. 3. To deactivate the tie-off options, use the wheel to step between the options and press OK for each one to deselect. D ABC 3:3
-
 1
1 -
2
-
3
-
4
-
5
-
6
-
7
-
8
-
9
-
10
-
11
-
12
-
13
-
14
-
15
-
16
-
17
-
18
-
19
-
20
-
21
-
22
-
23
-
24
-
25
-
26
-
27
-
 28
28 -
 29
29 -
 30
30 -
 31
31 -
 32
32 -
 33
33 -
 34
34 -
 35
35 -
 36
36 -
 37
37 -
 38
38 -
39
-
40
-
41
-
42
-
43
-
44
-
45
-
46
-
47
-
48
-
49
-
50
-
51
-
52
 |
 |
