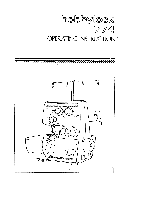
Pfaff hobbylock 774 Owner's Manual
Pfaff hobbylock 774 Manual
 |
View all Pfaff hobbylock 774 manuals
Add to My Manuals
Save this manual to your list of manuals |
Pfaff hobbylock 774 manual content summary:
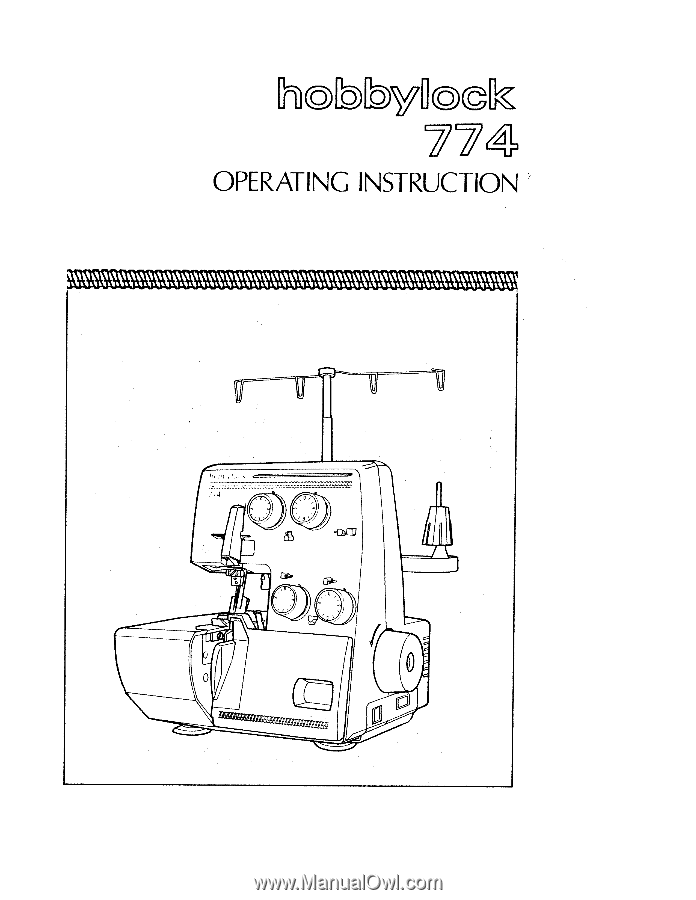
- Pfaff hobbylock 774 | Owner's Manual - Page 1
77" OPERATiNG iNSTRUCTION - Pfaff hobbylock 774 | Owner's Manual - Page 2
the machine 9 a. Test sewing 9 b. Thread tension adjustment (Normal hemming) 9 c. Dial chart for thread tension adjustment 9 d. Relation chart for fabrics and thread stitch length 10 e. Correct thread tension 10 1. Incorrect thread tension and how to adjust 11 g. Roll hemming 12 - Pfaff hobbylock 774 | Owner's Manual - Page 3
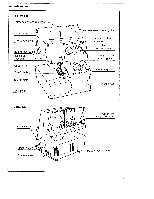
A. Parts name • Front side • Rear side 2 Presser toot feet - Pfaff hobbylock 774 | Owner's Manual - Page 4
speed Overlock seam width Stitch length Presser foot Presser foot lift Needle Number of threads Lubrication Dimentions Net weight 1 300 s.p.m. 35mm (standard) 1.0 5.0mm Hinged 5mm 130/705H No.75- No.90 4 Manual 278(W) x 264(D) >< 310(H) 7Kg Brush for dusting Roll hemming presser foot Upper - Pfaff hobbylock 774 | Owner's Manual - Page 5
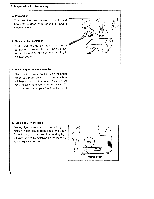
or purpose-built sewing machine table. b. Fitting the foot controller First, insert the controller connector into the connector socket on the machine as shown in the illustration, then connect the plug to a power source. c. How to adjust the foot controller Place the tip of your foot lightly on the - Pfaff hobbylock 774 | Owner's Manual - Page 6
e. Lubrication The bushings and other important parts are made from special materials and only require lubrication once or twice a month. When oiling always be sure to use a good quality sewing machine oil. Apply just one or two drops of oil to the areas indicated. 5 - Pfaff hobbylock 774 | Owner's Manual - Page 7
you. 3. To close the looper cover, push the looper cover upwards lightly towards the machine until it clicks and it will close securely. g. Threading procedure 1. Ensure that the telescopic thread guide bar is at maximum vertical height. 2. Threading must be done carefully in accord ance with the - Pfaff hobbylock 774 | Owner's Manual - Page 8
0 0 g. 0 r '< OCD e oc 0. CD CD -I CD C 0 C 0 0 •0 •0 C 0 C, 8 3 -I 0 0 C - Pfaff hobbylock 774 | Owner's Manual - Page 9
respective needle and looper. Once you are satisfied that the tension balance is correct (page 10) tie on those threads that are to be used. Be careful when passing these threads through the machine, so as to avoid any breakage of thread that may occur if due care is not taken. Then proceed to sew - Pfaff hobbylock 774 | Owner's Manual - Page 10
slowly towards you with your right hand. Checking the threads being interlocked. 2. Insert the cloth under the presser foot up to the edge of the upper cutter and start sewing slowly. b. Thread tension adjustment (Normal hemming) The correct thread tension varies depending on the fabric and type and - Pfaff hobbylock 774 | Owner's Manual - Page 11
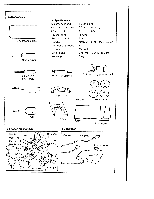
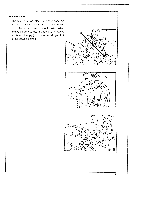
30-SO Polyester thread No.50-80 Synthetic thread No.60-80 Woolly_nylon Polyester thread No.80-100 Synthetic thread No.80-100 Woolly nylon Stitch l.ngth 3.0 to 4. 0mm 3.0 to 4.0mm 3.0 to 4.0mm 2.0 to 4. 0mm 1.0 to 1.5mm e. Correct thread tension Top side 10 Left needle thread Right needle thread - Pfaff hobbylock 774 | Owner's Manual - Page 12
f. Incorrect thread tension and how to adjust 1. The sketch shows the left needle thread tension is too loose. 2. The sketch shows the right needle thread tension is too loose. 3. The sketch shows the right looper thread tension is too loose. 4. The sketch shows the left looper thread tension is too - Pfaff hobbylock 774 | Owner's Manual - Page 13
g. Roll hemming • Roll hemming foot • Normal hemming foot N • How to replace the presser foot Remove the left needle first. For the roll hemm ing (narrow / foldover hemming) replace the normal stitch foot by the roll hemming foot. By following this instruction, very good sewing results can be - Pfaff hobbylock 774 | Owner's Manual - Page 14
chain. For knit fabric, a crochet needle can be used to pull the thread chain into the seam. • To prevent unravelling of seams, sew ap proximately 5 cm beyond the seam. Then, flip fabric over and sew over the seam ap proximately 2 cm. • This machine will sew from fine to very heavy fabrics. When - Pfaff hobbylock 774 | Owner's Manual - Page 15
i. 3 thread overedge seam Three-thread sewing is possible by using either right or left hand needles. Threading procedure is as usuaJ. For wide seam sewing. 1. Remove the right hand needle. 2. Use the left hand needle thread and right & left looper thread. 3. Seam width can be changed from 5 mm to 7 - Pfaff hobbylock 774 | Owner's Manual - Page 16
the required seam width by turning the dial. Wide Narrow seam width seam width After adjusting the seam width, it may be necessary to reset the thread tension. b. Adjusting the stitch length 1. To change the stitch length, open the side cover. 2. Loosen the feed regulator nut. 3. Align the - Pfaff hobbylock 774 | Owner's Manual - Page 17
correctly as to not do so could result in thread or needle breakage and also skipped stitches. Fitting the left needle screw ATTENTION When replacing needles, please take note of the illustrations below: The needle clamp screw for each needle crosses the other. It is important to prop erly - Pfaff hobbylock 774 | Owner's Manual - Page 18
be brought firmly against the lower knife and behind the guard on the presser foot. It is now ready for normal operation. 3. To set the cutting position: (A) securely, using a screw driver. If it is necessary to adjust, loosen the upper knife screw (A) and raise or lower as required. Only very - Pfaff hobbylock 774 | Owner's Manual - Page 19
holder and, with the cutting edge facing right, set the knife so that the cutting edge of the blade aligns with the surface of the needle plate and then re-tighten the fixing screw securely. using a screwdriver. Replace the upper knife in its working position by means of the release knob - Pfaff hobbylock 774 | Owner's Manual - Page 20
f. Replacing the light bulb FIRST DISCONNECT THE MAINS PLUG FROM THE POWER SOURCE • Loosen the screw of the rear of the machine body and remove the lamp cover. • Turn the bulb in direction (1) and remove it. Insert the new bulb by pushing upward, turning it in the - Pfaff hobbylock 774 | Owner's Manual - Page 21
. Incorrect stitch formation Incorrect setting of thread tensions Set thread tensions correctly. Puckered seams Thread tension too tight Thread has caught due to incorrect threading Reduce thread tension Thread correctly Material is not fed correctly Sewing foot is not in the working Push
-
 1
1 -
 2
2 -
 3
3 -
 4
4 -
 5
5 -
 6
6 -
 7
7 -
8
-
9
-
10
-
11
-
12
-
13
-
14
-
15
-
16
-
17
-
18
-
19
-
20
-
21
 |
 |
77”
OPERATiNG
iNSTRUCTION