Pfaff hobbylock 774 Owner's Manual - Page 5
illustration
 |
View all Pfaff hobbylock 774 manuals
Add to My Manuals
Save this manual to your list of manuals |
Page 5 highlights
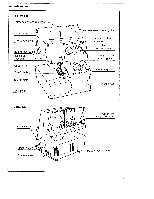
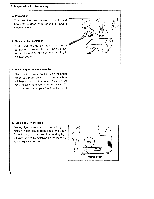
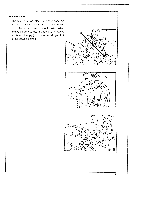
B Preparation for the sewing a. Preparation This machine must be used on a flat and horizontal surface or purpose-built sewing machine table. b. Fitting the foot controller First, insert the controller connector into the connector socket on the machine as shown in the illustration, then connect the plug to a power source. c. How to adjust the foot controller Place the tip of your foot lightly on the pedal. When you press down gently, the machine will begin to run at low speed: As you press more heavily the machine will run faster. To stop the machine, lift your foot from the pedal. d. Turning on / off the lamp Sewing light is switched on and off by the master switch located right side of the body. By switching on the machine, sewing light is turned on and by switching off the machine, sewing light is turned off. 4
-
 1
1 -
 2
2 -
 3
3 -
 4
4 -
 5
5 -
 6
6 -
 7
7 -
 8
8 -
 9
9 -
 10
10 -
 11
11 -
12
-
13
-
14
-
15
-
16
-
17
-
18
-
19
-
20
-
21
 |
 |
