Pfaff hobbylock 774 Owner's Manual - Page 2
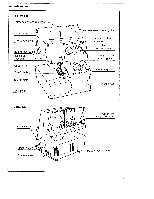
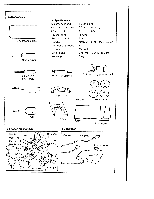
Contents - parts
 |
View all Pfaff hobbylock 774 manuals
Add to My Manuals
Save this manual to your list of manuals |
Page 2 highlights
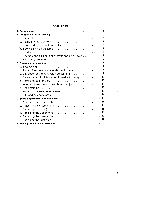
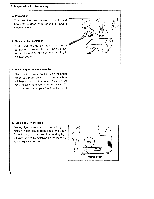
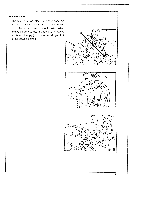
CONTENTS A. Parts names 2 B. Preparation for the sewing 4 a. Preparation 4 b. Fitting the foot controller 4 c. How to adjust the foot controller 4 d. Turning on / off the lamp 4 e. Labrication 5 f. Opening and closing looper cover and side cover 6 g. Threading procedure 6 C. Operating the machine 9 a. Test sewing 9 b. Thread tension adjustment (Normal hemming) 9 c. Dial chart for thread tension adjustment 9 d. Relation chart for fabrics and thread stitch length 10 e. Correct thread tension 10 1. Incorrect thread tension and how to adjust 11 g. Roll hemming 12 h. Points to obseave during sewing 13 i. 3-thread overedge seam 14 D. Some adjustments / Maintenance 15 a. Adjusting the seam width 15 b. Adjusting the stitch length 15 c. Replacing needle (s) 16 d. Replacing the upper knife 17 e. Replacing the lower knife 18 f. Replacing the light bulb 19 E. Sewing problems and solutions 20
-
 1
1 -
 2
2 -
 3
3 -
 4
4 -
 5
5 -
 6
6 -
 7
7 -
 8
8 -
9
-
10
-
11
-
12
-
13
-
14
-
15
-
16
-
17
-
18
-
19
-
20
-
21
 |
 |
