Pfaff tipmatic 6150 Owner's Manual
Pfaff tipmatic 6150 Manual
 |
View all Pfaff tipmatic 6150 manuals
Add to My Manuals
Save this manual to your list of manuals |
Pfaff tipmatic 6150 manual content summary:
- Pfaff tipmatic 6150 | Owner's Manual - Page 1
D C', 1 •0 C C) 03 0) og an C D 3 .sfl C-) NJ 0 '1 0) D C-a.) IT' C 0) 01 0 - Pfaff tipmatic 6150 | Owner's Manual - Page 2
For easier understanding of this instruction book please fold this or the last page open when reading it. I I I Safety rules For the United Kingdom only I The leads must definitely not be - Pfaff tipmatic 6150 | Owner's Manual - Page 3
MrsJ - - OCD '.a owl - Pfaff tipmatic 6150 | Owner's Manual - Page 4
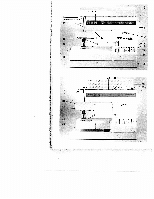
length knob (1 2) Connection socket ,,foot control" (Model 6230) (13) Base plate (14) Detachable work support (1 5) Sewing foot holder with sewing foot (16) Needle threader (17) Threading slit (1 8) Needle thread 30) Thread trimmer (31) Sewing lamp (max. 15 watt) (32) Thread guide (33) Needle plate - Pfaff tipmatic 6150 | Owner's Manual - Page 5
,aei'teca., such 1 6. Always unplug sewing machine from the electric outlet when when making any other user servicing adjustments mentioned removing covers, in the instruction lubricating, manual or 17. Hold plug when rewinding into cord reel Do not allow plug to whip when rewinding. Please - Pfaff tipmatic 6150 | Owner's Manual - Page 6
are no paris inside the machine which the user can repair. This is solely the responsibility of our qualified service staff. 11. Be sure to use only original PFAFF parts. Environment The recommended environment is: Ambient temperature 10° C to 40° C, Humidity 20% to 80%. This sewing machine is - Pfaff tipmatic 6150 | Owner's Manual - Page 7
to study the instruction book nothing can go wrong After all this is the only way to learn all the things the machine can do and to make full use of them If you have any further questions, that is no prob lem! Your PFAFF dealer will be at your service with any - Pfaff tipmatic 6150 | Owner's Manual - Page 8
Changing the needle plate . . Changing the sewing foot Cleaning and oiling . . . Closed overlock stitch . . Detachable work support Cording foot Cording foot . . Covering stitches . . . . Darning . . . . Darning tears . . . Darning with elastic stitch Darning with straight - Pfaff tipmatic 6150 | Owner's Manual - Page 9
stitches. Sewing chart Sewing feet lspecial accessories( Sewing feet (standard accessories( Sewing lamp Sewing on buttons Sewing problems . . Shell edging Slow sewing Smocking . . . Special accessory table Stitch density . Stitch length control j Straight stitch Stretch triple - Pfaff tipmatic 6150 | Owner's Manual - Page 10
Utility stitch table (elastic stitches) D E F G HI H HD ID IF K < / " ( < I _: _: ,-' c-' ' " I ' -' < '- ED I ED cI : ": - , With these programs the stitch length can be set as required between 0 and 6 mm with the stitch length knob (11). Program A/B/C Description - Pfaff tipmatic 6150 | Owner's Manual - Page 11
Utility stitch table (non-elastic stitches) KU KG L LC LU LF LI M ME MF MG Program KD Description Elastic edge seam Application For securing seams of edges that do not fray very much KG Shelledging stitch For decorative hems on light fabrics e.g. for underwear L Fancy elastic - Pfaff tipmatic 6150 | Owner's Manual - Page 12
Utility stitch table (elastic stitches) D l' ' '.. ,,, ', E F - '.', ,,- '.. Ill III G lii Hi I Hi I H HO I HG I ID I'i I ii I iii __.-ii -ii \ii I i"i I \I / '-'- IF I J 1 E c cD I IIlIl Iii Ih il0l I ",ii -"i I ",,ii ..-'ii 'sit I i"..i i 1 j I i IG I i I I I K KO I - Pfaff tipmatic 6150 | Owner's Manual - Page 13
Utility stitch table (elastic stitches) L LD LF LI I LK LDK '5' II J't% I 5 -ii 41 I I N'.Jii •.ii I ,X' Xi -ii I I .1i Xi \XI \) - Pfaff tipmatic 6150 | Owner's Manual - Page 14
a) 95a) Q) > C) C o 0 2 a) D C) -a 0 ) o a) a) C - C 0 -) a) V 00 2 >- a) ao)ac) - 2 - - t °' a) .0 o 0 .r CC C o 0t -C C C) .2 - a) a) - Cf C U) - 0 oC a) C 20 C - E 0 0 _ -C _: C a) >00 . LL 1IllIII VIIIILilII{ll. ifIIIIIJlIWIL ' II ill - Pfaff tipmatic 6150 | Owner's Manual - Page 15
PFAFF I pt onlc 6230 / i!II --- Operation of the sewing machine I I Electrical connection Detachable work support Bobbins page 1 2, 1 3 page 1 4 pages 15 - 17 Bobbin case pages 1 8, 1 9 Bobbin thread tension page 1 9 J Threading the needle page 20 Needle threader page 21 I Pulling - Pfaff tipmatic 6150 | Owner's Manual - Page 16
F. Ii N Carrying case Place the enclosed mains cord, foot control and instruction book in the compartment of the carrying case. Top cover Open the folding cover (26) upwards. ] 0' N' Programs The programs of the sewing machine are illustrated - Pfaff tipmatic 6150 | Owner's Manual - Page 17
- - Connecting the foot control (Model 6230) Connect the plug of the foot control with the connection socket (12) of the sewing machine. The sewing speed is regulated by pressing the pedal. Connecting the foot control (Models 6110. 6120. 6150) Connect the plug of the foot control with the - Pfaff tipmatic 6150 | Owner's Manual - Page 18
thread and hold the thread reel firmly, fit an unwind ing disk corresponding to the size of the thread reel. Threading Place the thread into guide A from behind and pull it through opening B to the right. Wind the thread clockwise a few times around the bobbin. Switch on the main switch Hold - Pfaff tipmatic 6150 | Owner's Manual - Page 19
second reel holder Insert the second reel holder (25) in the hole provided and place a reel of thread on it. Threading Place the thread into guide C and pull it through opening B to the right. Wind the thread clockwise a few times around the bob bin. Switch on the main switch Hold the - Pfaff tipmatic 6150 | Owner's Manual - Page 20
A Hook cover Switch off the main switch Hold the hook cover (28) at the side and open it to the front. Taking out the bobbin case Lift the latch of the bobbin case and pull out the bobbin case. Release the latch and take out the empty bobbin. Thread tension To obtain optimum seam appearance and - Pfaff tipmatic 6150 | Owner's Manual - Page 21
Inserting the bobbin Insert the full bobbin in the bobbin case. When doing so, pull the thread sideways through slot A, then under tension spring B until it rests in the opening (see arrow). Check: When you pull the thread, the bobbin must turn clockwise. Checking the bobbin thread tension Hold the - Pfaff tipmatic 6150 | Owner's Manual - Page 22
PFAFF /(/ D F; jA b Threading the needle Switch off the main switch. Raise the and fit an unwinding disk of the right size. Now, using both hands, pull the thread into guide A and under thread guide hook D. Pa the thread through the threading slot (17) ar downwards. Pull the thread around stop - Pfaff tipmatic 6150 | Owner's Manual - Page 23
/ Needle threader (Models 6120. 6150. 6230) The PFAFF needle threader (16) is an aid to make threading the needle easier and quicker. Lower the sewing foot (see next page). Turn the hand wheel - Pfaff tipmatic 6150 | Owner's Manual - Page 24
I, Presser bar lifter The sewing foot is raised or lowered with the presser bar lifter (20). Drawing up the bobbin thread Raise the sewing foot. Hold the needle thre and turn the hand wheel towards you until needle is at the top again and the bobbin thread has formed a loop. Pull the needle thread - Pfaff tipmatic 6150 | Owner's Manual - Page 25
U Removing the sewing foot Turn off the main switch Set the needle at its highest point. Press the sewing foot upwards at the front and down wards at the back at the same time so that it disengages from the sewing toot holder (15). Engaging the sewing foot Place the sewing foot under the sewing - Pfaff tipmatic 6150 | Owner's Manual - Page 26
The built-in dual fabric feed (Models 6120, 6150, 6230) For sewing difficult materials PFAFF offers the ideal solution: built-in dual feed. As on industria sewing machines it feeds the material from the top and bottom at the same - Pfaff tipmatic 6150 | Owner's Manual - Page 27
Engaging the top feed (Models 6120. 6150. 6230) Raise the sewing foot. Now push the top feed (23) so that it snaps in place Disengaging the top feed Hold the top feed with two fingers at the marked places. Push the top feed (23) down a little and out to the rear, and let it move slowly upwards (see - Pfaff tipmatic 6150 | Owner's Manual - Page 28
[A Changing the needle Switch off main switch To remove: Lower the sewing foot and set the needle at its highest point. Now loosen the Fixing screw (22) and pull the needle out downa rds. To insert: The flat side A of the needle must Face to the rear. Lower the sewing foot dnd insert the needle. - Pfaff tipmatic 6150 | Owner's Manual - Page 29
I I A I JI Setting the need'e thread tension Set the required amount on the needle thread tension (18) using mark A The normal setting for sewing is 4 to 5 For embroidering. darning and buttonhole sewing between 2 and 3. Lowering the feed dog For certain sewing work, e g. darning, the feed dog - Pfaff tipmatic 6150 | Owner's Manual - Page 30
PFAFF tiptr 1 11A) L fl1 Al Reverse sewing The machine sews in reverse as long as the reverse key (21) is kept pressed. Stitch length knob You - Pfaff tipmatic 6150 | Owner's Manual - Page 31
have been activated. If key G on models 6150 and 6230 is pressed again the width of the stitches can be redu ced by half. PFAFF tiptronic 6230 ) .4j 4J.4 1_ jI Setting stretch stitches All the stitches with a grey background are stretch stitches, i.e. they are suitable for stretch material. Press - Pfaff tipmatic 6150 | Owner's Manual - Page 32
stitch combinations are illustrated the program table in the lid. You can rele keys that are already activated with key B. PFAFF tiptronic 6230 MdinGem..'y PFAFF tiptronic 6230 0- I Fancy stitch knob (Models 6150 and 6230) Each fancy stitch has been given a letter. Select a fancy stitch from the - Pfaff tipmatic 6150 | Owner's Manual - Page 33
I II I I it Function keys (Model 6230) The tiptronic has three function keys. 1. Sewing slowly When key (1) slow sewing' is pressed the green diode lights up. The sewing machine now sews at half speed. - Pfaff tipmatic 6150 | Owner's Manual - Page 34
Utility stitches and practical sewing Sewing chart General sewing aids Nonelastic stitches Elastic stitches Overlock stitches Covering stitches Buttonhole Hems with twin needle Smocking Gathering Darning Inserting zippers Rollhemming Sewing lace Shelledging page 34 pages 35 pages 36 39 - pages 40, - Pfaff tipmatic 6150 | Owner's Manual - Page 35
The following charts show the recom mended settings that you require for the relevant sewing operations. These charts also provide you with further instructions that are necessary when sewing the selected programs: The choice of the sewing foot, the setting of the needle thread tension and whether - Pfaff tipmatic 6150 | Owner's Manual - Page 36
Needle thread tension scnIenoetretoridenrldcgetelryfaontraodduoabtibpoltitbtaeybidnisnttpoittehcrehrfaeeecacshdt issoteet3hwnesitrnio.ogn5Ts.rheemsunulotssrtmtbhaeel tTChheheecmiknitdtedhrleleactoeefnosthfioetnhtewusotwinfogabtahrircweiapddleiseszm.iguzsatg stitch. lie in ntfIoafeobtehrditeclieg - Pfaff tipmatic 6150 | Owner's Manual - Page 37
prog a Taste3 - b - - HLi C' 3 0/1 - - - - Basting stitch (Mode) 6230) With key (3) basting you can baste a gar ment before trying it on. When you press the foot control the machine will only make one stitch. For each further stitch you have to press the foot control each time, Lower the - Pfaff tipmatic 6150 | Owner's Manual - Page 38
pin C. thus preventing curling of the fabric edge In this way you can sew beautiful smooth seams. The edge of the cutting has to be guiding along edge guide B. You can adjust this edge guide with adjusting screw A. important: Only use the blind stitch foot with key F. 37 - Pfaff tipmatic 6150 | Owner's Manual - Page 39
stitches are visible on the face side, adjust edge guide B by turning adjusting screw A. Blind stitch Blind stitch inch. Now place the fabric under the sewing foot - so that the crease line runs along edge guide B. When the needle enters the crease line it - must only pick up one fibre of the fabric - Pfaff tipmatic 6150 | Owner's Manual - Page 40
button and sew it on as described on the left. Sewing on buttons With orogram E you can sew on two and fourhole buttons with no problem at all - Remove the sewing foot and lower the feed dog. - Turn the hand wheel towards you and posi tion the button so that the - Pfaff tipmatic 6150 | Owner's Manual - Page 41
1 prog 1" jJ a DFFSTc 46 • 35 -- 01 D E F StrpcP 4 6 35 0 Stretch triple straight stitch This program is used for sewing all seams where great strength is needed, e.g. inside trouser seams. The farther you turn the stitch length knob, the longer the stitch length. Stretch triple zigzag stitch - Pfaff tipmatic 6150 | Owner's Manual - Page 42
p1 rog I I I III I I a M 1-2,5 6 I • 3 5 0/1 [ bIMI125161._13-510I prog I I> III II I I a M Stretch 6 • 3-5 0/1 bMIStretchI6I_I35I0I Elastic stitch Owing to its high elasticity this stitch is used for sewing on elastic tapes, e.g. on underwear. Cut off the old elastic tape close to the - Pfaff tipmatic 6150 | Owner's Manual - Page 43
sew overlock seams, we recommend you use blind stitch foot No. 3. It guides the fabric better and prevents contrac tion of the seam at wider stitch 61- 3-5 0/1 3 ]35j03j Open overlock stitch With this stitch it is no problem to loin firm materials or fabrics which do not fray too much. TIP: Make - Pfaff tipmatic 6150 | Owner's Manual - Page 44
- '4 ' .. _4 I '_ •4 4 .s.4 •-.4_4'?a 4 _ _A - I I • _4_ _ 4 • 4,_•,,,-e a- I , ., I - 4?- %-'' 4? _i - A- -'-- " I 3 •-_'_ I I ', Aa_,_'•,4 -..-> I -':.4:%--- -4. > Pullover stitch tlTFeouhdglilesyttohsftaetihsrtchewhioriintigshehsdtiut - Pfaff tipmatic 6150 | Owner's Manual - Page 45
What is a covering stitch? You can use the following programs for sewing a flat covering seam. This produces the typical ,,flatlock effect" which lends a professional look to collar plackets or raglan seams. prog : : L Stretch 6 L Stretchl 6 • 3-5 I1 - Fagoting stitch With fagoting stitch you - Pfaff tipmatic 6150 | Owner's Manual - Page 46
p1 rog i -.-l progjI' ,I l)IJ I IJbaI LL H11--221I66j•3H-5Ij10 !aILbIFISItretIchI5I.3-5I1 I - - - - - Fancy elastic stitch Fancy elastic stitch is very useful for materials that need a flat seam, e.g. terry cloth. - Place the two fabric edges so that they overlap by about 3/4 of an inch and - Pfaff tipmatic 6150 | Owner's Manual - Page 47
PFAFF t i ptron ic 6230 tipmatic 6110, 6120, 6150 ) PFAFF - instruction manual - Pfaff tipmatic 6150 | Owner's Manual - Page 48
Buttonholes Smfaeobwdriiecnlgsdowbeuistthtonpontuhsohhlaebvsuetitstoonvebrceyotneutarrnsoyelsdw.siitnhceallththee 8omnthfueaetcdtteeoomsrunisaabhatlloreseyrl,deiaetsolf.gaaf.burrreossieimclgk.se,ciHnlookeornrwgpatarlaealnvpyczeetarsir,neabwgfnoandrcwkshovioinnilmsgetcoeostoaesewpp,iirneietgcvie.es - Pfaff tipmatic 6150 | Owner's Manual - Page 49
___________ B I prog I I I- II I I-I -.. ABC : b A BCI 44,5 3 3 5 Linen buttonholes Insert the buttonhole slide and push it fully to the front. - Press key C and sew the first seam to the required length. Then press key B. Keep it pressed and sew a few stitches for the bartack, while - Pfaff tipmatic 6150 | Owner's Manual - Page 50
iii ii I.! Il lii rr - Lit t.* -- ,, ., i. 't, -jiI'tt' t .t i.r -_-I progiII''Iv 23;i I Ta G i - • 3.510/h bIGl3-13-510I Sewing hems with the twin needle With the twin needle you embroider, but also make can not only topstitch seams. - Pfaff tipmatic 6150 | Owner's Manual - Page 51
or five inches of thread protruding at the end. You can now stitch the other seams at sewing foot width using the first one as a guide. Now gather the part by pulling the bottom threads. You determine the amount of gather yourself - Finally, knot the thread ends together to secure the - Pfaff tipmatic 6150 | Owner's Manual - Page 52
elastic threads. Finally, knot the threads and the elastic. - TIP: The cording foot (special accessory) is also ideal for gathering. The grooves in this foot guide the elastic evenly during the sewing operation. 50 - Pfaff tipmatic 6150 | Owner's Manual - Page 53
the darning foot: Set the needle at its highest position and push the pin of the darning foot fully into hole C. When you do this, guide fork G places itself around the presser bar. Wire E must be behind fixing screw F. Now tighten screw D. Darning position: Lower the presser bar lifter and push - Pfaff tipmatic 6150 | Owner's Manual - Page 54
I I! prog I a M 021 6 M 021 6 •35011 0 prog I < I M 15 6 35 0 Darning with elastic stitch Darning with elastic stitch is also a very suitable means of repairing damaged fabric. - Sew over the damaged area with rows of stitches until it is well covered. When doing so, make sure the stitch rows - Pfaff tipmatic 6150 | Owner's Manual - Page 55
2fl Z - : D DO • _ 0 Q E' CDE_ •0 0 0 -3 DD COO 3 00 0 -, D-43c LD o - C 0 0 = aoO 0 - D-, 00 V (0 r oa . C) ci, ci, ci, - Pfaff tipmatic 6150 | Owner's Manual - Page 56
progl aG 3 bG 3 >L --. 3-5 4 - 3-5 4 - Sewing in zippers TFctlsrayohotedoprnecireroecseessemks'ai.oarmlsfrteFseledaoznwcridpdokitepfnsofemuercbrergesooechtnntoaahcltmrmeewszamaiialadpteeveyepdnrasseidi,arlotasloansi,bnnlsadosseenuenwdrficentohirnpsisniglahmdaszoesteitp.hdpnisecep' - Pfaff tipmatic 6150 | Owner's Manual - Page 57
the overlap evenly onto the other zipper half. - Afterwards stitch along the basted seam. TIP: To achieve accurate seams we recom mend using the edge guide. 55 - Pfaff tipmatic 6150 | Owner's Manual - Page 58
the fabric Raise the Into the scroll of the hemmer. - Lower the sewing foot and edge evenly in the hemer. make sure the fabric does guide the fabric When doing so, not run under th right side of the sewing foot. TIP: For sIlk, vScuse or rolled hem looks better Qhlffor - Pfaff tipmatic 6150 | Owner's Manual - Page 59
Lace inserts You can produce a beautiful effect on christening wear or other children's clothes with lace inserts, First baste the lace to the face side of the fabric. - Stitch both edges of the lace with a narrow margin. Cut open the fabric under the lace at the - middle and iron it over to the - Pfaff tipmatic 6150 | Owner's Manual - Page 60
• - •- •: -- • • P'-, i'_ •;,''r'J;. - -; • -- .- -. -• '•; --: , ,• •• • -,•4 _-, -,'- •.;_ ,: 45O Shell edging Sffwtarhheebreqaerlriulac,edsentdottsgloeuyn.icnshugiToshaenisesdtvsthaieiglesrkyhaftaaneenrfrdtfeheydecvogrtuiiesvtchsefoeeisntfeoisstrhhhmeetlhaolintnneee, - Pfaff tipmatic 6150 | Owner's Manual - Page 61
4 Decorative and traditional embroidery techniques Sewing table for embroidery page 60 Decorative stitches page 61 - 64 Monograms I Appliqué Richelieu Quilting page 65 page 66 page 66 page 67 Eyelet embroidery page 68 Hemstitching page 69 59 - Pfaff tipmatic 6150 | Owner's Manual - Page 62
Decorative stitches B S Twmcecdeohmomeheormonebybolntrbressowhoieniaihtoddhanforeeretkcsiorroetyymmwnoyv.tseofhoa,drufrrYceaeieraolonacstoulcdoiowoy6smucnn1raawsmsn5nhhbed0ooipynrcmrdadhossneeiedcduzaluoeesrteecis6crnx.aet2gaittnii3veFlvgesv0aoepsierldenoasoeicbftfrm - Pfaff tipmatic 6150 | Owner's Manual - Page 63
/ / j 1 I Changing the pattern length Changing the pattern width I I You can vary the pattern length infinitely with the aid of the stitch length knob. The stitch density for embroidery is generally in the but tonhole range. The larger the stitch density you set is, the farther the pattern is - Pfaff tipmatic 6150 | Owner's Manual - Page 64
B S ft B 0 n r t Borders By combining different embroidery programs you can embroider borders of any width. Madeira embroidery threads are very suitable. They are available in many colour shades and different sizes. However, only use one thread size for one piece of embroidery work. - Apply iron-on - Pfaff tipmatic 6150 | Owner's Manual - Page 65
ferent coloured thread. Multicolour thread was used for the middle border in this example. You can obtain it in a great variety of shades from our PFAFF dealer. - Apply iron-on backing or place silk backing paper under the fabric. Mark the middle with tailors chalk. -. -. You can now begin with the - Pfaff tipmatic 6150 | Owner's Manual - Page 66
C. Place the threads farther than normal, but - make sure the threads are not twisted with each other. Pull the threads right and left into thread - guide (32) and thread the needles 64 - Pfaff tipmatic 6150 | Owner's Manual - Page 67
4. I. - Id Ii % 44.. Monograms NwgrooavmmensatfDtae,brErwico,hrewFthityehorutyhcoeaundwamronroiknngoognfroatoemrtryaanncdylopithnriotoir als of your own design. Freehand guiding, however, needs a little practice in the beginning. Transfer the initials with the magic pen to - the part to be - Pfaff tipmatic 6150 | Owner's Manual - Page 68
pl 1 Appliqué work Advrd(esuaepnpcrnptieesalceimtiqailaoyualbnéteseassrtaciigauctacaretleihslsfoesuqraodleunr.idfisceaYeksnpalofcyam,uyttbmceewearfacnfnidteashecumtys.taaheonkBuedeiyt acaahuaplsnapwpislneaiogqryabfusetdseacppiitfnef,rfocoeoiatl cutout on its sole for the zigzag seam. Insert the - Pfaff tipmatic 6150 | Owner's Manual - Page 69
Quilting Quilting is a traditional sewing technique. The method that the wives of American settlers developed to make use of material remnants has become an artistic hobby with many enthusiasts in our country, too. A quilt always consists of three layers of material. Lots of geometrically shaped - Pfaff tipmatic 6150 | Owner's Manual - Page 70
Eyelet embroidery Traditional eyelet embroidery which long ago had to he made laboriously by hand can be made quite easily with the help of an eyelet plate Ispecial accessory). This is very etfective on blouses, bed or table linen Practically all stitch types are suitable for this utility stitches - Pfaff tipmatic 6150 | Owner's Manual - Page 71
o 3 C C) 3-0 CD* D' CD 30 CD. CD 0 CD 3 CD C 9- CD 3 (DCD 0.0 CD 3 CD CI) 3CD Cs, DCD- -CD - 3. CD C, 0 3.3 CI) CD 32 3-9- DID DC 3 C ...3 D g , -°2 0< CD C C-CD® < 2. DCCD g g - DC DCCD 03 - 0) V 3 (0 Cl, 3CDCD23 C) CD 3 3 CD 0 N CD DC 0C -n7(9 CDDC CQ 0 0 DC D0 CC D - Pfaff tipmatic 6150 | Owner's Manual - Page 72
Accessories and needles Sewing feet (normal accessories) Special accessory table Felling foot Gathering foot Cording foot Bias binder Multistitch gatherer Cording foot Appliqué foot Fringe foot Needle table pages 72, 73 page 74 page 75 page 75 page 76 page 77 page 77 page 78 page 78 page 79 pages - Pfaff tipmatic 6150 | Owner's Manual - Page 73
K. 72 Sewing feet (accessories) o Normal sewing foot Part No. 98-694 816-00 (Model 6120-6230) Part No. 98-694 847-00 (Modell 6110) Fancy stitch foot for top feed Part No. 98-694 814-00 (Model 6120 - 6230) NO I(O Clearviewfoot L,(Q (Fancy stitch foot not suitable for top feed> Part No. 98-694 864- - Pfaff tipmatic 6150 | Owner's Manual - Page 74
-035960-91 (Model 6110 6230) For Model 6110 special accessory 7 Hemmer Part No. 98-694818-00 (Model 6110 - 6230) For Model 6110 special accessory 8 Edge guide Part No. 98-802422-00 (Model 6110 - 6230) Second spool holder 9333vC3 -'t Seam ripper Brush R Oil tube (. 73 - Pfaff tipmatic 6150 | Owner's Manual - Page 75
Sewing feet special accessory) Special accessories are intended for special sewing work. They are available at a charge from your dealer. Accessory Appliqué foot Bias binder (remove foot holder( Cording foot, 5 grooves (twin needles with needle spacing 1 6 to 20) Cording foot, 7 grooves (twirl - Pfaff tipmatic 6150 | Owner's Manual - Page 76
face side - While stitching you must pull the top fabric a little. The harder you pull, the greater the gathering effect you achieve. Be sure you guide the fabric edges evenly through the foot. - Disengage the gathering foot by pushing it down at the front, and take it Out to the back - Pfaff tipmatic 6150 | Owner's Manual - Page 77
sewing technique of cording can be used without any problems on fabrics such as cotton and light wollens Underclothing and pull the material lightly. - You can use the grooves in the cording foot to guide the work along an already sewn cording seam. This ensures that the distance between cording - Pfaff tipmatic 6150 | Owner's Manual - Page 78
. 3. Folding the fabric in pleats, sewing them on and sewing on lace at the same time. When you buy the multistitch gathering foot from your PFAFF dealer, full operating instructions are included. 77 - Pfaff tipmatic 6150 | Owner's Manual - Page 79
. - Afterwards overstitch all contours with nar row and dense zigzag stitches. When you reach a curve, use the needle down" iModel 62301 function to help you guide the work more easily. Also make sure the needle passes the outer edge so that no fraying occurs later. 78 - Pfaff tipmatic 6150 | Owner's Manual - Page 80
Fnnge foot With this special foot for loop embroidery you can produce fantastic effects in no time. This foot is very useful for terry cloth. -. Mark out any pattern you wish with the magic pen. - Use a silk paper underlay and engage the fringe foot. - Embroider the motif, row by row. For circ les - Pfaff tipmatic 6150 | Owner's Manual - Page 81
Needle size: 100 - - - -- Medium ball point Openknits, warpknits, lastex, interlock, Quiana, Simplex Medium ball point Large ball point Special Pfaff stretch fabric needle, very suitable for delicate stretch and warpknits Open corsetry fabrics, Lycra, Simplex, Lastex Sharp round point Twill - Pfaff tipmatic 6150 | Owner's Manual - Page 82
Needle Table Description Stitch length 130/705 H-ZWI 2,5 mm Size: 80 2.5 mm 130/705 H-ZWI Size: 80 Size: 90 Size: 100 2,5 mm 2,5 mm 3.0 mm Stitch width - - - - - Needle distance 1,6 mm 2.0 mm 2,5 mm 3,0 mm 4.0 mm suitable for normal cording normal cording wide cording extra wide cording - Pfaff tipmatic 6150 | Owner's Manual - Page 83
I E r Maintenance and fault-finding Changing the needle plate Cleaning and oiling Changing the sewing lamp Sewing problems and their solution Page 84 Page 84 Page 85 Page 86 83 - Pfaff tipmatic 6150 | Owner's Manual - Page 84
and oil the sewing machine, because it will reward you with a longer service life. The more often you use the machine, the more care it off the main switch Raise the sewing foot and remove the - detachable work support. Push the point of a small screwdriver into - the opening between needle plate - Pfaff tipmatic 6150 | Owner's Manual - Page 85
the sewing lamp Switch off the main switch Disconnect the mains plug and the toot control plug from the machine. -- Take off the detachable work support. The sewing lamp Ibulb) is located inside the needle head of the sewing machine Removal To make it easier to change the bulb we recommend - Pfaff tipmatic 6150 | Owner's Manual - Page 86
and their solutions Problem/cause: 1. The machine Skips stitches Needle is not properly inserted. fully in. Insert new needle See needle chart Ipage 80. 81). Let the machine teed the fabric. Only guide the fabric lightly. When you insert the bobbin case, push it fully into the stop. 4. Seam is - Pfaff tipmatic 6150 | Owner's Manual - Page 87
L9 - Pfaff tipmatic 6150 | Owner's Manual - Page 88
co - Pfaff tipmatic 6150 | Owner's Manual - Page 89
PFAFF G. M. Plaff Aktiengesellschaft Werk Karisruhe-Durlach GritznerstraL,e 11 76227 Karlsruhe Gedrucki in Deutschland Druckerei Gablenz GmbH 76356 Weingarten, Stettiner StraSe 17 Technische Anderungen vorbehaften Nr.: 29629996-65/OOO OG englisch 8/93
-
 1
1 -
 2
2 -
 3
3 -
 4
4 -
 5
5 -
 6
6 -
 7
7 -
8
-
9
-
10
-
11
-
12
-
13
-
14
-
15
-
16
-
17
-
18
-
19
-
20
-
21
-
22
-
23
-
24
-
25
-
26
-
27
-
28
-
29
-
30
-
31
-
32
-
33
-
34
-
35
-
36
-
37
-
38
-
39
-
40
-
41
-
42
-
43
-
44
-
45
-
46
-
47
-
48
-
49
-
50
-
51
-
52
-
53
-
54
-
55
-
56
-
57
-
58
-
59
-
60
-
61
-
62
-
63
-
64
-
65
-
66
-
67
-
68
-
69
-
70
-
71
-
72
-
73
-
74
-
75
-
76
-
77
-
78
-
79
-
80
-
81
-
82
-
83
-
84
-
85
-
86
-
87
-
88
-
89
 |
 |

D
C’,
1
C
C)
C
D
3
0)
D
C
0)
og
C-)
03
0)
.sfl
NJ
0
C.)
-a
01
0
•0
an
‘1
IT’