Pioneer AVHP5000DVD Owner's Manual
Pioneer AVHP5000DVD - DVD Player With LCD monitor Manual
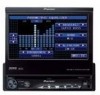 |
UPC - 012562883489
View all Pioneer AVHP5000DVD manuals
Add to My Manuals
Save this manual to your list of manuals |
Pioneer AVHP5000DVD manual content summary:
- Pioneer AVHP5000DVD | Owner's Manual - Page 1
Operation Manual DVD AV RECEIVER AVH-P5000DVD English - Pioneer AVHP5000DVD | Owner's Manual - Page 2
7 To avoid battery exhaustion 7 Before You Start Information to User 8 For Canadian model 8 About this unit 8 - Playable discs 9 - DVD video disc region numbers 9 About this manual 9 After-sales service for Pioneer products 9 Visit our website 10 Features 10 - About WMA 11 - About MP3 12 - About AAC - Pioneer AVHP5000DVD | Owner's Manual - Page 3
unit's iPod function from your iPod 31 - Pausing a song 31 - Selecting songs from album list of currently playing artist 31 - Changing audiobook speed 32 Playing songs on USB portable audio player up the DVD player 37 - Introduction of DVD setup adjustments code for Bluetooth wireless connection 42 - Pioneer AVHP5000DVD | Owner's Manual - Page 4
the iPod charge setting 47 - Selecting the OSD color 47 - Selecting the illumination color 47 - Adjusting the response positions of the touch panels (Touch Panel Calibration) 47 - Using the AUX source 48 - Using the external unit 49 - Using the PGM button 49 Available accessories XM tuner 51 - Pioneer AVHP5000DVD | Owner's Manual - Page 5
- Auto TA and EQ (auto-time alignment and auto-equalizing) 81 Additional Information Troubleshooting 84 Error messages 86 Understanding auto TA and EQ error messages 88 Handling guideline of discs and player 89 DVD discs 89 DVD-R/DVD-RW discs 89 AVCHD recorded discs 89 CD-R/CD-RW discs 89 Dual Discs - Pioneer AVHP5000DVD | Owner's Manual - Page 6
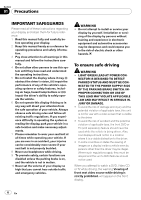
disabled unless the parking brake is on, and the vehicle is not in motion. 10 Never set the volume of your display so high that you cannot hear outside traffic and emergency vehicles. WARNING ! Do not attempt to install or service your display by yourself. Installation or servicing of the display - Pioneer AVHP5000DVD | Owner's Manual - Page 7
safe place, and (1) apply the parking brake, (2) release the parking brake, and then (3) apply the parking brake again. Please keep the brake pedal pushed down before releasing the parking brake. When using a display connected to REAR MONITOR OUTPUT This unit's REAR MONITOR OUTPUT is for connection - Pioneer AVHP5000DVD | Owner's Manual - Page 8
tuner frequencies on this unit are allocated for use in North America. Use in other areas may result in poor reception. WARNING Handling the cord on this product or cords associated with accessories to this unit, smoke, and overheating could result from contact with liquids. ! Keep this manual handy - Pioneer AVHP5000DVD | Owner's Manual - Page 9
DVD Format/Logo Licensing Corporation. ! This player can only play back discs bearing the marks shown above. DVD video disc region numbers DVD manual. After-sales service for Pioneer products Please contact the dealer or distributor from where you purchased this unit for after-sales service - Pioneer AVHP5000DVD | Owner's Manual - Page 10
claim such as loss or theft. 2 Receive updates on the latest products and technologies. 3 Download owner's manuals, order product catalogues, research new products, and When using this unit with a Pioneer multichannel processor, you can enjoy the atmosphere and excitement provided by DVD movie and - Pioneer AVHP5000DVD | Owner's Manual - Page 11
audio player and memory - WMA, MP3, AAC and WAV file playback For details about the compatibility, refer to Compressed audio compatibility on page 92. iPod® compatibility This unit can control and listen to songs on an iPod. ! This unit supports only the following iPods. Supported iPod software - Pioneer AVHP5000DVD | Owner's Manual - Page 12
, satellite, cable and/or any Pioneer service station regarding the satellite radio tuner that can be connected to this unit. For satellite radio tuner operation, please refer to the satellite radio tuner owner's manual the antenna of the cellular phone away from the display to prevent disruption - Pioneer AVHP5000DVD | Owner's Manual - Page 13
is possible. When an operation is prohibited When you are watching a DVD and attempt to perform an operation, it may not be performed because sunlight and high temperatures. ! If removed, replace the front panel on the unit before starting up your vehicle. Removing the front panel % Pinch the top - Pioneer AVHP5000DVD | Owner's Manual - Page 14
following conditions: ! Prior to using this unit for the first time after installation ! If the unit fails to operate properly ! When strange or demo continues operating when the car engine is turned off, it may drain battery power. Important The red lead (ACC) of this unit should be connected to a - Pioneer AVHP5000DVD | Owner's Manual - Page 15
unit is turned on by selecting a source. Press to cycle through all the available sources. 3 Disc loading slot Insert a disc to play. 4 -/+ (TRACK) button Press to do manual unit. 8 AUX1 input jack (3.5 mm stereo/video jack) Use to connect an auxiliary device. Optional remote control The remote - Pioneer AVHP5000DVD | Owner's Manual - Page 16
telephone ! BT-Audio - Bluetooth audio player ! S-DVD - DVD player/multi-DVD player ! MCD - Multi-CD player ! AUX 1 - AUX 1 ! AUX 2 - AUX 2 ! AV - AV input ! TV - Television ! EXT 1 - External unit 1 ! EXT 2 - External unit 2 ! XM - XM tuner ! SIRIUS - SIRIUS tuner ! REARVIEW - Rear view camera - Pioneer AVHP5000DVD | Owner's Manual - Page 17
view camera (back up camera) on page 46. ! External unit refers to a Pioneer product (such as ones available in the future) that, although To return to the previous group of touch panel keys, touch PREV. 2 Touch HIDE to hide the touch panel keys. Note If you do not use the touch panel keys - Pioneer AVHP5000DVD | Owner's Manual - Page 18
closed completely. If the LCD panel has stopped halfway, leaving it like this could result in damage. CAUTION Keep hands and fingers clear of the unit when opening, closing, or adjusting the LCD panel. Be especially cautious of children's hands and fingers. % Press OPEN/CLOSE to open the LCD panel - Pioneer AVHP5000DVD | Owner's Manual - Page 19
seconds after operation. Radio Basic Operations Section 03 Operating this unit 1 Source icon 2 Band indicator 3 Preset number indicator 4 also perform manual tuning by pressing - or + (TRACK). 4 To perform seek tuning, keep touching c or d for about one second and release. The tuner will scan - Pioneer AVHP5000DVD | Owner's Manual - Page 20
AM radio while an iPod is charged from this unit may generate noise. In this case, turn the iPod charge setting off and noise is disappeared. (Refer to Switching the iPod charge setting on page of only the strongest stations, while lower settings let you receive progressively weaker stations. 20 En - Pioneer AVHP5000DVD | Owner's Manual - Page 21
up the label side of a disc. # After a disc has been inserted, use touch panel keys to select the DVD player. # When the automatic playback function is on, this unit will cancel the DVD menu and automatically start playback from the first chapter of the first title. Refer to Automatic playback of - Pioneer AVHP5000DVD | Owner's Manual - Page 22
of DVD-R/RW/ROM, this unit does DVD or Video CD discs that some playback controls do not work in certain parts of the disc. This is not a malfunction. Operating the DVD menu Some DVDs instructions provided with the disc. Using DVD menu direct touch control This function allows you to operate the DVD - Pioneer AVHP5000DVD | Owner's Manual - Page 23
to start playback. Playback starts from the selected menu item. 3 Touch ESC to hide the touch panel keys. Notes ! You can display the menu by touching RETURN during PBC playback. For details, refer to the instructions provided with the disc. ! PBC playback of Video CD cannot be cancelled. ! During - Pioneer AVHP5000DVD | Owner's Manual - Page 24
Section 03 Operating this unit % To skip back or forward to another title, touch a or b. touch 7, 1, 0 and 0 in that order. 4 Touch ENTER. This starts playback from the selected part. Note With DVD discs featuring a menu, you can also touch MENU or TOP MENU and then make selections from the displayed - Pioneer AVHP5000DVD | Owner's Manual - Page 25
using a menu display. ! You can also switch between languages/audio systems using DVD SETUP. For details, refer to Setting the audio language on page 38. ! Only digital output of DTS audio is possible. If this unit's optical digital outputs are not connected, DTS audio will not be output, so - Pioneer AVHP5000DVD | Owner's Manual - Page 26
speed in four steps as follows: 1/16-1/8-1/4-1/2 ! During DVD playback, only the remote control can perform this operation. # To switch between groups in DVD disc, this function is not possible. Automatic playback of DVDs When a DVD disc with DVD menu is inserted, this unit will cancel the DVD menu - Pioneer AVHP5000DVD | Owner's Manual - Page 27
Operating this unit Section 03 Operating this unit Displaying text information % Touch INFO. Touch INFO repeatedly to switch between the following settings: For CD TEXT discs : disc title- : disc artist name- : track title- : - Pioneer AVHP5000DVD | Owner's Manual - Page 28
Section 03 Operating this unit For DVD, play range can be selected from DISC (disc repeat), TITLE scanning is finished, normal playback of the tracks will begin again. Selecting audio output When playing DVD video discs recorded with LPCM audio, you can switch the audio output. When playing Video CD - Pioneer AVHP5000DVD | Owner's Manual - Page 29
start. While connected to this unit, PIONEER, Accessory Attached or (check mark) is displayed on the iPod. # Before connecting the dock connector of this unit to the iPod, disconnect the headphones from the iPod. # Depending on the model of iPod or the data size in the iPod, there may be a delay to - Pioneer AVHP5000DVD | Owner's Manual - Page 30
86. ! Connect directly the dock connector cable to the iPod so that this unit works properly. ! When the ignition switch is set to ACC or ON, the iPod's battery is charged while the iPod is connected to this unit. ! While the iPod is connected to this unit, the iPod cannot be turned on or off. ! The - Pioneer AVHP5000DVD | Owner's Manual - Page 31
to turn shuffle all on. All songs on the iPod play randomly. Operating this unit's iPod function from your iPod This unit's iPod function can be operated from your iPod. Sound can be heard from car's speaker, and operation can be conducted from your iPod. ! While this function is in use, even if - Pioneer AVHP5000DVD | Owner's Manual - Page 32
Section 03 Operating this unit 2 Touch LINK SEARCH to turn link search on. Searches albums of audio player/USB memory Basic Operations For details about the supported device, refer to Portable audio player compatibility on page 11. Changing audiobook speed While listening to an audiobook on iPod, - Pioneer AVHP5000DVD | Owner's Manual - Page 33
of the files begins again. Displaying text information of an audio file The operation is the same as that of the builtin DVD player. Refer to Text information on page 26. ! If the characters recorded on the audio file are not compatible with this unit, those characters will not be displayed. En 33 - Pioneer AVHP5000DVD | Owner's Manual - Page 34
03 Operating this unit Selecting files from the file name list The operation is the same as that of the builtin DVD player. Refer to return to the previous group of function names, touch PREV. # When selecting FM and Bluetooth telephone as the source, you cannot switch to SLA. 2 Touch ESC to return - Pioneer AVHP5000DVD | Owner's Manual - Page 35
Section 03 Operating this unit 1 Touch FADER/BALANCE on the audio function menu. # When to right. Using the equalizer The equalizer lets you adjust the equalization to match the car's interior acoustic characteristics as desired. Recalling equalizer curves There are six stored equalizer curves - Pioneer AVHP5000DVD | Owner's Manual - Page 36
to turn loudness on. # To turn loudness off, touch c. 3 Touch c or d to select a desired level. LOW (low)-MID (mid)-HIGH (high) Using subwoofer output This unit is equipped with a subwoofer output which can be turned on or off. ! When the subwoofer output is on, you can adjust the cut-off frequency - Pioneer AVHP5000DVD | Owner's Manual - Page 37
DivX are set to the same source level adjustment volume automatically. ! External unit 1 and external unit 2 are set to the same source level adjustment volume automatically. Setting up the DVD player Introduction of DVD setup adjustments You can use this menu to change audio, subtitle, parental - Pioneer AVHP5000DVD | Owner's Manual - Page 38
Section 03 Operating this unit # If you have selected OTHERS, refer to When you select on the disc is displayed. Switching the assist subtitle on or off If assist subtitles are recorded on a DVD disc, you can display them by turning the assist subtitle function on. You can turn assist subtitles on - Pioneer AVHP5000DVD | Owner's Manual - Page 39
BOX or PAN SCAN. Selecting 16 : 9 may result in an unnatural picture. ! If you select the TV aspect, the unit's display changes to the same setting. % Touch TV ASPECT on the DVD For details, refer to the disc's instructions. Setting the parental lock Some DVD video discs let you use parental lock - Pioneer AVHP5000DVD | Owner's Manual - Page 40
unit ! With some discs, the parental lock may be active only on the scenes with certain levels. The playback of those scenes will be skipped. For details, refer to the instruction manual that came with the discs. Changing the level You can change the set parental lock level. 1 Touch NEXT on the DVD - Pioneer AVHP5000DVD | Owner's Manual - Page 41
system settings to achieve optimal performance from this unit. Switching the auxiliary 1 setting % Touch AUX1 on the initial menu to select desired setting. ! VIDEO - an iPod with video capabilities connected with 4-pole mini plug cable (e.g., CD-V150M) ! AUDIO - auxiliary device connected with - Pioneer AVHP5000DVD | Owner's Manual - Page 42
function is received. ! Sound unit via Bluetooth wireless technology, you need to enter PIN code on your phone to verify the connection. The default code is 0000, but you can change this in this function. ! With some Bluetooth audio players, you may be required to enter the Bluetooth audio player - Pioneer AVHP5000DVD | Owner's Manual - Page 43
You can only operate this function when Bluetooth adapter (e.g. CD-BTB200) is connected to this unit. 1 Touch NEXT on the initial menu. 2 Touch PINCODE INPUT. PIN code input display appears. 3 Touch 0 to 9 to input the PIN code of your Bluetooth audio player. # To cancel the inputted numbers, touch - Pioneer AVHP5000DVD | Owner's Manual - Page 44
Section 03 Operating this unit Other Functions Introduction of system adjustments 1 System menu 1 Touch WIDE MODE on the system menu. 2 Touch the desired wide mode setting. 3 Touch ESC to hide the touch panel keys. FULL (full) A 4:3 picture is enlarged in the horizontal direction only, giving you a - Pioneer AVHP5000DVD | Owner's Manual - Page 45
dimmed when the car's headlights are turned Touch ESC to hide the touch panel player) ! S-DVD - DVD player connected with RCA cable ! EXT-VIDEO - External video unit (such as Pioneer products available in the future) ! TV - TV tuner connected with RCA cable Setting the clock Use these instructions - Pioneer AVHP5000DVD | Owner's Manual - Page 46
unit Pioneer recommends the use of a camera which outputs mirror reversed images, otherwise screen image may appear reversed. This unit features a function that automatically switches to the rear view camera video (REAR CAMERA IN jack) when a rear view camera is installed unit park) position, or - Pioneer AVHP5000DVD | Owner's Manual - Page 47
mechanical pen. Otherwise the screen is damaged. ! If touch panel adjustment cannot be performed properly, consult your local Pioneer dealer. 1 Touch the source icon and then touch OFF to turn this unit off. # When the source icon is not displayed, you can display it by touching the screen. 2 Press - Pioneer AVHP5000DVD | Owner's Manual - Page 48
(AUX 1) When connecting auxiliary device using a mini plug cable iPod and portable audio/video player can be connected to this unit via mini plug cable. ! If an iPod with video capabilities is con- nected to this unit via 3.5 mm plug (4 pole) cable (e.g., CD-V150M), you can enjoy the video contents - Pioneer AVHP5000DVD | Owner's Manual - Page 49
remote control (e.g., CD- R55) can operate this function. % Press PGM to turn pause on when selecting the following sources: ! DVD - Built-in DVD player ! iPod - iPod ! USB - USB portable audio player/USB memory ! S-DVD - DVD player/multi-DVD player ! MCD - Multi-CD player ! BT Audio - Bluetooth - Pioneer AVHP5000DVD | Owner's Manual - Page 50
Section 03 Operating this unit % Press PGM and hold to turn BSSM on when selecting TV as the source. Press PGM and hold until the BSSM turns on. # To cancel - Pioneer AVHP5000DVD | Owner's Manual - Page 51
accessories XM tuner Basic Operations You can use this unit to control an XM satellite digital tuner (GEX-P920XM), which is sold separately. For details concerning operation, refer to the XM tuner's operation manuals. This section provides information on XM operations with this unit being received. - Pioneer AVHP5000DVD | Owner's Manual - Page 52
Section 04 Available accessories Switching the XM channel select mode You have two methods for selecting a channel: by number and by category. When selecting by number, channels in any - Pioneer AVHP5000DVD | Owner's Manual - Page 53
accessories Making the MyMix playlist You can add a song that is being broadcast to the MyMix playlist. When it is added, the song title and its artist name is memorized to this unit each alert setting. Set up an alert to on so you can receive the alert when the song is broadcast, or set it up to - Pioneer AVHP5000DVD | Owner's Manual - Page 54
04 Available accessories % Touch SIRIUS tuner, please refer to the SIRIUS operation manual. ! This unit does not have the text scroll function. ! With this unit, Shows the detail information of the broadcast channel currently being received. 1 Touch the source icon and then touch SIRIUS to - Pioneer AVHP5000DVD | Owner's Manual - Page 55
Section 04 Available accessories # To switch between groups of touch panel keys, touch NEXT or this page.) Note It may take a few seconds before you can hear anything while this unit acquires and processes the satellite signal. Storing and recalling broadcast stations You can easily store up - Pioneer AVHP5000DVD | Owner's Manual - Page 56
Section 04 Available accessories Selecting a SIRIUS channel directly You can select a SIRIUS channel directly MyMix playlist. When it is added, the song title and its artist name is memorized to this unit. The MyMix function will start on the song that matches the song title and its artist name in - Pioneer AVHP5000DVD | Owner's Manual - Page 57
Available accessories Section 04 Available accessories Setting up a song alert You can set up an alert on or off by each song in the MyMix playlist. First, display the MyMix playlist and then change each alert setting. Set up an alert to on so you can receive the alert when the song is broadcast - Pioneer AVHP5000DVD | Owner's Manual - Page 58
Function is required. ! For details, refer to SIRIUS plug-and-play unit's manuals. % Touch NEXT. % Touch INSTANT REPLAY. Instant Replay mode is deiplayed. Now, Instant Replay mode can be performed. # In the following conditions, tuner exits from the Instant Replay mode. - When LIVE is touched - When - Pioneer AVHP5000DVD | Owner's Manual - Page 59
section provides brief information on Blue- tooth audio player operations with this unit, which slightly differs or is abbreviated from that described in the Bluetooth adapter's operation manual. ! Even though your audio player does not contain a Bluetooth module, you can still control it from this - Pioneer AVHP5000DVD | Owner's Manual - Page 60
Section 04 Available accessories Pausing playback % Touch e during playback. # To resume playback at the . This unit is now on standby for connection from Bluetooth audio player. If your Bluetooth audio player is set ready for Bluetooth wireless connection, connection to this unit is automatically - Pioneer AVHP5000DVD | Owner's Manual - Page 61
that described in the Bluetooth adapter's operation manual. ! This unit is not compatible with registration for guest phone. ! This unit does not have the 6 Incoming call notice indication Shows when an incoming call has been received and not checked yet. ! Incoming call notice is not displayed for - Pioneer AVHP5000DVD | Owner's Manual - Page 62
Available accessories Shows when a phone connection using Bluetooth Bluetooth wireless connection between this unit and your phone, registering your phone with this unit, and adjusting the volume level. 1 Connection For detailed instructions on connecting your phone to this unit via Bluetooth - Pioneer AVHP5000DVD | Owner's Manual - Page 63
Available accessories Answering Bluetooth wireless technology are found, device name or Name Not Found (if names cannot be obtained) is displayed. # If this unit CONNECTING flashes. To complete the connection, check the device name (Pioneer BT unit2) and enter the link code on your cellular phone - Pioneer AVHP5000DVD | Owner's Manual - Page 64
Section 04 Available accessories Registering a your cellular phone is ready for Bluetooth wireless connection, connection to this unit is automatically established. # To transfer using the cellular phone. For detailed instructions, refer to the instruction manual that came with your cellular phone. - Pioneer AVHP5000DVD | Owner's Manual - Page 65
Section 04 Available accessories Note When the phone book transfer is complete, number. 7 To end the call, touch . Editing phone numbers Important Be sure to park your vehicle and apply the parking brake when performing this operation. You can edit the numbers of Phone Book entries. Each phone - Pioneer AVHP5000DVD | Owner's Manual - Page 66
accessories Clearing a phone book entry Important Be sure to park your vehicle and apply the parking brake park your vehicle and apply the parking brake when performing this operation. The 6 most recent calls made (dialled), received Call History, see the instructions explained in previous pages. - Pioneer AVHP5000DVD | Owner's Manual - Page 67
accessories a call by entering phone number Important Be sure to park your vehicle and apply the parking brake when performing this operation. 1 Touch DIRECT to display the # If you want to clear all the Phone Book, dialled/received/missed call history list and preset phone number, touch CLEAR ALL. - Pioneer AVHP5000DVD | Owner's Manual - Page 68
title and track title list functions. ! Only functions described in this manual are supported by 50-disc multi-CD players. ! This unit is not designed to operate disc title list functions with a 50-disc multi-CD player. 1 Source icon 2 Disc number indicator 3 Disc title indicator Shows the title - Pioneer AVHP5000DVD | Owner's Manual - Page 69
begins again. ! If the multi-CD player does not support COMP/DBE, you cannot operate this function. Using CD TEXT functions You can use these functions only with a CD TEXT compatible multi-CD player. The operation is the same as that of the builtin DVD player. Refer to Text information on page 26 - Pioneer AVHP5000DVD | Owner's Manual - Page 70
accessories DVD Player Basic Operations You can use this unit to control a DVD player or multi-DVD player, which is sold separately. For details concerning operation, refer to the DVD player's or multi-DVD player's operation manual. This section provides information on DVD operations with this unit - Pioneer AVHP5000DVD | Owner's Manual - Page 71
Section 04 Available accessories Introduction of advanced operations 1 Touch AV MENU and the file name list ! You can operate this function only when a DVD player compatible with compressed audio playback is connected to this unit. 1 Touch LIST to display the disc list. 2 Touch LIST repeatedly - Pioneer AVHP5000DVD | Owner's Manual - Page 72
04 Available accessories TV tuner Basic Operations You can use this unit to control a TV tuner (e.g. GEX-P5700TV), which is sold separately. For details concerning operation, refer to the TV tuner's operation manual. This section provides information on TV operations with this unit, which differs - Pioneer AVHP5000DVD | Owner's Manual - Page 73
differ depending on the multi-channel processor connected to this unit. Important When a multi-channel processor and an optional DVD player are connected to this unit, be sure to use an optical cable (e.g., CD-AD600). Available accessories 1 DSP display Shows the DSP function names. By carrying - Pioneer AVHP5000DVD | Owner's Manual - Page 74
Section 04 Available accessories # To go to the next group of function names, touch NEXT. # To . # When selecting FM as the source, you cannot switch to SLA. # When playing other than the DVD disc, you cannot switch to DYNAMIC RANGE CONTROL. # When neither FRONT-L nor FRONT-R is selected in POSITION - Pioneer AVHP5000DVD | Owner's Manual - Page 75
Section 04 Available accessories Note When you make adjustments to the listening position, source level adjustment volume automatically. ! DVD and the optional DVD player are set to the same source level adjustment volume automatically. ! External unit 1 and external unit 2 are set to the same - Pioneer AVHP5000DVD | Owner's Manual - Page 76
Section 04 Available accessories Using the down-mix function The down-mix function allows bandwidth output channels from two-channel sources to achieve high-purity matrix surround. ! Dolby Pro Logic II supports up to 48kHz sampling rate stereo source and has no effect on other types of source. ! - Pioneer AVHP5000DVD | Owner's Manual - Page 77
accessories the speaker is capable of reproducing bass content, or if no subwoofer is installed. 1 Touch NEXT on the DSP function menu. 2 Touch SPEAKER SETTING. hear over other speakers cancel each other out. To remove this problem, try changing the phase setting for the subwoofer. 1 Touch - Pioneer AVHP5000DVD | Owner's Manual - Page 78
Section 04 Available accessories Note When playing a 2-channel mono source with Pro Logic turned on, there may be occasions when the following will occur: ! No audio is outputted if the center speaker setting is SMALL or LARGE and no center speaker is installed. ! Audio is heard only over the - Pioneer AVHP5000DVD | Owner's Manual - Page 79
Section 04 Available accessories 3 Touch START to start the test tone output. The test tone is outputted. It rotates from speaker to speaker in the following sequence at intervals - Pioneer AVHP5000DVD | Owner's Manual - Page 80
Section 04 Available accessories 4 Touch c or d to adjust the distance between the selected speaker and . Using the equalizer The equalizer lets you adjust the equalization to match the car's interior acoustic characteristics as desired. Recalling equalizer curves There are seven stored equalizer - Pioneer AVHP5000DVD | Owner's Manual - Page 81
Section 04 Available accessories LOW (low)-MID (mid)-HIGH (high) 7 Touch b and then touch c or d accidents, never carry out auto TA and EQ while driving. When this function measures the car interior acoustic characteristics to create an auto-equalizer curve, a loud measurement tone (noise) may - Pioneer AVHP5000DVD | Owner's Manual - Page 82
the car interior acoustic characteristics. ! When front speaker is not connected, auto TA and EQ cannot be carried out. ! When this unit is the supplied microphone in the center of the headrest of the driver's seat, facing forward, using the belt (sold separately). The auto TA and EQ may differ - Pioneer AVHP5000DVD | Owner's Manual - Page 83
accessories For details concerning operation, refer to the multi-channel processor's operation manual. 8 Touch START to start the auto TA and EQ. 9 Get out of the car , touch STOP. # To cancel auto TA and EQ part way through, touch BACK or ESC. 10 When auto TA and EQ is completed, Complete - Pioneer AVHP5000DVD | Owner's Manual - Page 84
the cables correctly. The unit is performing still, slow mo- There is no sound during still, slow motion or tion or frame-by-frame playback. frame-by-frame playback. There is no picture. The parking brake cord is not con- Connect a parking brake cord, and apply the nected. parking brake. The - Pioneer AVHP5000DVD | Owner's Manual - Page 85
disc menu. indicated in the disc menu. No subtitles are displayed. The DVD playing does not feature Subtitles are not displayed if they are not re- viewed on some displays. This does not mean this unit is malfunctioning. Problems during Video CD playback Symptom The PBC (playback control) - Pioneer AVHP5000DVD | Owner's Manual - Page 86
- ar PCM. STREAM. (Page 40) put. Error messages When you contact your dealer or your nearest Pioneer Service Center, be sure to have the error message recorded. Built-in DVD player Message DIFFERENT REGION DISC (R ERROR) ERROR-02-XX NON-PLAYABLE DISC (NONPLAY) PROTECT SKIPPED TEMP Cause Action - Pioneer AVHP5000DVD | Owner's Manual - Page 87
USB memory instructions to dis- is connected able the security. The connected USB portable audio player/USB player or USB supported by this unit. memory that is USB Mass Storage Class compliant. The USB connector or USB cable is Confirm that the USB connector or USB short-circuited. cable - Pioneer AVHP5000DVD | Owner's Manual - Page 88
Error has occurred when connecting the iPod to this unit Check if the connection cable for iPod shorted out (e.g., not caught in metal objects). After checking, turn the ignition switch OFF and back ON or disconnect the iPod and connect again. Reconnect the iPod. Turn the ignition switch to OFF - Pioneer AVHP5000DVD | Owner's Manual - Page 89
and player ! Use only conventional, fully circular discs. Do not use shaped discs. ! Use 12-cm or 8-cm disc. Do not use an adapter when about recording mode, please contact manufacture of DVD recorder or application. AVCHD recorded discs ! This unit is not compatible with discs recorded in AVCHD - Pioneer AVHP5000DVD | Owner's Manual - Page 90
and a recordable DVD for video on the other. ! Playback of the DVD side is possible with this unit. However, since disc. Serious scratches can lead to playback problems on this unit. In some cases, a Dual Disc may Depending on the version of Windows Media Player used to encode WMA files, album names - Pioneer AVHP5000DVD | Owner's Manual - Page 91
let the USB portable audio player/USB memory fall onto the floor, where it may become jammed under the brake or accelerator pedal. ! There may be a slight delay when starting playback of audio files encoded with image data. ! Depending on the USB devices connected to this unit, it may generate noise - Pioneer AVHP5000DVD | Owner's Manual - Page 92
on the player. Example of a hierarchy : Folder : Compressed audio file 1 2 3 4 5 6 Level 1 Level 2 Level 3 Level 4 ! 01 to 05 represent assigned folder numbers. 1 to 6 represent the playback sequence. The user cannot assign folder numbers and specify the playback sequence with this unit. ! Playback - Pioneer AVHP5000DVD | Owner's Manual - Page 93
it may become jammed under the brake or accelerator pedal. For details, refer to the iPod's manuals. About iPod settings ! You cannot operate the iPod Equalizer on Pioneer products. We recommend that you set the iPod Equalizer to off, before connecting to this unit. ! You cannot set Repeat to off - Pioneer AVHP5000DVD | Owner's Manual - Page 94
unit, as there are high-voltage components inside which may cause an electric shock. Be sure to consult your dealer or the nearest authorized PIONEER Service LCD screen and do not indicate a problem with the display. ! At low antenna of the portable phone away from the display to prevent disruption - Pioneer AVHP5000DVD | Owner's Manual - Page 95
LCD screen. - The fluorescent tube should last for approximately 10 000 hours, depending on operating conditions. (Using the display at low temperatures reduces the service life of the fluorescent tube.) - When the fluorescent tube reaches the end of its useful life, the screen will be dark and the - Pioneer AVHP5000DVD | Owner's Manual - Page 96
Appendix Additional Information Language code chart for DVD Language (code), input code Japanese (ja), 1001 English (en), 0514 French (fr), 0618 Spanish (es), 0519 German (de), 0405 Italian (it), 0920 Chinese (zh), 2608 - Pioneer AVHP5000DVD | Owner's Manual - Page 97
Bit rate This expresses data volume per second, or bps (bits per second) units. The higher the rate, the more information is available to reproduce the sound. are numbered in the same way as the chapters of a book. With DVD video discs featuring chapters, you can quickly find a desired scene with - Pioneer AVHP5000DVD | Owner's Manual - Page 98
or CD-RW, etc., all data from beginning to end is treated as a single unit or session. Multi-session is a method of recording more than 2 sessions on one be recorded on a single DVD, letting you choose as desired. Optical digital output/input By transmitting and receiving audio signals in a digital - Pioneer AVHP5000DVD | Owner's Manual - Page 99
indicating the area in which they were purchased. Playback of a DVD is not possible unless it features the same region number as the DVD player. This unit's region number is displayed on the bottom of the unit. Title DVD video discs have high data capacity, enabling recording of multiple movies - Pioneer AVHP5000DVD | Owner's Manual - Page 100
6 dB to -24 dB Phase Normal/Reverse Bass boost: Gain 12 dB to 0 dB DVD Player System DVD video, Video CD, CD, WMA, MP3, AAC, DivX system Usable discs DVD video, Video CD, CD, CD-R/RW, DVD-R/RW Region number 1 Signal format: Sampling frequency ..... 44.1/48/96 kHz Number of quantization bits - Pioneer AVHP5000DVD | Owner's Manual - Page 101
......... Ver. 7, 7.1, 8, 9, 10, 11 (2ch audio) (Windows Media Player) AAC decoding format MPEG-4 AAC (iTunes® encoded only) (.m4a) (Ver. 7.2 and earlier) WAV signal format Linear PCM & MS ADPCM (Non-compressed) FM tuner Frequency range 87.9 MHz to 107.9 MHz Usable sensitivity 8 dBf (0.7 µV/75 - Pioneer AVHP5000DVD | Owner's Manual - Page 102
Index A Angle icon 25,.39 Aspect ratio 39,.97 Audio language 25,.38 B Bookmark 24 Brightness 44 C Chapter 97 Code number 39 Color 44 Contrast 44 D DivX 97 DivX Certified 97 Dolby Digital 10,.97 Dolby Pro Logic II 97 DTS 10,.97 Dynamic range control 97 H Hue 44 L Language code chart - Pioneer AVHP5000DVD | Owner's Manual - Page 103
1-CHOME, MEGURO-KU TOKYO 153-8654, JAPAN PIONEER ELECTRONICS (USA) INC. P.O. Box 1540, Long Beach, California 90801-1540, U.S.A. TEL: (800) 421-1404 PIONEER EUROPE NV Haven 1087, Keetberglaan 1, B-9120 Melsele, Belgium TEL: (0) 3/570.05.11 PIONEER ELECTRONICS ASIACENTRE PTE. LTD. 253 Alexandra Road
-
 1
1 -
 2
2 -
 3
3 -
 4
4 -
 5
5 -
 6
6 -
 7
7 -
8
-
9
-
10
-
11
-
12
-
13
-
14
-
15
-
16
-
17
-
18
-
19
-
20
-
21
-
22
-
23
-
24
-
25
-
26
-
27
-
28
-
29
-
30
-
31
-
32
-
33
-
34
-
35
-
36
-
37
-
38
-
39
-
40
-
41
-
42
-
43
-
44
-
45
-
46
-
47
-
48
-
49
-
50
-
51
-
52
-
53
-
54
-
55
-
56
-
57
-
58
-
59
-
60
-
61
-
62
-
63
-
64
-
65
-
66
-
67
-
68
-
69
-
70
-
71
-
72
-
73
-
74
-
75
-
76
-
77
-
78
-
79
-
80
-
81
-
82
-
83
-
84
-
85
-
86
-
87
-
88
-
89
-
90
-
91
-
92
-
93
-
94
-
95
-
96
-
97
-
98
-
99
-
100
-
101
-
102
-
103
 |
 |

Operation Manual
DVD AV RECEIVER
AVH-P5000DVD
English