Pioneer BDP-330 Owner's Manual - Page 51
USB Memory Management
 |
UPC - 884938112260
View all Pioneer BDP-330 manuals
Add to My Manuals
Save this manual to your list of manuals |
Page 51 highlights
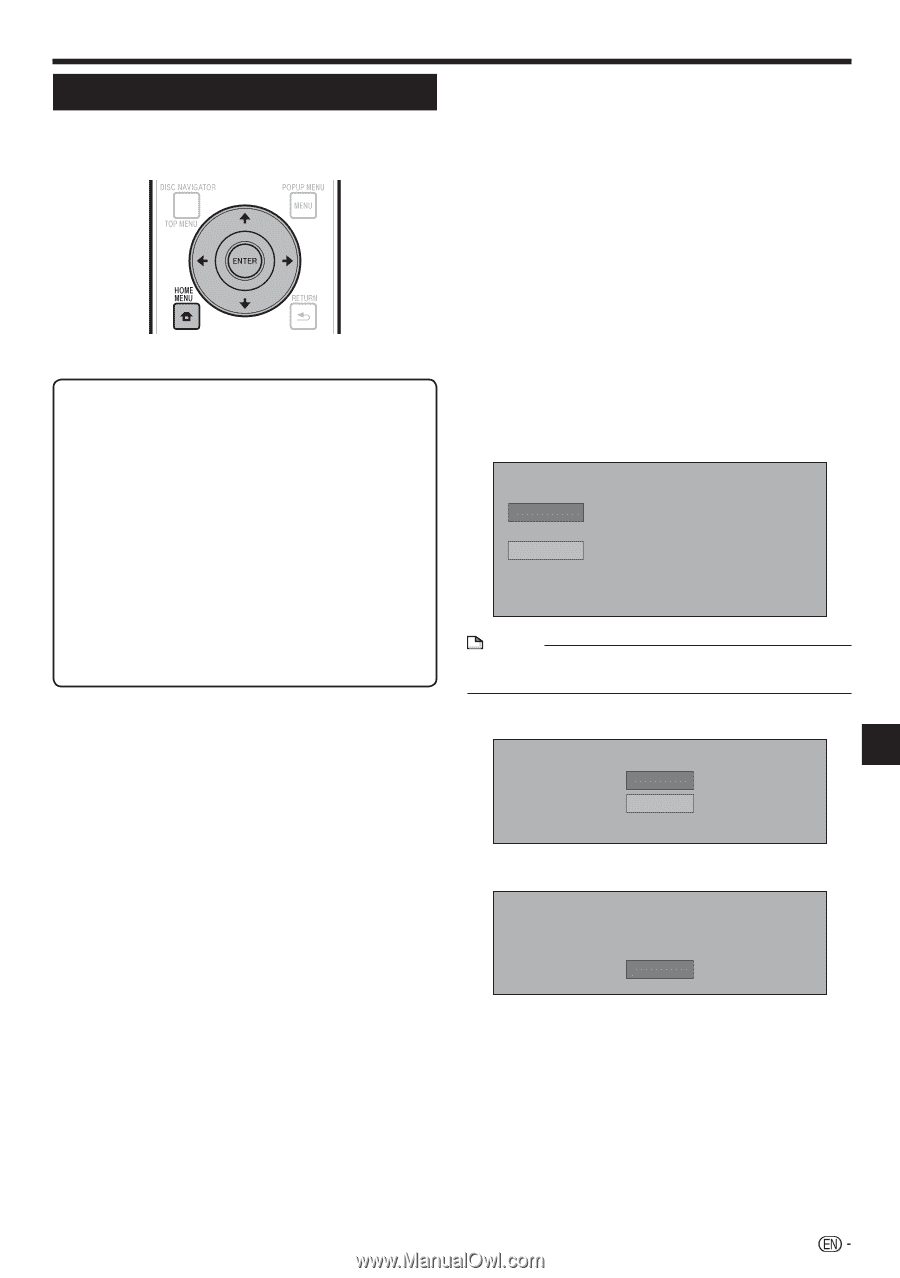
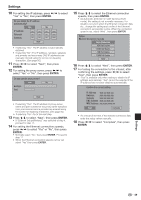
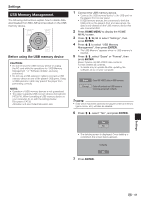
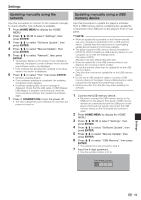
Settings USB Memory Management The following instructions explain how to delete data downloaded from BD-LIVE and recorded on the USB memory device. Before using the USB memory device CAUTION: • Do not remove the USB memory device or unplug the AC cord while the operations for "USB Memory Management " or "Software Update" are being performed. • Do not use a USB extension cable to connect a USB memory device to one of the player's USB ports. Using a USB extension cable may prevent the player from performing correctly. NOTE: • Operation of USB memory devices is not guaranteed. • The player supports USB memory devices formatted in FAT32/16. When formatting a USB memory device on your computer, do so with the settings below. File system: FAT32 Allocation unit size: Default allocation size 1 Connect the USB memory device. • Connect the USB memory device to the USB port on the player's front or rear panel. • If USB memory devices are connected to both the USB ports on the player's front and rear panels, the data is only deleted on the USB memory device that was connected first. 2 Press HOME MENU to display the HOME MENU screen. 3 Press to select "Settings", then press ENTER. 4 Press to select "USB Memory Management", then press ENTER. • "No USB Memory" appears when no USB memory is inserted. 5 Press , select "Erase" or "Format", then press ENTER. Erase: Deletes only BD-VIDEO data contents. Format: Deletes all contents. • To delete only an update file after updating the software, do so on your computer. Erase Erase BD-VIDEO data on USB memory. Format Erase all contents on USB memory including protected contents. NOTE • Data which has been saved to the player's internal memory (game score, etc.) will also be deleted. 6 Press , select "Yes", and press ENTER. Yes No • The deleting screen is displayed. Once deleting is completed, the screen below appears. Complete OK 7 Press ENTER. Settings 51
-
 1
1 -
2
-
3
-
4
-
5
-
6
-
7
-
8
-
9
-
10
-
11
-
12
-
13
-
14
-
15
-
16
-
17
-
18
-
19
-
20
-
21
-
22
-
23
-
24
-
25
-
26
-
27
-
28
-
29
-
30
-
31
-
32
-
33
-
34
-
35
-
36
-
37
-
38
-
39
-
40
-
41
-
42
-
43
-
44
-
45
-
 46
46 -
 47
47 -
 48
48 -
 49
49 -
 50
50 -
 51
51 -
 52
52 -
 53
53 -
 54
54 -
 55
55 -
 56
56 -
57
-
58
-
59
-
60
-
61
-
62
-
63
-
64
-
65
-
66
-
67
-
68
-
69
-
70
-
71
-
72
-
73
-
74
-
75
-
76
-
77
-
78
-
79
-
80
-
81
-
82
-
83
-
84
-
85
-
86
-
87
-
88
-
89
-
90
-
91
-
92
-
93
-
94
-
95
-
96
-
97
-
98
-
99
-
100
-
101
-
102
-
103
-
104
-
105
-
106
-
107
-
108
-
109
-
110
-
111
-
112
-
113
-
114
-
115
-
116
-
117
-
118
-
119
-
120
-
121
-
122
-
123
-
124
-
125
-
126
-
127
-
128
-
129
-
130
-
131
-
132
-
133
-
134
-
135
-
136
-
137
-
138
-
139
-
140
-
141
-
142
-
143
-
144
-
145
-
146
-
147
-
148
-
149
-
150
-
151
-
152
-
153
-
154
-
155
-
156
-
157
-
158
-
159
-
160
-
161
-
162
-
163
-
164
-
165
-
166
-
167
-
168
-
169
-
170
-
171
-
172
-
173
-
174
-
175
-
176
-
177
-
178
-
179
-
180
-
181
-
182
-
183
-
184
-
185
-
186
-
187
-
188
-
189
-
190
-
191
-
192
-
193
-
194
-
195
-
196
 |
 |