Pioneer DV-47Ai Owner's Manual - Page 18
a digital connection.
 |
View all Pioneer DV-47Ai manuals
Add to My Manuals
Save this manual to your list of manuals |
Page 18 highlights
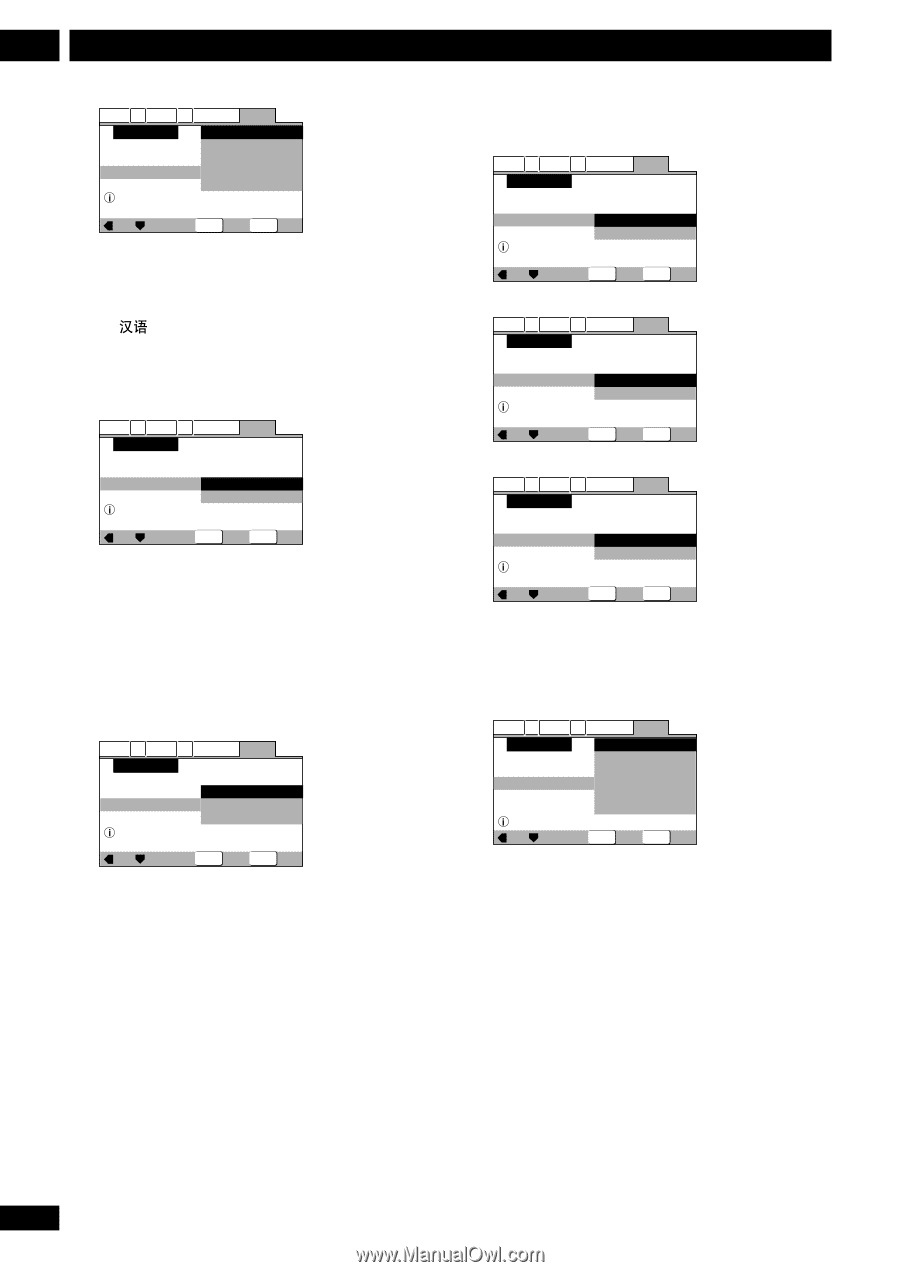
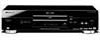
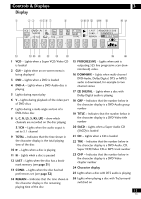
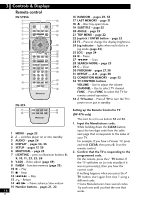
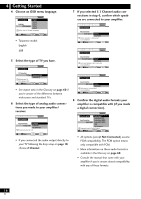
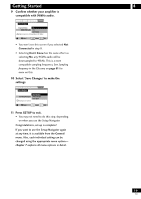
4 Getting Started 4 Choose an OSD menu language. Audio1 A2 Video1 V2 Language General Setup Navigator Language OSD Language English français Deutsch Italiano Español Select the On Screen Language Move ENTER Select SETUP Exit • Taiwanese model: English 5 Select the type of TV you have. Audio1 A2 Video1 V2 Language General Setup Navigator TV Connection TV Type Widescreen TV 16:9 aspect ratio Widescreen(16:9) Standard(4:3) Move ENTER Select SETUP Exit • See Aspect ratio in the Glossary on page 60 if you're unsure of the difference between widescreen and standard TVs. 6 Select the type of analog audio connections you made to your amplifier/ receiver. Audio1 A2 Video1 V2 Language General Setup Navigator Amp Connection 2 ChannelDolby Digital/DTS Analog Jacks 5.1Channel Not Connected 2channel jacks for L/R Move ENTER Select SETUP Exit • If you connected the audio output directly to your TV following the Easy setup on page 10, choose 2 Channel. 7 If you selected 5.1 Channel audio connections in step 6, confirm which speakers are connected to your amplifier. Audio1 A2 Video1 V2 Language General Setup Navigator Amp Connection Center Speaker PresentDolby Digital/DTS Not Present Center speaker is connected to an amplifier Move ENTER Select SETUP Exit Audio1 A2 Video1 V2 Language General Setup Navigator Amp Connection Surround Speakers PresentDolby Digital/DTS Not Present Surround speakers are connected to an amplifier Move ENTER Select SETUP Exit Audio1 A2 Video1 V2 Language General Setup Navigator Amp Connection Sub-woofer PresentDolby Digital/DTS Not Present Sub-woofer is connected to an amplifier Move ENTER Select SETUP Exit 8 Confirm the digital audio formats your amplifier is compatible with (if you made a digital connection). Audio1 A2 Video1 V2 Language General Setup Navigator Dolby Digital Dolby Digital/DTS Amp Connection Dolby Digital/MPEG Digital Jack Dolby D/DTS/MPEG PCM Not Connected Compatible with Dolby Digital Move ENTER Select SETUP Exit • All options (except Not Connected) assume PCM compatibility. The PCM option means only compatible with PCM. • More information on these audio formats is available in the Glossary on page 60. • Consult the manual that came with your amplifier if you're unsure about compatibility with any of these formats. 18 En
-
 1
1 -
2
-
3
-
4
-
5
-
6
-
7
-
8
-
9
-
10
-
11
-
12
-
 13
13 -
 14
14 -
 15
15 -
 16
16 -
 17
17 -
 18
18 -
 19
19 -
 20
20 -
 21
21 -
 22
22 -
 23
23 -
24
-
25
-
26
-
27
-
28
-
29
-
30
-
31
-
32
-
33
-
34
-
35
-
36
-
37
-
38
-
39
-
40
-
41
-
42
-
43
-
44
-
45
-
46
-
47
-
48
-
49
-
50
-
51
-
52
-
53
-
54
-
55
-
56
-
57
-
58
-
59
-
60
-
61
-
62
-
63
-
64
-
65
-
66
-
67
-
68
-
69
-
70
-
71
-
72
 |
 |