Pioneer VSX23TXH Owner's Manual
Pioneer VSX23TXH - Elite 7.1 Channel Audio/Video Receiver Manual
 |
UPC - 012562957074
View all Pioneer VSX23TXH manuals
Add to My Manuals
Save this manual to your list of manuals |
Pioneer VSX23TXH manual content summary:
- Pioneer VSX23TXH | Owner's Manual - Page 1
Operating Instructions audio/video multi-channel receiver - Pioneer VSX23TXH | Owner's Manual - Page 2
CHANNEL RECEIVER Model Number: VSX-23TXH, VSX-21TXH Responsible Party Name: PIONEER ELECTRONICS SERVICE, INC to comply with the limits for a Class B digital device, pursuant to Part 15 of the FCC Rules installed and used in accordance with the instructions, may cause harmful interference to radio - Pioneer VSX23TXH | Owner's Manual - Page 3
servicing) instructions in the literature accompanying the appliance. D3-4-2-1-1_A1_En 1) Read these instructions. 2) Keep these instructions. 3) Heed all warnings. 4) Follow all instructions at least 60 cm at top, 10 cm at rear, and 30 cm at each side). WARNING Slots and openings in the cabinet - Pioneer VSX23TXH | Owner's Manual - Page 4
and appropriate one fitted. Replacement and mounting of an AC plug on the power supply cord of this unit should be performed only by qualified service personnel. If connected to an AC outlet, the cut-off plug can cause severe electrical shock. Make sure it is properly disposed of after removal - Pioneer VSX23TXH | Owner's Manual - Page 5
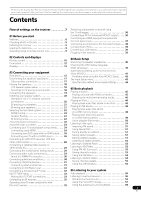
you for buying this Pioneer product. Please read through these operating instructions so you will know how to operate your model properly. After you have finished reading the instructions, put them away in a safe place for future reference. Contents Flow of settings on the receiver 7 01 Before you - Pioneer VSX23TXH | Owner's Manual - Page 6
information Speaker Setting Guide 97 Positional relationship between speakers and monitor 98 Troubleshooting 98 Power 98 No sound 99 Other audio problems 100 Video 101 Settings 101 Professional Calibration EQ graphical output . . . . 102 Display 102 Remote control 103 HDMI 103 Important - Pioneer VSX23TXH | Owner's Manual - Page 7
(page 31) • Plugging in the receiver (page 39) 5 Switching the settings • Automatically setting up for surround sound (Auto MCACC) (page 41) 10 The Input Setup menu (page 43) (When using connections other than the recommended connections) 11 Switching the HDMI output (page 71) (VSX-23TXH model - Pioneer VSX23TXH | Owner's Manual - Page 8
your Pioneer component that supports the KURO LINK function by connecting your component to this receiver via HDMI. Also, the built-in digital video converter of this receiver makes both de-interlacing and up-scaling possible, and analog video signals being input are converted and output as digital - Pioneer VSX23TXH | Owner's Manual - Page 9
is ready for handling digital audio and video, and this receiver's enhanced compatibility makes on cord • Warranty card • These operating instructions Installing the receiver • When installing this unit, make sure work properly if: • There are obstacles between the remote control and the receiver's - Pioneer VSX23TXH | Owner's Manual - Page 10
on a CD, DVD, etc. ENTER can be used to enter commands for TV or DTV. Press RECEIVER first to access: INPUT SELECT - Use to select the input function (page 45). VSX-23TXH only: HDMI OUT - Switch the HDMI output terminal (page 71). SIGNAL SEL - Use to select an input signal (page 61). MCACC - Press - Pioneer VSX23TXH | Owner's Manual - Page 11
to perform operations in the main zone, ZONE 2 and ZONE 3 (VSX-23TXH only) (page 70). 12 Remote control LED Lights when a command is sent from the remote control (page 73). 13 SOURCE Press to turn on/off other components connected to the receiver (see page 73 for more on this). 14 MASTER VOLUME - Pioneer VSX23TXH | Owner's Manual - Page 12
HDMI 4 9 10 11 12 13 14 15 VSX-23TXH USB iPod iPhone VIDEO 2 INPUT VIDEO L AUDIO R MCACC SETUP MIC VSX-21TXH 14 16 13 1 INPUT SELECTOR dial Use to select an input function. 2 STANDBY/ON Switches the receiver (page 56). HOME THX - Press to select a Home THX listening mode (page 57 - Pioneer VSX23TXH | Owner's Manual - Page 13
device for audio and photo playback (page 38). 15 VSX-23TXH only: HDMI 4 input connector Use for connection to compatible HDMI device (Video camera, etc.). See Connecting an HDMI-equipped component to the front panel input on page 37. 16 VSX-21TXH only: VIDEO 2 INPUT terminals Use to connect your - Pioneer VSX23TXH | Owner's Manual - Page 14
an analog signal (page 70). 12 Tuner indicators TUNED - Lights when a broadcast is being received. STEREO - Lights when a stereo FM broadcast is being received in auto stereo mode. MONO - Lights when the mono mode is set using MPX. 13 Lights when the sound is muted (page 11). 14 Master volume level - Pioneer VSX23TXH | Owner's Manual - Page 15
home theater system. Important • Illustration shows the VSX-23TXH, however connections for the VSX-21TXH are the same except where noted. Rear panel HDMI V TRIGGER (OUTPUT 12 V TOTAL 50 mA MAX) 1 2 CENTER SURROUND L R SURROUND BACK / B LR L (Single) 19 AC IN VSX-21TXH CAUTION • - Pioneer VSX23TXH | Owner's Manual - Page 16
VSX-23TXH only: See Switching the HDMI output on page 71. 2 Coaxial digital audio inputs (x2) Use for digital audio sources, including DVD players/ recorders, digital satellite receivers Pioneer components with this unit's sensor on page 35. 16 Remote input(s)/output (x3 (VSX-23TXH)/x2 (VSX21TXH)) - Pioneer VSX23TXH | Owner's Manual - Page 17
on page 22). [1] 7.1ch surround connection (Simple connection & Best surround) *Default setting These connections prioritize surround sound with a speaker layout like that in a movie theater. • Surr Back System setting: Normal (default) • If you have six speakers, either only connect one surround - Pioneer VSX23TXH | Owner's Manual - Page 18
speakers don't face each other. For DVD-Audio, the speakers should be more directly behind the listener than for home theater playback. • If the surround speakers cannot be set directly to the side of the listening position with a 7.1-channel system, the surround effect can be enhanced by turning - Pioneer VSX23TXH | Owner's Manual - Page 19
03 Connecting the speakers Each speaker connection on the receiver comprises a positive (+) and negative (-) terminal. Make banana plug into the end of the speaker terminal. Important • Please refer to the manual that came with your speakers for details on how to connect the other end of the - Pioneer VSX23TXH | Owner's Manual - Page 20
HDMI (OUTPUT 12 V TOTAL 50 mA MAX) 1 2 VSX-23TXH AC IN Surround left The surround back terminals can also be used for the Speaker B and ZONE 2. 7.1 ch surround setting Surround back left Surround back right 6.1 ch surround setting Surround back No connect Speaker B setting - Pioneer VSX23TXH | Owner's Manual - Page 21
speaker Front right HDMI ASSIGNABLE 13 OUTPUT 12 V TOTAL 50 mA MAX) 1 2 AC IN VSX-23TXH speaker manual for support biamping. • With these connections, the Surr Back System setting makes no difference. • To bi-wire a speaker, connect two speaker cords to the speaker terminal on the receiver - Pioneer VSX23TXH | Owner's Manual - Page 22
setting on output terminals on this receiver. The receiver selects the first available signal in the following order when you choose AUTO as the input signal: Types of cables and terminals HDMI Transferable audio signals HD audio Sound signal priority Digital (Coaxial) Conventional digital - Pioneer VSX23TXH | Owner's Manual - Page 23
HDMI IN This receiver TV monitor Terminal for connection with TV monitor Types of cables HDMI intended for home and other Digital Video Conversion (in Setting the Video options on page 68) OFF. • The signal input resolutions that can be converted from the component video input for the HDMI output - Pioneer VSX23TXH | Owner's Manual - Page 24
the player to the receiver's BD IN terminal. • VSX-23TXH only: When connecting to an HDMI/DVIcompatible monitor or a flat panel TV using the HDMI OUT 2 terminal, switch the HDMI output setting to HDMI OUT 2 or HDMI OUT ALL. See Switching the HDMI output on page 71. • The HDMI indicator lights on the - Pioneer VSX23TXH | Owner's Manual - Page 25
This diagram shows connections of a TV (with HDMI input) and DVD player (or other playback component with no HDMI output) to the receiver. HDMI IN HDMI/DVI-compatible monitor or flat panel TV DVD player, etc. Select one AUDIO OUT DIGITAL OUT R ANALOG L COAXIAL OPTICAL Select one COMPONENT - Pioneer VSX23TXH | Owner's Manual - Page 26
IN OUT SPEAKERS FRONT AR CENTER SURROUND L R L 12 V TRIGGER IR IN 1 IN 2 OUT (OUTPUT 12 V TOTAL 50 mA MAX) 1 2 VSX-23TXH • Connect using an HDMI cable to listen to HD audio on the receiver. Do not use an HDMI cable to input video signals. Depending on the video component, it may not be - Pioneer VSX23TXH | Owner's Manual - Page 27
SAT DVR VIDEOa/VIDEO 1b HDMI 1 HDMI 2 HDMI 3 HDMI 4a (front panel) Input Terminals Digital HDMI Component COAX-1 IN 1 (BD) OPT-1 OPT-2 IN 2 OPT-3 (HDMI-1) (HDMI-2) (HDMI-3) (HDMI-4) CD COAX-2 a. VSX-23TXH only b. VSX-21TXH only About HDMI1 The HDMI connection transfers uncompressed - Pioneer VSX23TXH | Owner's Manual - Page 28
receiver has two sets of audio/video inputs and outputs suitable for connecting analog or digital video devices, including HDD/DVD recorders and VCRs. When you set up the receiver you'll need to tell the receiver 12 V TRIGGER IR IN 1 IN 2 OUT (OUTPUT 12 V TOTAL 50 mA MAX) 1 2 VSX-23TXH 28 En - Pioneer VSX23TXH | Owner's Manual - Page 29
MAX) T1 2 VSX-23TXH • If your player has 7.1-channel analog outputs, the player's surround back output terminals are not used. Please refer to the operating instructions supplied with your component for more information. Connecting other audio components This receiver has both digital and analog - Pioneer VSX23TXH | Owner's Manual - Page 30
channel amplifier ANALOG INPUT Powered subwoofer VSX-23TXH • If your turntable has line-level outputs (i.e., it has a built-in HDMI, coaxial or optical digital connection when connected to a WMA9 Pro-compatible player. However, the connected DVD player, set-top box, etc. must be able to output - Pioneer VSX23TXH | Owner's Manual - Page 31
Connecting your equipment 03 Connecting AM/FM antennas Connect the AM loop antenna and the FM wire antenna as shown below. To improve reception and sound quality, connect external antennas (see Connecting external antennas below). Connecting external antennas To improve FM reception connect an - Pioneer VSX23TXH | Owner's Manual - Page 32
an XM Mini-Tuner and Home Dock (both sold separately), you will also need to activate the XM Radio service to begin receiving broadcasts. BLE 2 IN (Single) SATELLiTE RADiO SATELLiTE RADiO XM Mini-Tuner and Home Dock with antenna • For instructions on playing the XM Radio, see Listening to XM - Pioneer VSX23TXH | Owner's Manual - Page 33
MULTI-ZONE setup This receiver can power up to two (VSX-21TXH)/three (VSX-23TXH) independent systems in connect them) depends on how you want to set up your system. Sub zone (ZONE 3) (VSX-23TXH only) Sub zone (ZONE 2) VIDEO IN Main zone HDMI ASSIGNABLE 13 COMPONENT VIDEO ASSIGNABLE IN 1 (DVD - Pioneer VSX23TXH | Owner's Manual - Page 34
Main zone VIDEO IN AUDIO IN R L HDMI ASSIGNABLE 13 COMPONENT VIDEO ASSIGNABLE IN 1 ( VSX-23TXH only) • Connect a separate amplifier to the AUDIO ZONE 3 OUT jacks on this receiver VSX-23TXH MULTI-ZONE setup using speaker terminals (ZONE 2) You must select ZONE 2 in Surround back speaker setting - Pioneer VSX23TXH | Owner's Manual - Page 35
OUT VSX-23TXH VSX-23TXH IR receiver 2 Connect the IR IN jack of another component to the IR OUT jack on the rear of this receiver to link it to the IR receiver. Please see the manual supplied with your IR receiver for the type of cable necessary for the connection. • If you want to link a Pioneer - Pioneer VSX23TXH | Owner's Manual - Page 36
work with components that have a standby mode.1 HDMI receiver (the cable must be cross type, female-female). The software to output the results is available from the support area of the Pioneer website (http:// www.pioneerelectronics.com/PUSA/ Home+Entertainment+Custom+Install). Instructions - Pioneer VSX23TXH | Owner's Manual - Page 37
IN 1 IN 2 OUT (OUTPUT 12 V TOTAL 50 mA MAX) 1 2 VSX-23TXH Connecting an HDMI-equipped component to the front panel input (VSX-23TXH only) There is an HDMI input terminal on the front panel. High quality pictures can be viewed via the receiver simply by connecting an HDMI-equipped video camera - Pioneer VSX23TXH | Owner's Manual - Page 38
on page 46. VSX-23TXH: USB iPod iPhone VIDEO 2 INPUT VIDEO L AUDIO R MCACC SETUP MIC CONTROL ON / OFF MASTER VOLUME MCACC SETUP MIC iPod iPhone USB VIDEO CAMERA HDMI 4 VIDEO AUDIO OUTPUT TV game, video camera, etc. iPod cable (supplied) MENU iPod VSX-21TXH: USB iPod - Pioneer VSX23TXH | Owner's Manual - Page 39
receiver. • Push down on the PUSH OPEN tab to access the USB terminal. • For instructions on playing the USB device, see Playing a USB device on page 48. VSX-23TXH: CONTROL ON / OFF MASTER VOLUME MCACC SETUP MIC iPod iPhone USB VIDEO CAMERA HDMI 4 USB mass storage device VSX-21TXH: USB - Pioneer VSX23TXH | Owner's Manual - Page 40
SURR/ALC/ STREAM DIRECT SPEASKTEERRSEO MULTI-ZONE CONTROL ON / OFF PHONES PUSH OPEN VSX-23TXH 1 Switch the receiver into standby. 2 While holding down ENTER on the front panel, press STANDBY/ON. The display shows RESET NO . Use TUNE +/- (or / on the remote control) to select SPEAKER - Pioneer VSX23TXH | Owner's Manual - Page 41
input function is selected (in either the main or sub zone). • VSX-23TXH: When you set ZONE 2, ZONE 3 or ZONE 2&3 to ON (page 69), you can't use the HOME MENU. • VSX-21TXH: When you set ZONE 2 to ON (page 69), you can't use the HOME MENU. • If you leave the GUI screen for over five minutes, the - Pioneer VSX23TXH | Owner's Manual - Page 42
outputs more test tones to determine the optimum receiver settings for Channel Level, Speaker Distance, Standing Wave and Acoustic Cal EQ. Again, try to be as quiet as possible while this is happening. It may take 3 to 10 minutes. 7 The Auto MCACC Setup procedure is completed and the Home Menu - Pioneer VSX23TXH | Owner's Manual - Page 43
select MAIN, ZONE 2, ZONE 3 (VSX-23TXH only) or OFF for the corresponding trigger setting to switch it on automatically along with the (main or sub) zone specified. 4b.Input Setup A/V RECEIVER Input Input Name Input Skip : DVD : Rename : OFF Digital In : HDMI Input : Component In : 12V - Pioneer VSX23TXH | Owner's Manual - Page 44
Digital COAX-1 OPT-1 OPT-2 OPT-3 HDMI a (BD)b a a a Component IN 1 IN 2 (HDMI-1) (HDMI-2) (HDMI-3) (HDMI-4)b COAX-2 a a.With KURO LINK set to ON, assignments cannot be made (see KURO LINK on page 63). b.This assignment is fixed and cannot be changed. c. VSX-23TXH only d. VSX-21TXH - Pioneer VSX23TXH | Owner's Manual - Page 45
Basic playback 05 Chapter 5: Basic playback Playing a source Here are the basic instructions for playing a source (such as a DVD disc) with your home theater system. RECEIVER SOURCE DVD BD DVR HDMI AUTO/ALC/ MENU DIRECT STEREO STANDARD ADV SURR HDD DVD THX PHASE CTRL STATUS TV CD CD - Pioneer VSX23TXH | Owner's Manual - Page 46
set the playback source to the proper output setting. For example, you might need to set your DVD player to output some of the functions may be restricted for some models. The system is not compatible with the iPod receiver, and we recommend switching the equalizer off before connecting. • Pioneer - Pioneer VSX23TXH | Owner's Manual - Page 47
playback. 2 You cannot use this function, when an iPod of fifth generation or iPod nano of first generation is connected. 3 When this function is set, iPod images cannot be played on this receiver. However, when video clips recorded on the iPod are played, the playback picture is displayed. 47 En - Pioneer VSX23TXH | Owner's Manual - Page 48
may take some time to read all the contents. • This receiver does not support a USB hub. 4 Note that characters that cannot be displayed on this receiver are displayed as #. 5 • If the file selected cannot be played back, this receiver automatically skips to the next file playable. • When the file - Pioneer VSX23TXH | Owner's Manual - Page 49
'Slideshow Setup' from the USB Top menu. USB Top A/V RECEIVER Music Photos Slideshow Setup Top Menu Slideshow Setup A/V RECEIVER Theme Interval BGM Music Select Folder1 : Normal(OFF) : 5 sec : ON : Select 3/3 Return 2 Select the setting you want. • Theme - Add various effects to the - Pioneer VSX23TXH | Owner's Manual - Page 50
About playable file formats The USB function of this receiver supports the following file formats. Note that some file including files recorded in Exif/DCF format) • Y:Cb:Cr - 4:4:4a, 4:2:2 or 4:2:0 30 to 8192 pixels vertical, 40 to 8192 pixels horizontal a.The maximum playable resolution for 4:4:4 - Pioneer VSX23TXH | Owner's Manual - Page 51
XM SIRIUS INPUT SELECT 12 HDMI OUT 3 SIGNAL SEL MCACC T.EDIT GUIDE PRESET ENTER PRESET CATEGORY HOME MENU manually tuning in each time. This receiver can memorize up to 63 stations, stored in seven banks, or classes (A to G) of 9 stations each. When saving an FM frequency, the MPX setting - Pioneer VSX23TXH | Owner's Manual - Page 52
to select a character, / to set the position, and ENTER to confirm service. Easy to follow installation and setup instructions are provided with the satellite tuners. Whichever service XM Tuner or Check Antenna, try disconnecting the receiver and tuner connections, and then plugging them back - Pioneer VSX23TXH | Owner's Manual - Page 53
Guide A/V RECEIVER 0 RADIO ID 1 Preview 2 Highway 1 3 America 4 Hank's Place 5 Fifties (50's) 6 Sixties (60's) 7 Seventies (70's) Exit • Sub Zone: Channel Guide D.ACCESS, then the three-digit channel number. • You can reset the channel presets and memory in Resetting the system on page 72. 53 En - Pioneer VSX23TXH | Owner's Manual - Page 54
guide. manual for the SiriusConnect™ Home receiver to the SiriusConnect™ tuner. After connecting, you will be able to use this receiver reset the Channel Skip/Add settings in Resetting digit SID number. When you have located the SID, write it down in the space provided near the end of this manual - Pioneer VSX23TXH | Owner's Manual - Page 55
Zone: Channel Guide A/V RECEIVER 184 Weather recall the channel preset. Channel Guide [ 184 Weather ] [ enter the SIRIUS Channel Guide, then navigate through the three-digit channel This receiver can and the receiver stores the to the channel guide. • Parental Guide • Password Set - Set the parental - Pioneer VSX23TXH | Owner's Manual - Page 56
RECEIVER , then press STANDARD (STANDARD SURROUND).4 If necessary, press repeatedly to select a listening mode. • If the source is Dolby Digital - When MULTI CH IN input is selected. - When the HDMI audio output parameter is set to THROUGH in Setting the Audio options on page 66. 3 In modes that give - Pioneer VSX23TXH | Owner's Manual - Page 57
home theater sound. Home THX is designed to make home theater audio sound more like what you hear in a cinema. Different THX options will be available depending on the source and the setting sources recorded in Dolby Digital and DTS, but the HDMI audio output parameter is set to THROUGH in Setting the - Pioneer VSX23TXH | Owner's Manual - Page 58
MEMORY AUDIO INFO CH DISP TV CTRL RECEIVER REMOTE SETUP Note 1 • Depending on Digital sources). 3 • The STEREO, F.S.SURR FOCUS and F.S.S WIDE mode cannot be selected in the following cases: - When MULTI CH IN input is selected. - When the HDMI audio output parameter is set to THROUGH in Setting - Pioneer VSX23TXH | Owner's Manual - Page 59
digital processing. No sound is output from the Speaker B in this mode. Using surround back channel processing • Default setting: SBch ON You can have the receiver to which the Up Mix function is added are output from the surround back speakers. HDMI OUT 123 SIGNAL SEL MCACC 45 SLEEP 6 SBch - Pioneer VSX23TXH | Owner's Manual - Page 60
it was originally encoded, you can have the receiver only apply this effect to 6.1 encoded sources like Dolby Digital EX or DTS-ES.1 • Press SBch repeatedly PQMLCSACC HDMI ENTER PRESET PRESET TUNER EDIT AUTO SURR/ALC/ STREAM DIRECT SPEASKTEERRSEO MULTI-ZONE CONTROL ON / OFF Setting the - Pioneer VSX23TXH | Owner's Manual - Page 61
the signal input to DIGITAL. • Some DVD players don't output DTS signals. For more details, refer to the instruction manual supplied with your DVD player. 4 When the HDMI audio output parameter is set to THROUGH, the sound will be heard through your TV, not from this receiver. 5 • This is useful if - Pioneer VSX23TXH | Owner's Manual - Page 62
MEMORY AUDIO INFO CH DISP TV CTRL RECEIVER REMOTE SETUP • Press RECEIVER , then press PHASE CTRL (PHASE set to ON in the following cases: - When the PURE DIRECT mode is switched on. - When the MULTI CH IN input is selected. - When the HDMI audio output parameter is set to THROUGH in Setting - Pioneer VSX23TXH | Owner's Manual - Page 63
to the receiver using an HDMI cable. For details about concrete operations, settings, etc., refer to the operating instructions for each component. • You cannot use this function with components that do not support KURO LINK. • We do not guarantee this receiver will work with Pioneer KURO LINK - Pioneer VSX23TXH | Owner's Manual - Page 64
is connected to a TV of a brand other than Pioneer that supports the KURO LINK function. (Depending on the TV, however, some of the KURO LINK functions may not work.) • You can set whether to output the sound over the speakers connected to the receiver or over the TV's speakers using the TV's menu - Pioneer VSX23TXH | Owner's Manual - Page 65
from the receiver to a PQLS compatible player, etc. This enables removing jitter that has a negative effect on the quality of the sound and is generated upon transmission. • VSX-23TXH only: On players compatible with PQLS Multi Surround, PQLS works for all sources. Set the player's audio output to - Pioneer VSX23TXH | Owner's Manual - Page 66
settings and status of the receiver. 1 Press RECEIVER , then press AUDIO PARAMETER. 2 Use / to select the setting you want to adjust. Depending on the current status/mode of the receiver 30 Setting Digital Digital, DTS, Dolby Digital Digital and DTS audio sources include ultra-low bass tones. Set - Pioneer VSX23TXH | Owner's Manual - Page 67
maximizing the dynamic range (during digital processing). 0dB +6 dB HDMIg (HDMI Audio) Specifies the routing of the HDMI audio signal out of this receiver (amp) or through to a TV or flat panel TV. When THROUGH is selected, no sound is output from this receiver. AMPLIFIER THROUGH A.DELAY This - Pioneer VSX23TXH | Owner's Manual - Page 68
not affect inputs other than DVD, TV/SAT, DVR, VIDEO (VSX-21TXH), VIDEO1 and 2 (VSX23TXH). 1 Press RECEIVER , then press VIDEO PARAMETER. 2 Use / to select the setting you want to adjust. Depending on the current status/mode of the receiver, certain options may not be able to be selected. Check - Pioneer VSX23TXH | Owner's Manual - Page 69
setting only.1 VSX-23TXH PQLS HDMI ENTER PRESET PRESET TUNER EDIT STANDARD SURROUND HOME VSX-23TXH only: If you selected ZONE 2&3 ON above, you can toggle between ZONE 2 and ZONE 3. • When the receiver 1 • The subwoofer output depends on the settings you made in Manual speaker setup on page - Pioneer VSX23TXH | Owner's Manual - Page 70
. You can also press MULTI-ZONE ON/OFF on the front panel to switch off all output to the sub zone(s).2 MULTI-ZONE remote controls Set the MULTI-ZONE operation switch to ZONE 2 or ZONE 3 (VSX-23TXH only) to operate the corresponding zone. The following table shows the possible MULTI-ZONE remote - Pioneer VSX23TXH | Owner's Manual - Page 71
• Press RECEIVER , then press DIMMER repeatedly to change the brightness of the front panel display. Switching the HDMI output (VSX-23TXH only) Set which terminal to use when outputting video and audio signals from the HDMI output terminals (HDMI OUT ALL, HDMI OUT 1 or HDMI OUT 2). The HDMI OUT1 - Pioneer VSX23TXH | Owner's Manual - Page 72
See Input function default and possible settings on page 44. MULTI-ZONE ZONE 2/ZONE 3 (VSX-23TXH only) Volume Variable Level ZONE 2/ZONE 3 (VSX-23TXH only) Volume -60 dB HDMI HDMI Audio Amp HDMI output (VSX-23TXH only) HDMI OUT ALL KURO LINK ON Setting Default DSP Surround back channel - Pioneer VSX23TXH | Owner's Manual - Page 73
model as this receiver) in addition to this receiver. The receiver to be operated is switched by inputting the preset code to set the remote control setting. • Set the remote modes on the receivers before using this function (see Remote Control Mode Setup on page 96). INPUT SELECT 12 HDMI digit preset - Pioneer VSX23TXH | Owner's Manual - Page 74
. 4 Use the number buttons to enter 9, 8, 1. The LED flashes four times to indicate that the resetting is completed. Default preset codes Input function button DVD BD DVR HDMI TV CD CD-R VIDEO TV CTRL RECEIVER Preset code 31571 32442 22306 32442 14001 70468 71087 20058 14001 61935 Controls the - Pioneer VSX23TXH | Owner's Manual - Page 75
Controls for BD. TOOLS GUIDE ENTER HOME MENU ENTER HOME MENU RETURN RETURN - HDD - DVD - VCR MENU MENU AUDIO AUDIO DISPLAY DISPLAY OUTPUT CH+/- RESOLUTION+/-a - - - - - AUDIO CH+/- - GUIDE ENTER HOME / MENU RETURN Red Green - Pioneer VSX23TXH | Owner's Manual - Page 76
09 Controlling the rest of your system Button(s) SOURCE Number buttons • (dot) ENTER (CLASS) LD CD/CD-R/SACD MD/DAT TAPE POWER ON/OFF POWER ON/OFF POWER ON/OFF POWER ON/OFF numerics +10 ENTER numerics >10/CLEAR DISK/ENTER numerics CLEARc OPEN/CLOSEc CLEAR ENTER TOP MENU - - MS - - Pioneer VSX23TXH | Owner's Manual - Page 77
power when using the HOME MENU. 2 • You can't use the HOME MENU when the iPod/USB, XM or SIRIUS Radio input function is selected (in either the main or sub zone). • VSX-23TXH: When you set ZONE 2, ZONE 3 or ZONE 2&3 to ON (page 69), you can't use the HOME MENU. • VSX-21TXH: When you set ZONE 2 to ON - Pioneer VSX23TXH | Owner's Manual - Page 78
. CAUTION • The test tones used in the Auto MCACC Setup are output at high volume. THX® THX is a trademark of THX Ltd., receiver settings from the Advanced MCACC menu on page 77. 1.Advanced MCACC A/V RECEIVER a. Full Auto MCACC b. Auto MCACC c. Manual MCACC d. Demo 1b.Auto MCACC A/V RECEIVER - Pioneer VSX23TXH | Owner's Manual - Page 79
SETUP MIC jack. Make sure there are no obstacles between the speakers and the microphone. VSX-23TXH: CONTROL ON / OFF MASTER VOLUME MCACC SETUP MIC iPod iPhone USB VIDEO CAMERA HDMI 4 VSX-21TXH: USB iPod iPhone VIDEO 2 INPUT VIDEO L AUDIO R CONTROL ON / OFF MCACC SETUP MIC USB iPod - Pioneer VSX23TXH | Owner's Manual - Page 80
screen. When you're finished, select RETURN to go back to the HOME MENU. Be sure to disconnect the microphone from this receiver upon completion of the Auto MCACC Setup. Manual MCACC setup You can use the settings in the Manual MCACC setup menu to make detailed adjustments when you're more familiar - Pioneer VSX23TXH | Owner's Manual - Page 81
receiver. If the microphone is connected while the HOME MENU is not being displayed, the display will change to the Full Auto MCACC under Advanced MCACC. • See Problems middle position. 1 Select 'Manual MCACC' from the Advanced MCACC menu. See Making receiver settings from the Advanced MCACC menu - Pioneer VSX23TXH | Owner's Manual - Page 82
each speaker in 1/2 inch increments. The following setting can help you make detailed adjustments that you may not achieve using the Manual speaker setup on page 90. 1 Select 'Fine SP Distance' from the Manual MCACC setup menu. 1c.Manual MCACC A/V RECEIVER 1. Fine Channel Level 2. Fine SP Distance - Pioneer VSX23TXH | Owner's Manual - Page 83
settings manually to get a frequency balance that suits your tastes. 1 Select 'EQ Adjust' from the Manual MCACC setup menu. 1c.Manual MCACC A/V RECEIVER help of a graphical output that can be displayed on-screen, or using a computer (with software available from Pioneer - see Output PC on page 88). - Pioneer VSX23TXH | Owner's Manual - Page 84
receiver.1 Setting Acoustic Calibration EQ Professional according to your room characteristics Using the manual setup, you can set audio is output from your 30-50ms setting. Later time settings may provide a more detailed sound experience with your speaker system. It is best to try and see what works - Pioneer VSX23TXH | Owner's Manual - Page 85
settings. 3 If you selected 'Reverb Measurement', select EQ ON or OFF, and then START. 1c5a.Reverb Measurement A/V RECEIVER Professional Calibration EQ graphical output on page 102 for troubleshooting information. 4 If you exit the HOME MENU and press MCACC to select it before pressing HOME MENU. • - Pioneer VSX23TXH | Owner's Manual - Page 86
MCACC Data Check' from the HOME MENU. HOME MENU A/V RECEIVER 1. Advanced MCACC 2. MCACC Data Check 3. Data Management 4. System Setup 2.MCACC Data Check A/V RECEIVER a. Speaker Setting b. Channel Level c. Speaker Distance d. Standing Wave e. Acoustic Cal EQ f. Output PC Exit Return Exit Return - Pioneer VSX23TXH | Owner's Manual - Page 87
Use this to display the speaker size and number of speakers. See Speaker Setting on page 91 for more on this. 1 Select 'Speaker Setting' from the MCACC Data Check menu. 2a.Speaker Setting A/V RECEIVER Front : LARGE Center : LARGE Surr : LARGE SB : LARGE x 2 SW : YES Exit Return 2 Select - Pioneer VSX23TXH | Owner's Manual - Page 88
MENU. HOME MENU A/V RECEIVER 1. Advanced MCACC 2. MCACC Data Check 3. Data Management 4. System Setup 3.Data Management A/V RECEIVER a. Memory Rename b. MCACC Memory Copy c. MCACC Memory Clear Exit Return Exit Return 3 Select the setting you want to adjust. • Memory Rename - Name your MCACC - Pioneer VSX23TXH | Owner's Manual - Page 89
setup menu. 3.Data Management A/V RECEIVER a. Memory Rename b. MCACC Memory Copy c. MCACC Memory Clear Copy 3b.MCACC Memory Copy A/V RECEIVER : All Data From : M1.MEMORY 1 To : M1.MEMORY 1 OK 4 Select 'OK' to confirm and copy the settings. When MCACC Memory Copy? is displayed, select YES - Pioneer VSX23TXH | Owner's Manual - Page 90
settings manually and make various other settings (input selection, OSD language selection, etc.). RECEIVER SOURCE DVD BD DVR HDMI TV CD CD-R VIDEO iPod USB TUNER XM SIRIUS AUDIO PARAMETER LIST VIDEO PARAMETER TUNE TOOLS TOP MENU BAND T.EDIT GUIDE PRESET ENTER PRESET CATEGORY HOME - Pioneer VSX23TXH | Owner's Manual - Page 91
addition to a normal home theater setup where they are used for the surround back speakers, they can be used for bi-amping the front speakers or as an independent speaker system in another room. 1 Select 'Surr Back System' from the Manual SP Setup menu. See Making receiver settings from the System - Pioneer VSX23TXH | Owner's Manual - Page 92
setting up a home theater system. 1 Select 'Channel Level' from the Manual SP Setup menu. 4a.Manual SP Setup A/V RECEIVER 1. Surr Back System 2. Speaker Setting dB SPL (C-weighting/slow reading). • The subwoofer test tone is output at low volumes. You may need to adjust the level after testing - Pioneer VSX23TXH | Owner's Manual - Page 93
acts as a kind of re-equalization for home theater listening, and restores proper tonal balance of movie soundtracks.1 1 Select 'X-Curve' from the Manual SP Setup menu. 4a.Manual SP Setup A/V RECEIVER 1. Surr Back System 2. Speaker Setting 3. Channel Level 4. Speaker Distance 5. X-Curve 6. THX Audio - Pioneer VSX23TXH | Owner's Manual - Page 94
Exit Finish Exit Return Exit Return 4 Select the setting you want to adjust. If you are doing this for the first time, you may want to adjust these settings in order: • KURO LINK Setup - Synchronizes this receiver with your Pioneer component supporting KURO LINK (see KURO LINK Setup on page - Pioneer VSX23TXH | Owner's Manual - Page 95
setting of ZONE 21 and ZONE 3 (VSX-23TXH only). • Variable - Use this setting if you've connected a power amplifier in the sub room (this receiver is Pioneer VSX receiver) in the sub room and want to use that receiver's volume controls. With the Fixed setting, the source is sent from this receiver - Pioneer VSX23TXH | Owner's Manual - Page 96
1 OK Exit Return Exit Cancel 2 Select the Remote Control Mode setting you want. 3 Select "OK" to change the remote control mode. 4 Follow the instructions on the screen to change the remote control's setting. See Operating multiple receivers on page 73. 5 When you're finished, press RETURN. You - Pioneer VSX23TXH | Owner's Manual - Page 97
Setting Guide homes, however, it is not possible to achieve this environment. For the distance, on this receiver . Testing by the Pioneer Multi-channel Research Group the speakers towards an area 30 cm (12 inches) to not cancel out the bass sound output from the other speakers. Also problem. 97 En - Pioneer VSX23TXH | Owner's Manual - Page 98
blinks. • The receiver may have a serious problem. Disconnect from the power and call a Pioneer authorized independent service company. During loud playback the power suddenly switches off. • Turn down the volume. • Lower the 63 Hz and 125 Hz equalizer levels in the Manual MCACC setup on page - Pioneer VSX23TXH | Owner's Manual - Page 99
The ADVANCED MCACC indicator flashes and power turns off. • There is a problem with the receiver's power unit. The receiver may have a serious problem. Unplug the receiver from the wall and call a Pioneer authorized independent service company. AMP OVERHEAT and the • Allow the unit to cool down - Pioneer VSX23TXH | Owner's Manual - Page 100
signal output is set software is played back. to On. • If the source component has a digital volume control, make sure this is not turned down. No sound when using the HOME MENU. • If the HDMI input function is selected, sound is muted until exiting the HOME MENU. Other audio problems Symptom - Pioneer VSX23TXH | Owner's Manual - Page 101
receiver's Resolution setting (in Setting the Video options on page 68) and/or the resolution settings on your component or display doesn't work, try switching Digital Video Conversion (in Setting monitor is connected to the HDMI terminal, the video signals may not be output to the monitor connected - Pioneer VSX23TXH | Owner's Manual - Page 102
etc.) this may occur in some cases. Change the speaker setting manually in Speaker Setting on page 91, and use the ALL (Keep SP digital output) settings of the source component. • Check that the player is connected using a digital connection. • Make sure that the receiver is set to AUTO or DIGITAL - Pioneer VSX23TXH | Owner's Manual - Page 103
digital or analog audio connection. • To output signals in Deep Color, use an HDMI cable (High Speed HDMI™ Cable) to connect this receiver to a component or TV with the Deep Color feature. • Try changing the Resolution setting (in Setting the Video options on page 68). • VSX-23TXH only: Set the HDMI - Pioneer VSX23TXH | Owner's Manual - Page 104
Select ON for the KURO LINK setting (see KURO LINK Setup on page 64). • Turn the TV's power on before turning on this receiver's power. • Set the TV side KURO LINK setting to ON. • VSX-23TXH only: Connect the TV to the HDMI OUT 1 terminal and set the HDMI output to HDMI OUT 1. Then turn on first the - Pioneer VSX23TXH | Owner's Manual - Page 105
are more than 30 000 folders/files stored in Limit the receiver (page 39). A USB hub is currently being used. This receiver does not support a USB hub (page 48). This receiver recognizes the USB memory device Switch off and on again this receiver instructions supplied with the XM Mini-Tuner and Home - Pioneer VSX23TXH | Owner's Manual - Page 106
The SiriusConnect™ tuner's firmware is being updated. Wait for updating to finish. If the problem is not solved after the troubleshooting above, if the screen freezes unexpectedly or if the buttons on the remote control or front panel stop working completely, do the following: • Press STANDBY - Pioneer VSX23TXH | Owner's Manual - Page 107
by bass management in the receiver. Dolby Surround is an encoding output, interactive mixing and streaming capability in advanced systems. Supported by HighDefinition Media Interface (HDMI), a single-cable digital home theater experience with stunning sound and high-definition picture. It supports - Pioneer VSX23TXH | Owner's Manual - Page 108
generated by bass management in the receiver). Two modes (Cinema and is an extension of the original DTS Digital Surround which offers high quality 96 kHz is a low-bitrate encoding technology supporting up to 5.1 channels with fixed Apple performance standards. "Works with iPhone" means that - Pioneer VSX23TXH | Owner's Manual - Page 109
the optimal surround sound experience. When you set up your home theater system using all eight speaker outputs (Left, Center, Right, Surround Right, Surround and the THX Ltd. In a movie theater, film soundtracks that have been encoded with Dolby Digital Surround EX technology are able to reproduce - Pioneer VSX23TXH | Owner's Manual - Page 110
home. This product may also engage the "THX Surround EX" mode during the playback of 5.1 channel material that is not Dolby Digital 6.1 and 7.1-channel support for gaming, movies and digital music. By unmasking the Neural Audio Corporation and THX Ltd. PIONEER Corporation hereby grants the user a - Pioneer VSX23TXH | Owner's Manual - Page 111
a one-time activation fee may apply. XM tuners and home docks or SIRIUS tuners (each sold separately) are required to receive the SIRIUS or XM satellite radio service. All programming and fees subject to change. It is prohibited to copy, decompile, disassemble, reverse engineer, hack, manipulate or - Pioneer VSX23TXH | Owner's Manual - Page 112
EX 2 Pro Logic llx MOVIEa Straight decoding As above As above a.Unavailable with only one surround back speaker connected. PURE DIRECT / DIRECT Dolby Digital EX 2 Pro Logic llx MOVIEa DTS-ES (Matrix/Discrete) Straight decoding As above As above As above Straight decoding As above As above 112 - Pioneer VSX23TXH | Owner's Manual - Page 113
problem controlling a component if you find the manufacturer in this list, but please note that there are cases where codes for the manufacturer in the list will not work for the model Amtron 10000, 10180 Anam 10180 AOC 10180, 11365 Apex Digital 10156, 10765, 10890, 11217 AR 10556 Audinac 10180 - Pioneer VSX23TXH | Owner's Manual - Page 114
10000 SVA 10865 Sylvania 11271, 11394 Tatung 11101, 11756 Toshiba 10650, 11704 Viewsonic 11755 Vizio 11758, 11756 Zenith 10178 LCD Pioneer 11260 Akai 11675 AOC 11365 Apex Digital 10890, 11217 Audiovox 10180, 10802, 10875 Byd:sign 11309 Dell 11264, 11080, 11178 Dynex 12049 Element 11687 Emerson 11394 - Pioneer VSX23TXH | Owner's Manual - Page 115
20058 White Westinghouse 20000, 20278 XR-1000 20035, 20000 Yamaha 20038 Zenith 20037, 20039, 20033, 20000, 20278, 21479 ZT Group 21972 PVR Pioneer 22306, 22465, 22466, 22467 ABS 21972 Alienware 21972 CyberPower 21972 Dell 21972 DirecTV 20739 Gateway 21972 Go Video 20614 Hewlett Packard 21972 Howard - Pioneer VSX23TXH | Owner's Manual - Page 116
3D LAB 30503, 30539 A-Trend 30714 Accurian 30675, 31416 Acoustic Solutions 30730 Adcom 31094 AEG 30788 Aiwa 30533, 30641 Akai 30695, 30770, 30899 Alba 30672 Alco 30790 Allegro 30869 Amphion Media Works 30872 Amstrad 30713 AMW 30872 Apex Digital Zeus 30784 Blu-ray Pioneer 30142, 32442 Denon 32258 - Pioneer VSX23TXH | Owner's Manual - Page 117
Toshiba 31503, 31510, 31588 DVD/VCR Combination Pioneer 31460 Accurian 30675 Allegro 30869 Apex Digital 31061 Broksonic 30695 CineVision 30869, 31483 Daewoo 70100, 71364 Yamaha 71292 MD Pioneer 71063 Onkyo 70868 Optimus 71063 Satellite Set Top Box General Pioneer 00329, 01308 Akai 00200 Allsat - Pioneer VSX23TXH | Owner's Manual - Page 118
Samsung 01442 Sony 00639, 01640 Tivo 01142, 01442 Zenith 01810 Cable Set Top Box General Pioneer 01877, 00877, 00144, 00533, 01021, 01782 A-Mark 00008, Sony 40243 Wards 40027 Yamaha 40097 Digital Tape Pioneer 40019 Onkyo 40019 Video Accessory Pioneer 01010 2Wire 02045 ABS 01272 Accurian 01653 - Pioneer VSX23TXH | Owner's Manual - Page 119
Video convert off) Digital In/Out Section HDMI terminal 19-pin (Not DVI) HDMI output type 5 V, (H) x 17 1/16 in. (D)) Weight (without package VSX-23TXH: 13.5 kg (29.8 lb) VSX-21TXH: 13.3 kg (29.3 lb) Furnished Parts Number MCACC philosophy Pioneer is dedicated to making your home theater listening - Pioneer VSX23TXH | Owner's Manual - Page 120
83 Advanced MCACC 77-89 Output PC 36, 88 Advanced surround HDMI Audio 67 Hue 68 I Input function 45 Default and possible settings 44 Input Setup 43-44 Input signal 61 iPod 38, 46-47, 108 Switching controls 47 IR jack 35 K KURO LINK 27, 63-65 L LFE Attenuate 66 Loudness 66 M Manual MCACC 80 Manual - Pioneer VSX23TXH | Owner's Manual - Page 121
T THX 18, 78, 93, 109 Home THX 57 Tone Control 66 Treble 66 Troubleshooting 98 Tuner 31, 51-52 U Up Mix 60 USB 39, 48-50, 105 Playable file formats 50 V Video cable 23 Video converter 23 VIDEO PARAMETER 68 Volume Limit 95 W WMA9 108 WMA9 Pro 30 X x.v.Color 27 X-Curve 93 Y YNR - Pioneer VSX23TXH | Owner's Manual - Page 122
and clearly, and without distortion. Once you have established a comfortable sound level: • Set the dial and leave it there. Taking a minute to do this now will sound levels is included for your protection. Decibel Level Example 30 Quiet library, soft whispers 40 Living room, refrigerator, bedroom - Pioneer VSX23TXH | Owner's Manual - Page 123
the U.S.A. and you wish to locate the nearest Pioneer Authorized Independent Service Company, or if you wish to purchase replacement parts, operating instructions, service manuals, or accessories, please call the number shown below. Si ce produit doit être réparé au Canada, veuillez vous adresser
-
 1
1 -
 2
2 -
 3
3 -
 4
4 -
 5
5 -
 6
6 -
 7
7 -
8
-
9
-
10
-
11
-
12
-
13
-
14
-
15
-
16
-
17
-
18
-
19
-
20
-
21
-
22
-
23
-
24
-
25
-
26
-
27
-
28
-
29
-
30
-
31
-
32
-
33
-
34
-
35
-
36
-
37
-
38
-
39
-
40
-
41
-
42
-
43
-
44
-
45
-
46
-
47
-
48
-
49
-
50
-
51
-
52
-
53
-
54
-
55
-
56
-
57
-
58
-
59
-
60
-
61
-
62
-
63
-
64
-
65
-
66
-
67
-
68
-
69
-
70
-
71
-
72
-
73
-
74
-
75
-
76
-
77
-
78
-
79
-
80
-
81
-
82
-
83
-
84
-
85
-
86
-
87
-
88
-
89
-
90
-
91
-
92
-
93
-
94
-
95
-
96
-
97
-
98
-
99
-
100
-
101
-
102
-
103
-
104
-
105
-
106
-
107
-
108
-
109
-
110
-
111
-
112
-
113
-
114
-
115
-
116
-
117
-
118
-
119
-
120
-
121
-
122
-
123
 |
 |

Operating Instructions
audio/video multi-channel receiver