Pioneer djm909 Owner's Manual - Page 5
Connections, Checking Accessories - dj mixer
 |
UPC - 012562666723
View all Pioneer djm909 manuals
Add to My Manuals
Save this manual to your list of manuals |
Page 5 highlights
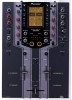
CHECKING ACCESSORIES ÷ Hexagonal Allen driver (for cross fader operating load adjust screw) ÷ These operating instructions ÷ Warranty CONNECTIONS When connecting or changing the connection of units, make sure to first turn off the power switch and disconnect the power cord from the outlet. This mixer is not furnished with any connection cables; when performing connections, use the cables that came provided with your player and other components, or purchase commercially available audio cables. 1. Connecting Input Components Analog turntable 2 [DJ CD Player] CDJ-800, CDJ-1000, CDJ-1000MK2, CDJ-100S, CDJ-700S, CDJ-500II, CMX-3000, CMX-5000, DMP-555 Player B Player A Analog turntable 1 Cassette deck, etc. Cassette deck, etc. 2 1 1 2 Microphone RL RL RL CONTRAST BRIGHT CH-2 R L SEND RETURN R LR L CH-1 MIC R L CD L MASTER 2 R L PHONO / LINE R PHONO CD (MONO) MASTER 1 (MONO) PHONO / LINE R L 3 COLD PHONO 1 GND BOOTH/ SESSION OUT SIGNAL LINE GND CH-2 PLAYER CONTROL R 2 HOT SIGNAL LINE GND L CH-1 PLAYER CONTROL SESSION IN 3 L R 4 CH-2 PHONO/LINE selector switch CH-1 PHONO/LINE selector switch Other mixer output DJ CD Players 1 Connect the AUDIO OUT connectors from Player A to the CH-1 CD input jacks of the DJ mixer, and connect the AUDIO OUT connectors from Player B to the CH-2 CD input jacks. When using one of the listed DJ CD players, the control cord furnished with the CD player should be connected between the player and the DJ mixer. In this way, the DJ mixer's fader lever can be operated to control operation of the DJ CD player for fader start play and back cue. Analog turntable / Cassette deck, etc. 2 Connect the analog turntable 1 output cables to the CH-1 PHONO/LINE jacks of the DJ mixer, and connect the ground wire to the SIGNAL GND terminal. Set the CH-1 PHONO/ LINE selector switch to [PHONO]. When connecting a cassette deck or other such component to these jacks, set the CH-1 PHONO/LINE selector switch to [LINE]. Connect the analog turntable 2 output cables to the CH-2 PHONO/LINE jacks of the DJ mixer, and connect the ground wire to the SIGNAL GND terminal. Set the CH-2 PHONO/ LINE selector switch to [PHONO]. When connecting a cassette deck or other such component to these jacks, set the CH-2 PHONO/LINE selector switch to [LINE]. * The PHONO input for this DJ mixer supports use of a MM cartridge. MIC 3 The MIC jack on this unit supports use of either PHONE type or XLR type plugs. SESSION IN 4 When using multiple mixers simultaneously, use the appropriate audio cables to connect the other mixer outputs to these jacks. 5
-
 1
1 -
 2
2 -
 3
3 -
 4
4 -
 5
5 -
 6
6 -
 7
7 -
 8
8 -
 9
9 -
 10
10 -
 11
11 -
12
-
13
-
14
-
15
-
16
-
17
-
18
-
19
-
20
-
21
-
22
-
23
-
24
-
25
-
26
-
27
-
28
 |
 |
