Polaroid FLM-2632 Service Manual - Page 22
Note: Before returning this product to the end user, you must follow the steps - power
 |
UPC - 826219004925
View all Polaroid FLM-2632 manuals
Add to My Manuals
Save this manual to your list of manuals |
Page 22 highlights
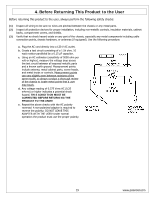
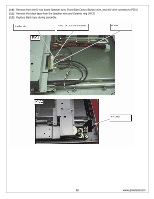
(7) Lift up the control box from the A/V connector side (PIC1). There are cables underneath that are connected so be careful. Release control box from back hinges and tilt to the left (PIC3). (8) Tear off the Aluminum foil covering the LVDS connector. Disconnect LVDS cable connector from LCD panel (PIC2). (9) Disconnect the LCD Panel power cord from bottom side of control box (PIC3). Note: Before returning this product to the end user, you must follow the steps outlined in the section, Before Returning This Product to the User, on page 19. This procedure ensures that the chassis will not cause electric shock. 22 www.polaroid.com
-
 1
1 -
2
-
3
-
4
-
5
-
6
-
7
-
8
-
9
-
10
-
11
-
12
-
13
-
14
-
15
-
16
-
 17
17 -
 18
18 -
 19
19 -
 20
20 -
 21
21 -
 22
22 -
 23
23 -
 24
24 -
 25
25 -
 26
26 -
 27
27 -
28
-
29
-
30
-
31
-
32
-
33
-
34
-
35
-
36
-
37
-
38
-
39
-
40
-
41
-
42
-
43
-
44
-
45
-
46
-
47
-
48
-
49
-
50
-
51
-
52
 |
 |
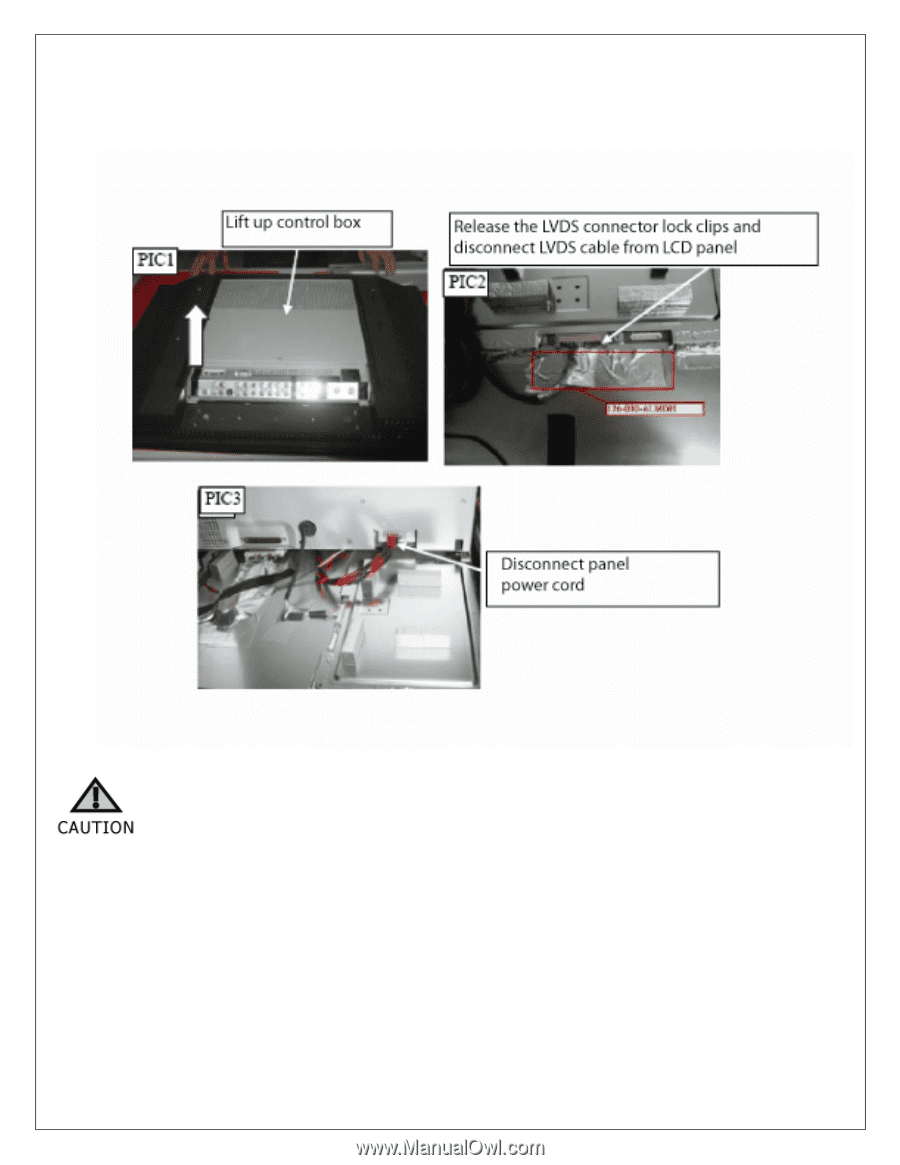
(7)
Lift up the control box from the A/V connector side (PIC1). There are cables underneath that are connected so be
careful. Release control box from back hinges and tilt to the left (PIC3).
(8)
Tear off the Aluminum foil covering the LVDS connector. Disconnect LVDS cable connector from LCD panel (PIC2).
(9)
Disconnect the LCD Panel power cord from bottom side of control box
(PIC3).
Note: Before returning this product to the end user, you must follow the steps
outlined in the section, Before Returning This Product to the User, on page 19. This
procedure ensures that the chassis will not cause electric shock.
www.polaroid.com
22