ProForm 900 Treadmill Uk Manual
ProForm 900 Treadmill Manual
 |
View all ProForm 900 Treadmill manuals
Add to My Manuals
Save this manual to your list of manuals |
ProForm 900 Treadmill manual content summary:
- ProForm 900 Treadmill | Uk Manual - Page 1
, Ltd. Unit 4 Revie Road Industrial Estate Revie Road, Beeston Leeds, LS11 8JG UK email: [email protected] USER'S MANUAL CAUTION Read all precautions and instructions in this manual before using this equipment. Save this manual for future reference. Visit our website at www.iconeurope.com - ProForm 900 Treadmill | Uk Manual - Page 2
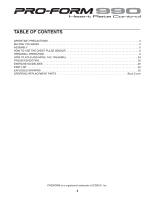
PRECAUTIONS 3 BEFORE YOU BEGIN 5 ASSEMBLY 6 HOW TO USE THE CHEST PULSE SENSOR 8 TREADMILL OPERATION 9 HOW TO FOLD AND MOVE THE TREADMILL 24 TROUBLESHOOTING 26 EXERCISE GUIDELINES 29 PART LIST 30 EXPLODED DRAWING 32 ORDERING REPLACEMENT PARTS Back Cover PROFORM is a registered trademark of - ProForm 900 Treadmill | Uk Manual - Page 3
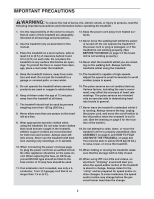
. Always remove the key, unplug the power cord, and move the on/off switch to the off position when the treadmill is not in use. (See the drawing on page 5 for the location of the switch.) 18. Do not attempt to raise, lower, or move the treadmill until it is properly assembled. (See ASSEMBLY on page - ProForm 900 Treadmill | Uk Manual - Page 4
Always unplug the power cord immediately after use, before cleaning the treadmill, and before performing the main- tenance and adjustment procedures de- scribed in this manual. Never remove the motor hood unless instructed to do so by an authorised service representative. Servicing other than - ProForm 900 Treadmill | Uk Manual - Page 5
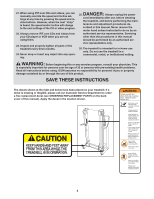
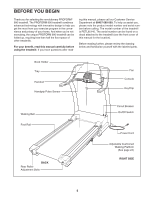
, the unique PROFORM 990 treadmill can be folded up, requiring less than half the floor space of other treadmills. For your benefit, read this manual carefully before using the treadmill. If you have questions after read- ing this manual, please call our Customer Service Department at 08457 - ProForm 900 Treadmill | Uk Manual - Page 6
packing materials until the treadmill is assembled. Note: The underside of the treadmill walking belt is coated with high-performance lubricant. During shipping, ARE NOT CONNECTED PROPERLY, THE CONSOLE MAY BE DAMAGED WHEN THE POWER IS TURNED ON. 71 85 71 65 85 2. Insert the excess Wire Harness - ProForm 900 Treadmill | Uk Manual - Page 7
be preassembled. 4 Console Assembly 23 Tape 6. Make sure that all parts are properly tightened before you use the treadmill. Place a mat beneath the treadmill to protect the floor or carpet. For your benefit, we recommend that you familiarise yourself with the TROUBLESHOOTING section on pages 26 - ProForm 900 Treadmill | Uk Manual - Page 8
to a position against your chest. CHEST PULSE SENSOR TROUBLESHOOTING The instructions on the following pages explain how the chest pulse sensor interference caused by high power lines or other sources. If it is suspected that this is a problem, try relocating the treadmill. • The CR2032 battery - ProForm 900 Treadmill | Uk Manual - Page 9
treadmill features a walking belt coated with PERFORMANT LUBETM, a high-performance lubricant. IMPORTANT: Never apply silicone spray or other substances to the walking belt or the walking platform. Such substances will deteriorate the walking belt and cause excessive wear. HOW TO PLUG IN THE POWER - ProForm 900 Treadmill | Uk Manual - Page 10
Key Clip Note: If there is a sheet of clear plastic on the console, remove the plastic. FEATURES OF THE CONSOLE The treadmill console offers an impressive array of features designed to help you get the most from your workouts. When the manual incline of the treadmill as it guides you through an - ProForm 900 Treadmill | Uk Manual - Page 11
buttons. Note: After the buttons are pressed, it may take a moment for the treadmill to reach the selected incline setting. HOW TO USE THE MANUAL MODE 1 Insert the key into the console. See HOW TO TURN ON THE POWER above. 5 Follow your progress with the two displays. The left display-This display - ProForm 900 Treadmill | Uk Manual - Page 12
handrails for support when you exercising, remove the key from the console. instructions in this section refer to miles. To reset the displays, press the Stop button, remove the key, and then reinsert the key. Step onto the foot rails, press the Stop button, and adjust the incline of the treadmill - ProForm 900 Treadmill | Uk Manual - Page 13
Insert the key into the console. See HOW TO TURN ON THE POWER on page in the flashing Current Segment column and the treadmill will automatically adjust to the speed and incline low at any time during the program, you can manually override the setting by pressing the Speed or Incline buttons - ProForm 900 Treadmill | Uk Manual - Page 14
1 mph. When the next segment of the program begins, the treadmill will automatically adjust to the speed and incline settings for the next segment. remove the key from the console. When the program ends, make sure that the incline of the treadmill is at the lowest setting. Next, remove the key from the - ProForm 900 Treadmill | Uk Manual - Page 15
HOW TO CREATE A CUSTOM PROGRAM 1 Insert the key into the console. See HOW TO TURN ON THE POWER on page 11. 2 Select one of the an incline setting for the first segment, simply adjust the speed and incline of the treadmill as de- sired by pressing the Speed and Incline buttons. Every few times one - ProForm 900 Treadmill | Uk Manual - Page 16
HOW TO USE A CUSTOM PROGRAM 1 Insert the key into the console. See HOW TO TURN ON THE POWER on page 11. 2 Select one of the segment will then be shown in the flashing Current Segment column and the treadmill will automatically adjust to the second speed and incline settings that you programmed - ProForm 900 Treadmill | Uk Manual - Page 17
on the chest pulse sensor. You must wear the chest pulse sensor (see page 8) to use a heart rate program. 2 Insert the key into the console. See HOW TO TURN ON THE POWER on page 11. 3 Select a heart rate program. To select a heart rate program, press the Heart Rate Control Programs button repeatedly - ProForm 900 Treadmill | Uk Manual - Page 18
in the right display and the speed and incline of the treadmill may automatically decrease. If this occurs, see CHEST PULSE SENSOR TROUBLESHOOTING on page 8. To stop the program at any time, page 12. 10 When you are finished exercising, remove the key from the console. See step 7 on page 14. 18 - ProForm 900 Treadmill | Uk Manual - Page 19
your CD player has separate LINE OUT and PHONES jacks, see instruction A below. If your CD player has only one jack, see instruction B. A. Plug one end of the audio cable into the jack on the front of the treadmill near the power cord. Plug the other end of the cable into the LINE OUT - ProForm 900 Treadmill | Uk Manual - Page 20
B. Note: If your computer has a 3.5 mm LINE OUT jack, see instruction A. If your computer has only a PHONES jack, see instruction B. A. Plug one end of the audio cable into the jack on the front of the treadmill near the power cord. Plug the other end of the cable into the adaptor. Plug the - ProForm 900 Treadmill | Uk Manual - Page 21
instruction B. If your VCR is connected to your home stereo, see HOW TO CONNECT YOUR HOME STEREO on page 20. A. Plug one end of the audio cable into the jack on the front of the treadmill near the power begin guiding you through your workout. Simply follow your personal trainer's instructions. Note - ProForm 900 Treadmill | Uk Manual - Page 22
or too low, you can manually override the settings at any button or remove the key and go to step 1 on page 20. Note: If the speed or incline of the treadmill does not change when fully plugged in, and that it is not wrapped around a power cord. • If you are using your portable CD player and the - ProForm 900 Treadmill | Uk Manual - Page 23
. Read and follow the on-line instructions for using a program. 6 Follow the on-line instructions to start the program. When you start the program, an on-screen countdown will begin. 7 Return to the treadmill and stand on the foot rails. Find the clip attached to the key and slide the clip onto the - ProForm 900 Treadmill | Uk Manual - Page 24
the right display, the "demo" mode is selected. This mode is intended to be used only when a treadmill is displayed in a store. When the demo mode is selected, the power cord can be plugged in, the key can be removed from the console, and the displays and indicators on the console will automatically - ProForm 900 Treadmill | Uk Manual - Page 25
storage position in temperatures above 30° C (85° F). 2 Frame Handgrip Pin Latch Pin Knob Handgrip Latch Knob HOW TO MOVE THE TREADMILL Before moving the treadmill, convert the treadmill to the storage position as described above. Make sure that the pin on the latch knob is fully inserted into - ProForm 900 Treadmill | Uk Manual - Page 26
TROUBLESHOOTING Most treadmill problems can be solved by following the steps below. Find the symptom that applies, and follow the steps listed. If further assistance is needed, please call our Customer Service Department. PROBLEM: The power does not turn on SOLUTION: a. Make sure that the power - ProForm 900 Treadmill | Uk Manual - Page 27
is no longer than 1.5 m (5 ft.). b. If the walking belt is overtightened, treadmill performance may decrease and the walking belt may become damaged. Remove the key and UNPLUG THE POWER CORD. Using the included hex key, turn both rear roller adjustment bolts counterclockwise 1/4 of a turn. When the - ProForm 900 Treadmill | Uk Manual - Page 28
. Whilst the incline is changing, remove the key. After a few seconds, re-insert the key. The treadmill will automatically rise to the maximum incline level and then return to the minimum level. This will recalibrate the incline system. PROBLEM: The heart rate monitor does not function properly - ProForm 900 Treadmill | Uk Manual - Page 29
your cardiovascular system, the key to achieving the desired results guide. The chart below shows recommended heart rates for fat burning and aerobic exercise. is to burn fat, adjust the speed or incline of the treadmill will help prevent post-exercise problems. EXERCISE FREQUENCY To maintain - ProForm 900 Treadmill | Uk Manual - Page 30
Bar Pulse Receiver Left Handgrip (Top) Right Handgrip (Top) Upright/Base Belt Guide Screw Console Frame Latch Housing Ferrite Box Right Handgrip (Bottom) Console Wire Harness iFIT.com Wire Incline Pivot Bolt Incline Wire Key/Clip Access Door Front Wheel Wheel Bolt Fan Cover Console Console Base Fan - ProForm 900 Treadmill | Uk Manual - Page 31
Power Cord Receptical Warning Decal 1/2" Screw Jack iFIT.com Audio Cable Rear Roller Star Washer Controller Screw Incline Motor Bolt (Bottom) Incline Bracket Outlet Bracket Star Washer Static Decal Latch Assembly Assembly Motor Isolator Plate Key No Manual *Includes all parts shown in the box - ProForm 900 Treadmill | Uk Manual - Page 32
EXPLODED DRAWING-Model No. PETL85140 Part 1 of 4 R0904A 32 114 35 20 40 29 68 40 36 1 40 19 90 40 42 20 5 105 66 10 49 19 21 54 52 108 53 40 48 56 8 21 1 2 30 108 52 53 40 48 6 58 139 40 138 28 2 55 123 124 122 141 125* 125* 21 119 120 121 52 45 12 21 11 - ProForm 900 Treadmill | Uk Manual - Page 33
EXPLODED DRAWING-Model No. PETL85140 127* 128 22 130 129 131 57 13 17 132 134 133 10 15 14 13 84 84 24 43 21 18 16 27 43 126 74 109 60 3 27 32 92 34 38 32 37 143 40 44 13 31 112 33 21 100 103 142 21 43 44 69 25 27 89 13 27 39 40 43 14 15 10 40 41 102 113 40 40 33 - ProForm 900 Treadmill | Uk Manual - Page 34
34 135 136 40 40 62 40 23 26 63 40 40 81 40 40 40 40 40 40 40 80 40 114 79 96 97 61 40 95 40 40 72 93 101 82 71 70 64 40 40 40 40 76 40 40 49 40 40 75 40 Part 3 of 4 R0904A EXPLODED DRAWING-Model No. PETL85140 - ProForm 900 Treadmill | Uk Manual - Page 35
EXPLODED DRAWING-Model No. PETL85140 67 Part 4 of 4 R0904A 83 94 99 83 50 94 85 107 65 99 106 73 78 47 77 88 104 13 98 43 111 13 40 13 91 110 104 13 47 77 78 40 35 86 73 43 13 88 98 - ProForm 900 Treadmill | Uk Manual - Page 36
. office, or write: ICON Health & Fitness, Ltd. Customer Service Department Unit 4, Revie Road Industrial Estate Revie Road Beeston Leeds, LS118JG NAME of the product (PROFORM® 990 treadmill) • The SERIAL NUMBER of the product (see the front cover of this manual) • The KEY NUMBER AND DESCRIPTION OF
-
 1
1 -
 2
2 -
 3
3 -
 4
4 -
 5
5 -
 6
6 -
 7
7 -
8
-
9
-
10
-
11
-
12
-
13
-
14
-
15
-
16
-
17
-
18
-
19
-
20
-
21
-
22
-
23
-
24
-
25
-
26
-
27
-
28
-
29
-
30
-
31
-
32
-
33
-
34
-
35
-
36
 |
 |
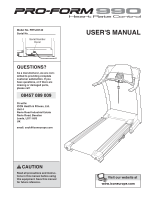
Serial Number
Decal
Model No. PETL85140
Serial No.
CAUTION
Read all precautions and instruc-
tions in this manual before using
this equipment. Save this manual
for future reference.
USER'S MANUAL
QUESTIONS?
As a manufacturer, we are com-
mitted to providing complete
customer satisfaction. If you
have questions, or if there are
missing or damaged parts,
please call:
Or write:
ICON Health & Fitness, Ltd.
Unit 4
Revie Road Industrial Estate
Revie Road, Beeston
Leeds, LS11 8JG
UK
email: [email protected]
www.iconeurope.com
Visit our website at
08457 089 009