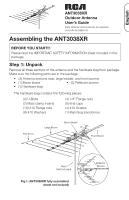
RCA ANT3038XR Owner/User Manual - Page 4
Step 6, Connect the rear to the middle, large Step 7, Connect the phasing lines
 |
UPC - 044476071638
View all RCA ANT3038XR manuals
Add to My Manuals
Save this manual to your list of manuals |
Page 4 highlights
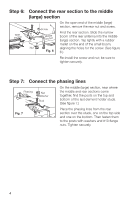
Step 6: Rear section Connect the rear section to the middle (large) section On the open end of the middle (large) Screw Mseidcdtiolen section, remove the rear nut and screw. Find the rear section. Slide the narrow boom of the rear antenna into the middle (large) section. Tap lightly with a rubber mallet on the end of the small boom, Nut aligning the holes for the screw. (See figure Fig. 6 6.) Re-install the screw and nut; be sure to tighten securely. Step 7: Connect the phasing lines Phasing line Nut Washer Stud On the middle (large) section, near where the middle and rear sections come together, find the posts on the top and bottom of the last element holder studs. (See figure 7.) Fig. 7 Place the phasing lines from the rear section over the studs, one on the top side and one on the bottom. Then fasten them to the posts with washers and #10 flange nuts. Tighten securely. 4
-
 1
1 -
 2
2 -
 3
3 -
 4
4 -
 5
5 -
 6
6 -
 7
7 -
 8
8
 |
 |
