Ricoh Pro C651EX Quick Reference Guide - Page 4
Scan to E-Mail - manual
 |
View all Ricoh Pro C651EX manuals
Add to My Manuals
Save this manual to your list of manuals |
Page 4 highlights
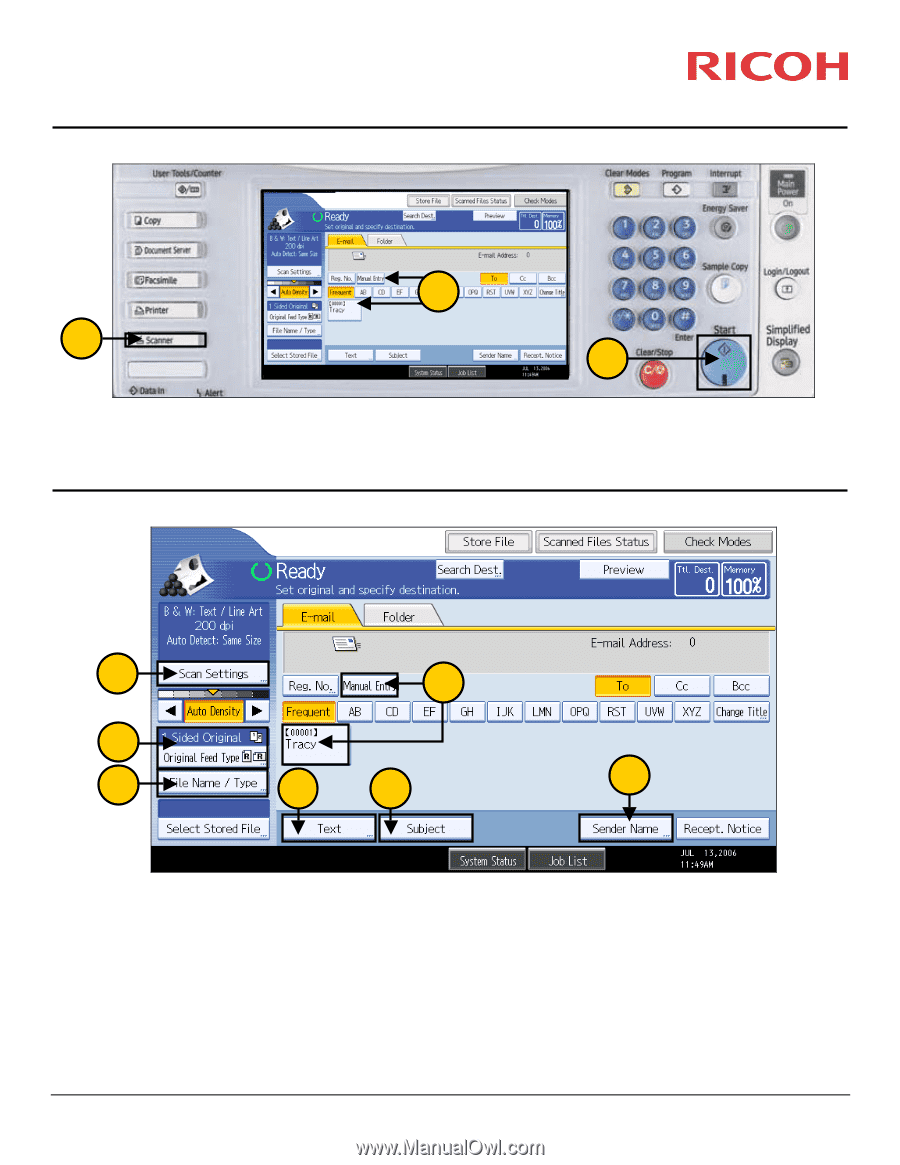
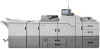
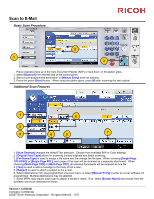
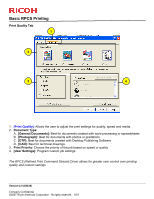
Scan to E-Mail Basic Scan Procedure 2 1 3 Place original(s) face up in the Auto Document Feeder (ADF) or face down on the platen glass. 1. Select [Scanner] from the left side of the control panel. 2. Select a pre-programmed destination or [Manual Entry] enter an address. 3. Press the green [Start] button. When using the platen glass, press [#] after scanning the last original. Additional Scan Features 1 6 2 3 4 5 7 1. [Scan Settings] changes the default Text selection. Choose from available B/W or Color settings. 2. [Original Feed Type] allows for scanning 2-sided originals and Batch scanning. 3. [File Name/Type] is used to assign a file name and the change the file type. When choosing [Single Page TIFF/JPEG] or [Single Page PDF], each page of the scan will be received as a separate attachment. When choosing [Multi-Page TIFF] or [Multi-Page PDF], all scanned documents will be received as one file. 4. [Text] is used to add a message to the body of the e-mail. 5. [Subject] is used to attach a subject to the e-mail. 6. Select destinations from pre-programmed one-touch keys, or select [Manual Entry] to enter an e-mail address not programmed. Multiple destinations may be selected. 7. Some MFPs may require each scan to attach a sender's name. If so, select [Sender Name] and choose from the available one-touch destinations shown. Version 1.0 (52342) Company Confidential ©2007 Ricoh Americas Corporation. All rights reserved. - 4/07
-
 1
1 -
 2
2 -
 3
3 -
 4
4 -
 5
5 -
 6
6 -
 7
7 -
 8
8 -
 9
9 -
 10
10 -
11
-
12
-
13
-
14
-
15
-
16
-
17
-
18
-
19
-
20
 |
 |