Ricoh SP C420DN-KP Operation Guide - Page 20
Test Printer, Step D - speed
 |
UPC - 026649066245
View all Ricoh SP C420DN-KP manuals
Add to My Manuals
Save this manual to your list of manuals |
Page 20 highlights
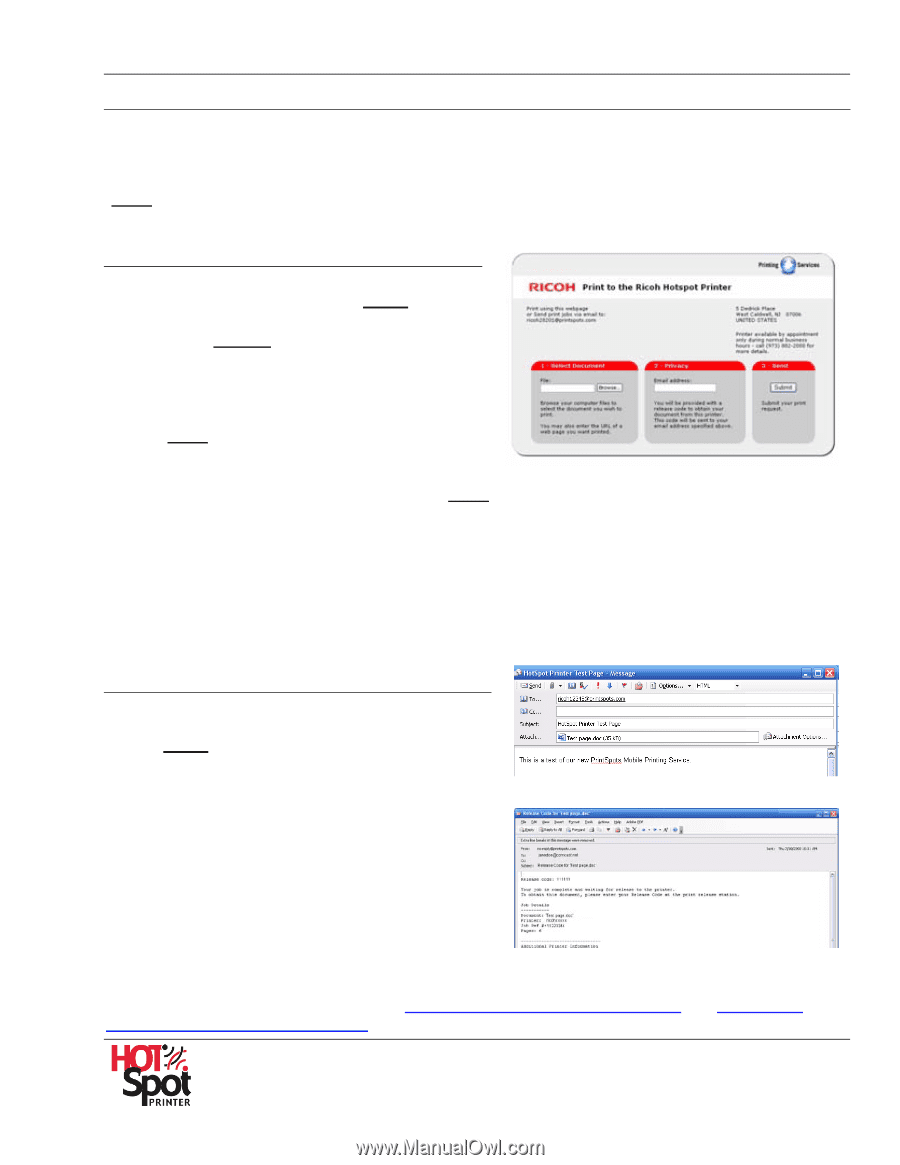
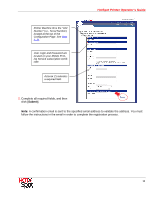
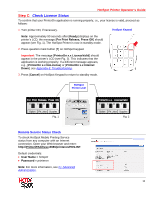
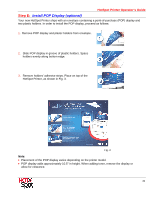
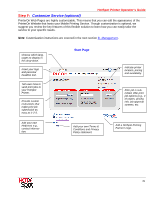
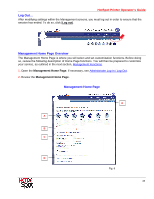
HotSpot Printer Operator's Guide Step D: Test Printer To test your HotSpot Printer, send a print job using Method A and/or Method B, outlined below. Note that these instructions are general guidelines, as your configuration settings may vary. Note: The URL and/or email address you use includes the HotSpot Printer's unique 5- or 6-digit ID (xxxxx), which is located on the label affixed to the printer, as well as the Mobile Printing Service subscription certificate. Method A: Print via Web Upload 1. Open your Web browser. 2. Go to: www.printeron.net/ricoh/xxxxx. Note: • This URL must be typed in lower-case letters. If typed in upper case, the screen reads [The page you requested could not be found.]. Re-enter URL using lower-case letters. • If you enter a URL using a non-existent printer ID (xxxxx), the screen reads [The page you requested could not be found.]. Re-enter URL with correct ID. • If you enter a URL using a valid printer ID (xxxxx), but the unit is not yet registered, the screen reads [Service offline]. Click [Back] and enter URL with ID of a registered printer. 3. Browse to your document or, if printing a Web page, enter the complete URL. 4. Enter your email address. 5. Click [Submit]. Note: Your release code is displayed, along with a tracking number. In additional, this information is emailed to the address entered in step 4. 6. Follow the instructions on the HotSpot Printer LCD to enter your release code and print the job. Method B: Print via Email 1. Open your email application. 2. Enter the printer's email address: [email protected] 3. Send email/attachments as you normally would. 4. The service replies with a confirmation message that includes your private release code and details regarding the print job (as shown at right). Note: If Method A: Print via Web Upload was used to submit the job, the release code will display on the computer screen as well. 5. Follow the instructions on the HotSpot Printer LCD to enter your release code and print the job. Important: Print speed may be affected by network, application, or computer performance. Reference: For detailed instructions, see Appendix 1: HotSpot Printer Operation and Appendix 2: HotSpot Keypad Layout & Operation. 20
-
 1
1 -
2
-
3
-
4
-
5
-
6
-
7
-
8
-
9
-
10
-
11
-
12
-
13
-
14
-
 15
15 -
 16
16 -
 17
17 -
 18
18 -
 19
19 -
 20
20 -
 21
21 -
 22
22 -
 23
23 -
 24
24 -
 25
25 -
26
-
27
-
28
-
29
-
30
-
31
-
32
-
33
-
34
-
35
-
36
-
37
-
38
-
39
-
40
-
41
-
42
-
43
-
44
-
45
-
46
-
47
-
48
-
49
-
50
-
51
-
52
-
53
-
54
-
55
-
56
-
57
-
58
-
59
-
60
-
61
-
62
-
63
-
64
-
65
-
66
-
67
-
68
-
69
-
70
-
71
-
72
-
73
-
74
-
75
-
76
-
77
-
78
-
79
-
80
-
81
-
82
-
83
-
84
-
85
-
86
-
87
-
88
-
89
-
90
-
91
-
92
-
93
 |
 |