Ryobi BE318-2 English Manual - Page 11
To Adjust Sanding Belt Tracking - belt sander parts
 |
View all Ryobi BE318-2 manuals
Add to My Manuals
Save this manual to your list of manuals |
Page 11 highlights
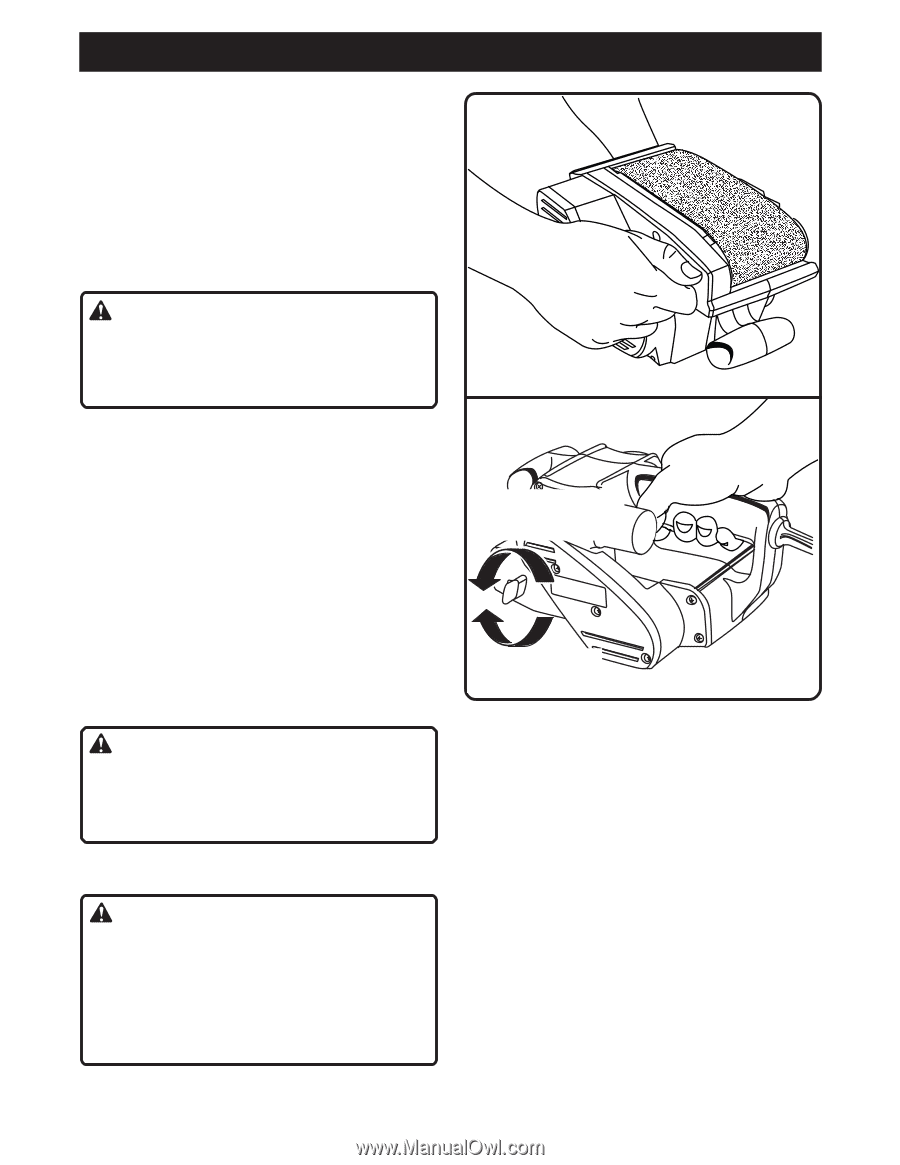
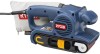
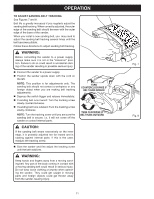
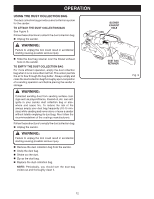
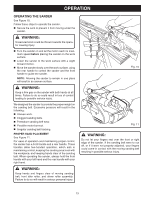
OPERATION TO ADJUST SANDING BELT TRACKING See Figures 7 and 8. Belt life is greatly increased if you regularly adjust the sanding belt tracking. When correctly adjusted, the outer edge of the sanding belt should be even with the outer edge of the base of the sander. When you install a new sanding belt, you may need to adjust the sanding belt tracking several times until the belt becomes pliable. Follow these directions to adjust sanding belt tracking. WARNING: Before connecting the sander to a power supply, always make sure it is not in the "locked-on" position. Failure to do so could result in accidental starting of the sander resulting in possible serious injury. Connect the sander to a power supply. Position the sander upside down with the cord on the left. NOTE: This position is for adjustments only. The sanding belt should not contact a workpiece or any foreign object when you are making belt tracking adjustments. Depress the switch trigger and release immediately. If sanding belt runs inward: Turn the tracking screw slowly counterclockwise. If sanding belt runs outward: Turn the tracking screw slowly clockwise. NOTE: Turn the tracking screw until you are sure the sanding belt is secure, i.e, it will not come off the sander or contact internal parts. CAUTION: If the sanding belt wears excessively on the inner edge, it is probably adjusted too far inward and is rubbing against internal parts. If this is the case, readjust the tracking screw. Start the sander and fine adjust the tracking screw until the belt stablizes. WARNING: Keep hands and fingers away from a moving sanding belt. Any part of the body coming in contact with a moving sanding belt could result in serious injury. Do not wear loose clothing or jewelry when operating the sander. They could get caught in moving parts and foreign objects could get thrown away from the sander causing injury. TURN COUNTERCLOCKWISE IF BELT RUNS INWARD TURN CLOCKWISE IF BELT RUNS OUTWARD 11 Fig. 7 Fig. 8
-
 1
1 -
2
-
3
-
4
-
5
-
 6
6 -
 7
7 -
 8
8 -
 9
9 -
 10
10 -
 11
11 -
 12
12 -
 13
13 -
 14
14 -
 15
15 -
 16
16
 |
 |