Ryobi P600 English Manual - Page 15
Setting Depth Of Cut, Warning
 |
View all Ryobi P600 manuals
Add to My Manuals
Save this manual to your list of manuals |
Page 15 highlights
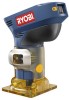
OPERATION setting DEPTH OF CUT See Figure 10. n Turn the switch off and remove the battery pack from the trimmer. n Open the depth adjustment latch as indicated by the ar- row. n Slide the motor housing section of the trimmer upward until the tip of the bit reaches the work surface. The depth of cut is zero at this point. n Adjust the position of the trimmer to obtain the desired depth of cut by moving the motor housing section up or down, as shown by the up/down arrow. The distance the bit moves can be read on the depth of cut scale. Each mark on the scale indicates a 1/16 in. change in depth setting. Indicator points are located on the base. n Completely close the depth adjustment latch. WARNING: Avoid open area of trimmer base. Serious personal injury will result from contact with a rotating bit. NOTE: To make deeper cuts, it is necessary to make as many successive passes as required, lowering the bit 1/8 in for each new pass. To save time, perform all the cutting necessary at one depth setting, then lower the bit for the next pass. This will assure uniform depth when the final pass is completed. INDICATOR POINT(S) DEPTH OF CUT SCALE DEPTH ADJUSTMENT LATCH Fig. 10 15
-
 1
1 -
2
-
3
-
4
-
5
-
6
-
7
-
8
-
9
-
 10
10 -
 11
11 -
 12
12 -
 13
13 -
 14
14 -
 15
15 -
 16
16 -
 17
17 -
 18
18 -
 19
19 -
 20
20 -
21
-
22
 |
 |
