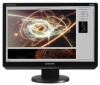
Samsung 220WM User Manual (ENGLISH) - Page 16
Setup, Connecting the Monitor
 |
UPC - 729507802602
View all Samsung 220WM manuals
Add to My Manuals
Save this manual to your list of manuals |
Page 16 highlights
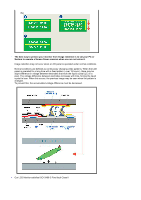
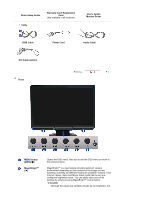
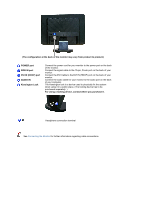
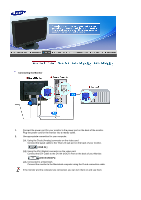
Connecting the Monitor 1. Connect the power cord for your monitor to the power port on the back of the monitor. Plug the power cord for the monitor into a nearby outlet. 2. Use appropriate connection for your computer. 2-1. Using the D-sub (Analog) connector on the video card. Connect the signal cable to the 15-pin, D-sub port on the back of your monitor. [ RGB IN ] 2-2. Using the DVI (Digital) connector on the video card. Connect the DVI Cable to the DVI IN (HDCP) Port on the back of your Monitor. [DVI IN (HDCP)] 2-3. Connected to a Macintosh. Connect the monitor to the Macintosh computer using the D-sub connection cable. If the monitor and the computer are connected, you can turn them on and use them.
-
 1
1 -
2
-
3
-
4
-
5
-
6
-
7
-
8
-
9
-
10
-
 11
11 -
 12
12 -
 13
13 -
 14
14 -
 15
15 -
 16
16 -
 17
17 -
 18
18 -
 19
19 -
 20
20 -
 21
21 -
22
-
23
-
24
-
25
-
26
-
27
-
28
-
29
-
30
-
31
-
32
-
33
-
34
-
35
-
36
-
37
-
38
-
39
-
40
-
41
-
42
-
43
-
44
-
45
-
46
-
47
-
48
 |
 |

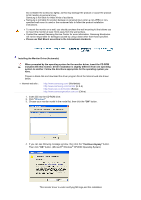
Connecting the Monitor
1.
Connect the power cord for your monitor to the power port on the back of the monitor.
Plug the power cord for the monitor into a nearby outlet.
2.
Use appropriate connection for your computer.
2-1.
Using the D-sub (Analog) connector on the video card.
Connect the signal cable to the 15-pin, D-sub port on the back of your monitor.
[ RGB IN ]
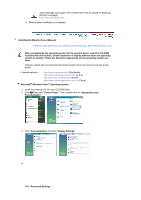
2-2.
Using the DVI (Digital) connector on the video card.
Connect the DVI Cable to the DVI IN (HDCP) Port on the back of your Monitor.
[DVI IN (HDCP)]
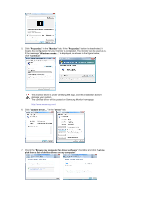
2-3.
Connected to a Macintosh.
Connect the monitor to the Macintosh computer using the D-sub connection cable.
If the monitor and the computer are connected, you can turn them on and use them.